Amazon S3
Overview
This guide walks through submitting data stored in an Amazon S3 bucket to AlphaSOC for analysis. AlphaSOC reads the log files uploaded to the bucket, identifying security threats and detecting anomalies. It ingests any log format it can parse, not only AWS-native sources like CloudTrail or VPC flow logs but logs from other products too.
Setup happens in two phases:
- Phase 1: Set up AWS resources (in the AWS console). Create and wire the
resources that let AlphaSOC pull your logs, in dependency order:
- S3 bucket that stores the logs and emits an event notification when an object is uploaded.
- SQS queue that receives those notifications, with an access policy that lets the bucket publish to it.
- IAM role that grants AlphaSOC read access to the bucket and the queue.
- Phase 2: Register in the AlphaSOC console (the Credentials → AWS tab). Add the credential, then register the bucket and queue as sources.
Prerequisites
- An AWS account with permissions to create S3, SQS, and IAM resources.
- An S3 bucket that receives your logs (created in the first step if you don't have one yet).
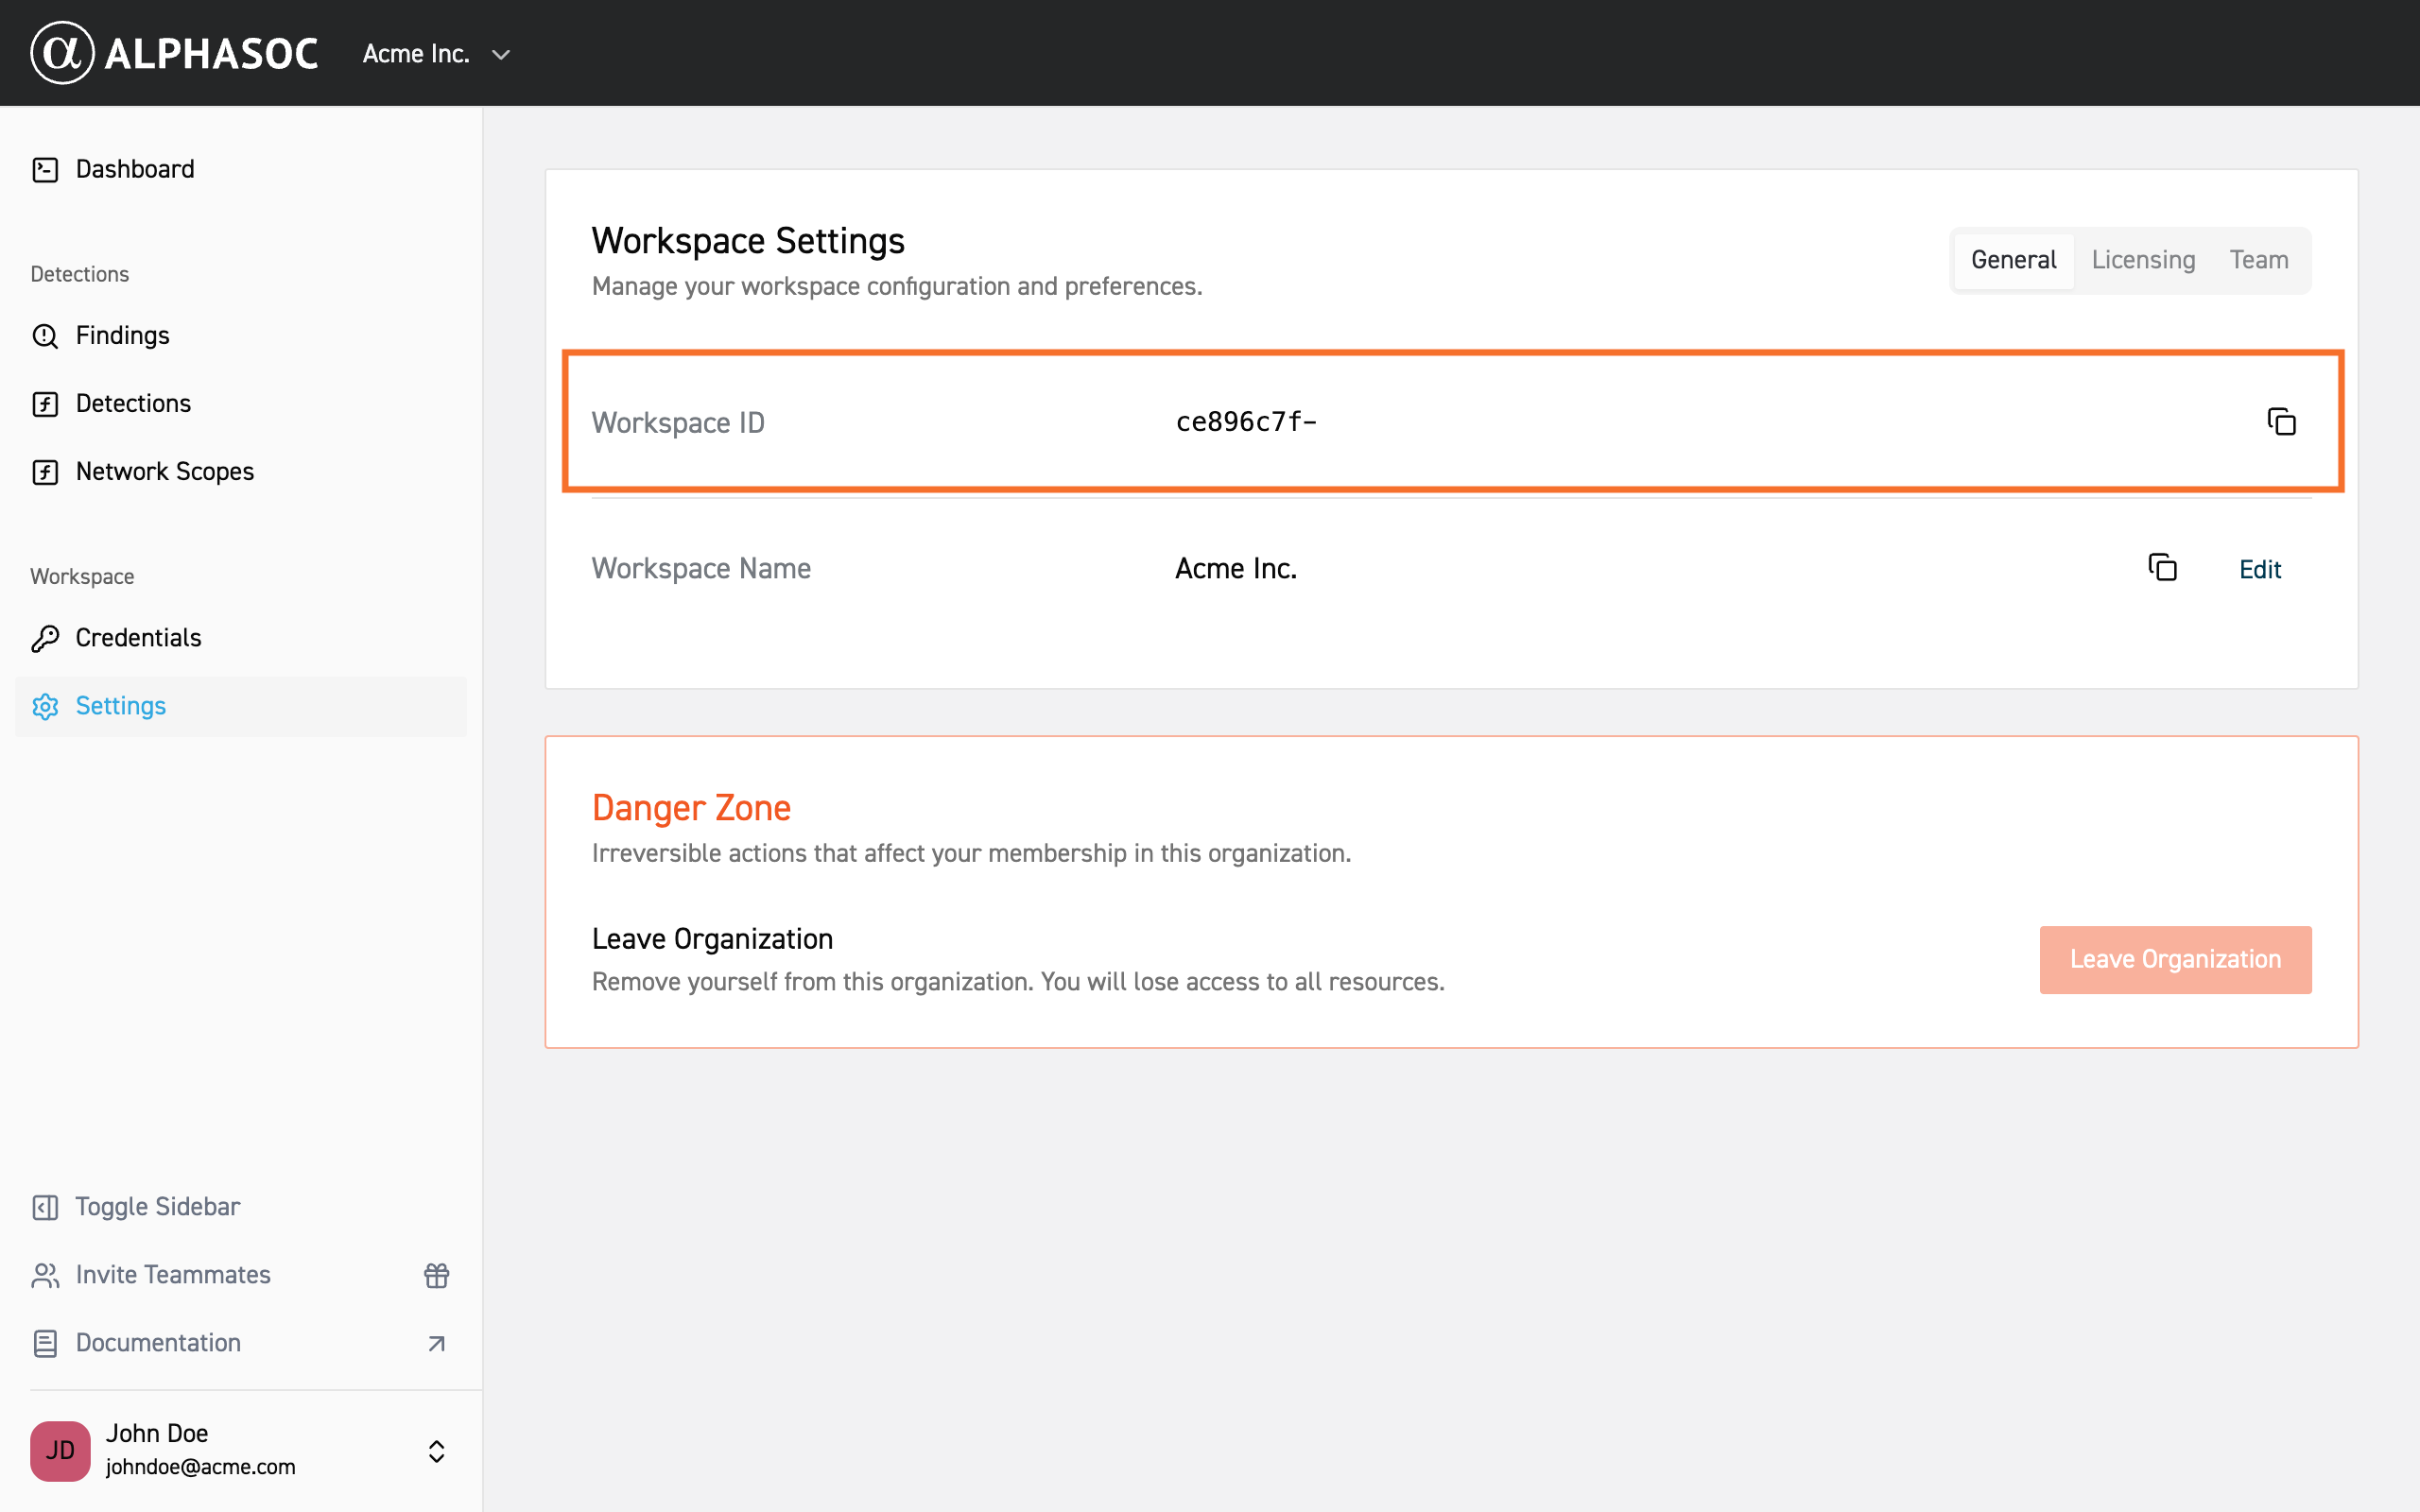
- An AlphaSOC workspace. Your Workspace ID is in the AlphaSOC console under Settings > General, which you need for the IAM trust policy.
Phase 1: Set up AWS resources
Throughout this phase, replace the <...> placeholders with your own values:
<AWS_REGION>: the region of your queue, for exampleus-east-1<AWS_ACCOUNT_ID>: your 12-digit AWS account ID<S3_BUCKET_NAME>/<S3_BUCKET_ARN>: your bucket's name / ARN<SQS_QUEUE_NAME>/<SQS_QUEUE_ARN>: your queue's name / ARN<WORKSPACE_ID>: your AlphaSOC Workspace ID (from Settings > General)<AWS_KEY_ARN>: your AWS KMS key ARN (only if the bucket or queue is encrypted)
Creating the S3 Bucket
Create, or identify, the
S3 bucket
that holds the logs you want AlphaSOC to analyze. Note its name and ARN
(arn:aws:s3:::<S3_BUCKET_NAME>), both referenced by later steps. You can use
more than one bucket; the steps below apply to each (see
Adding the S3 Source for the multi-bucket setup).
Creating the SQS Queue
Create a standard SQS queue in the same account. Note its ARN (used by the IAM permissions policy) and its URL (used when you register the SQS source in Phase 2).
Next, attach an access policy so the bucket's S3 service can publish event notifications to the queue. In the SQS console, open the queue, edit its Access policy, and add the following statement:
{
  "Version": "2012-10-17",
  "Id": "__default_policy_ID",
  "Statement": [
    {
      "Sid": "__owner_statement",
      "Effect": "Allow",
      "Principal": {
        "Service": "s3.amazonaws.com"
      },
      "Action": ["SQS:SendMessage"],
      "Resource": "arn:aws:sqs:<AWS_REGION>:<AWS_ACCOUNT_ID>:<SQS_QUEUE_NAME>",
      "Condition": {
        "ArnLike": {
          "aws:SourceArn": "arn:aws:s3:*:*:<S3_BUCKET_NAME>"
        },
        "StringEquals": {
          "aws:SourceAccount": "<AWS_ACCOUNT_ID>"
        }
      }
    }
  ]
}
Without this policy the queue silently rejects the bucket's notifications.
Adding the S3 Event Notification
Configure the bucket to notify the queue whenever a new object is uploaded:
- In the S3 console, open the bucket you created earlier and go to the Properties tab.
- Under Event notifications, choose Create event notification.
- Give it a name, and under Event types select All object create
events (
s3:ObjectCreated:*). - Under Destination, choose SQS queue and select the queue you created earlier.
- Save the notification.
To ingest more than one bucket, repeat this step for each; they can all send notifications to the same SQS queue. For AWS's full walkthrough, see Configuring a bucket for notifications.
New objects uploaded to a bucket now enqueue a message that tells AlphaSOC what to fetch.
Creating the IAM Role
Create an IAM role that AlphaSOC assumes to read your bucket and consume your queue. The role needs a trust policy (who may assume it) and a permissions policy (what it may do).
Trust Policy
The trust policy lets AlphaSOC's data-import principal assume the role, scoped
to your workspace by the sts:ExternalId condition. Replace <WORKSPACE_ID>
with your Workspace ID from Settings > General.
{
  "Version": "2012-10-17",
  "Statement": [
    {
      "Effect": "Allow",
      "Principal": {
        "AWS": "arn:aws:iam::610660487454:role/data-import"
      },
      "Action": "sts:AssumeRole",
      "Condition": {
        "StringEquals": {
          "sts:ExternalId": "<WORKSPACE_ID>"
        }
      }
    }
  ]
}
Permissions Policy
Attach a permissions policy granting read access to the bucket and consume access to the queue:
{
  "Version": "2012-10-17",
  "Statement": [
    {
      "Sid": "S3",
      "Effect": "Allow",
      "Action": "s3:GetObject",
      "Resource": "<S3_BUCKET_ARN>/*"
    },
    {
      "Sid": "SQS",
      "Effect": "Allow",
      "Action": [
        "SQS:ChangeMessageVisibility",
        "SQS:DeleteMessage",
        "SQS:ReceiveMessage",
        "SQS:GetQueueAttributes"
      ],
      "Resource": "<SQS_QUEUE_ARN>"
    }
  ]
}
KMS Encryption (Optional)
If the bucket or queue is encrypted with AWS KMS, add a statement allowing the
role to decrypt with your key. Replace <AWS_KEY_ARN> with the ARN of your KMS
key:
{
  "Sid": "KMS",
  "Effect": "Allow",
  "Action": "kms:Decrypt",
  "Resource": "<AWS_KEY_ARN>"
}
Alternative: Static Access Keys (Not Recommended)
Not recommended. Static access keys are a long-lived shared secret with no
ExternalId scoping, so they're less secure than an IAM role. Prefer the IAM
role above. Use access keys only for legacy or specific environments that
can't assume a cross-account role.
If you must use static credentials, create an IAM user instead of a role:
- Attach the same permissions policy as above (the S3 and SQS statements). A trust policy is not used.
- Create an access key for the user and note the access key ID and secret access key.
You'll paste the key ID and secret into the AWS tab in Phase 2 instead of a role ARN.
Phase 2: Register in the AlphaSOC Console
With the AWS resources wired, register them in the AlphaSOC console under Credentials → AWS. Add them in this order, because AlphaSOC requires at least one S3 source before you can add an SQS source:
- Add the credential (IAM role or access key).
- Add the S3 source (the bucket).
- Add the SQS source (the queue).
Adding the Credential
In the AWS tab, under IAM Roles, add the role you created and paste its role ARN. For the access-key alternative, use Access Keys instead and paste the access key ID and secret access key.
Adding the S3 Source
Under S3 Buckets, add a source bound to the credential you just created and enter the bucket name, or choose to read from any bucket in the workspace.
A single credential can ingest multiple buckets. Grant the IAM role (or user)
read access to all of them, for example by setting the permissions policy
Resource to arn:aws:s3:::*/*, and add one S3 source set to read from any
bucket. AlphaSOC determines which bucket and object to fetch from each SQS
notification, which carries the bucket name and object key, so every bucket that
notifies the queue is ingested.
Adding the SQS Source
Under SQS Queues, add a source bound to the same credential and enter the SQS queue URL. This requires the S3 source you added above.
AlphaSOC begins pulling logs as new objects arrive in the bucket.
Further Reading
Need help? Contact support@alphasoc.com.