On-Premise Installation Guide
Introduction
For on-premise use, the AlphaSOC Analytics Engine (AE) is provided as a snap which can be installed via Canonical's Snap Store. Alternatively, AlphaSOC also provides an Amazon Web Services (AWS) machine image (AMI) from which a virtual machine can be created with AE pre-installed. This AMI is available directly from the Amazon Marketplace.
If your use case requires an AE binary in a different form, please contact support@alphasoc.com
Installation
Installing AE onto an Existing GNU/Linux Node via Snap
It is assumed that you have a node (virtual or otherwise) with snapd already installed. For
details on installing snap, please visit installing snapd.
Install the alphasoc-ae snap:
sudo snap install alphasoc-ae
Generating a VM from the AlphaSOC AE AMI
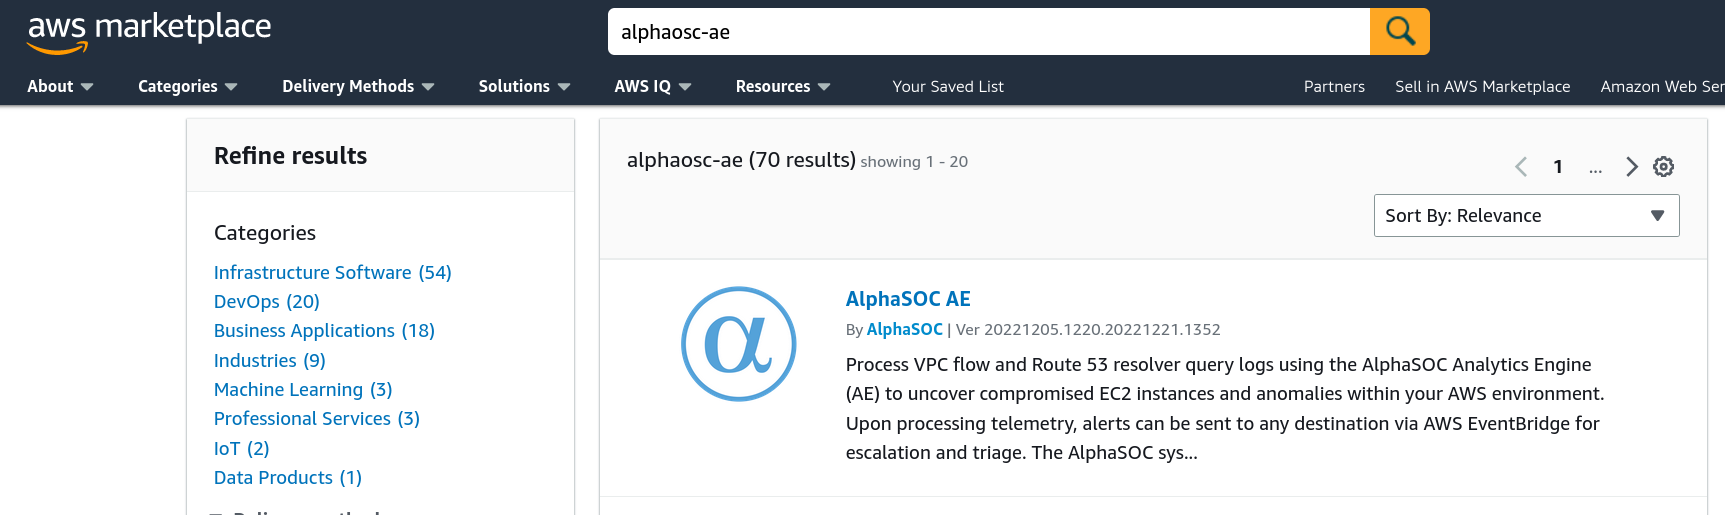
Head to the AWS Marketplace and find the latest official AlphaSOC AE product.
From the product page, click on Continue to Subscribe.
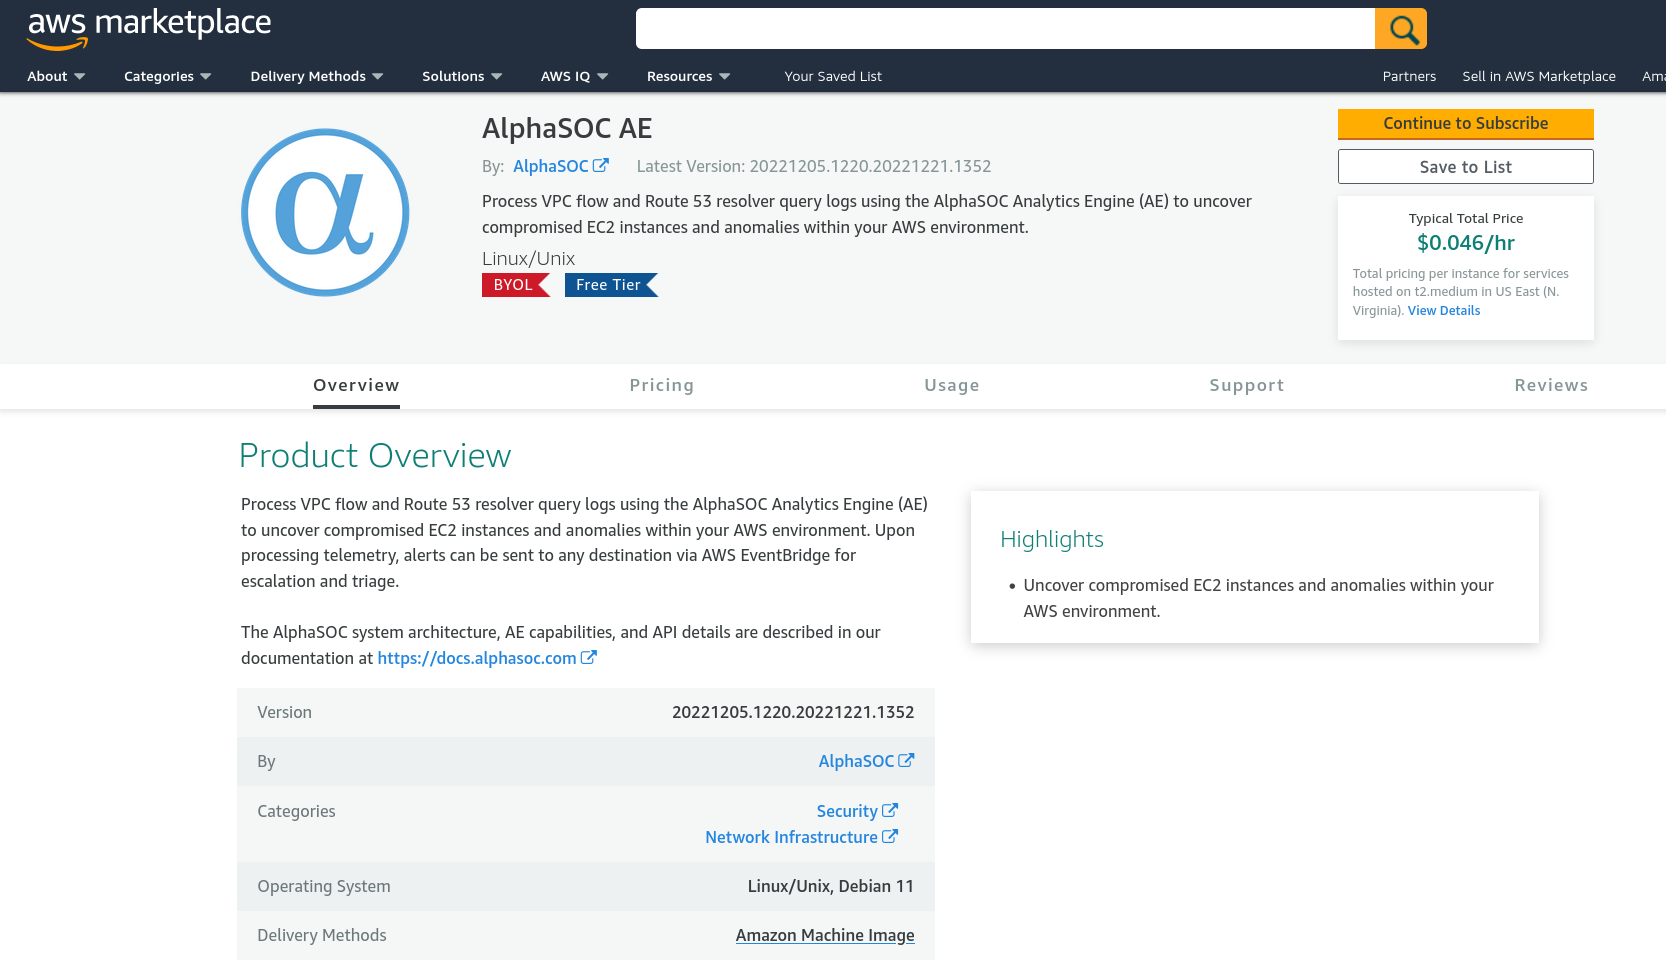
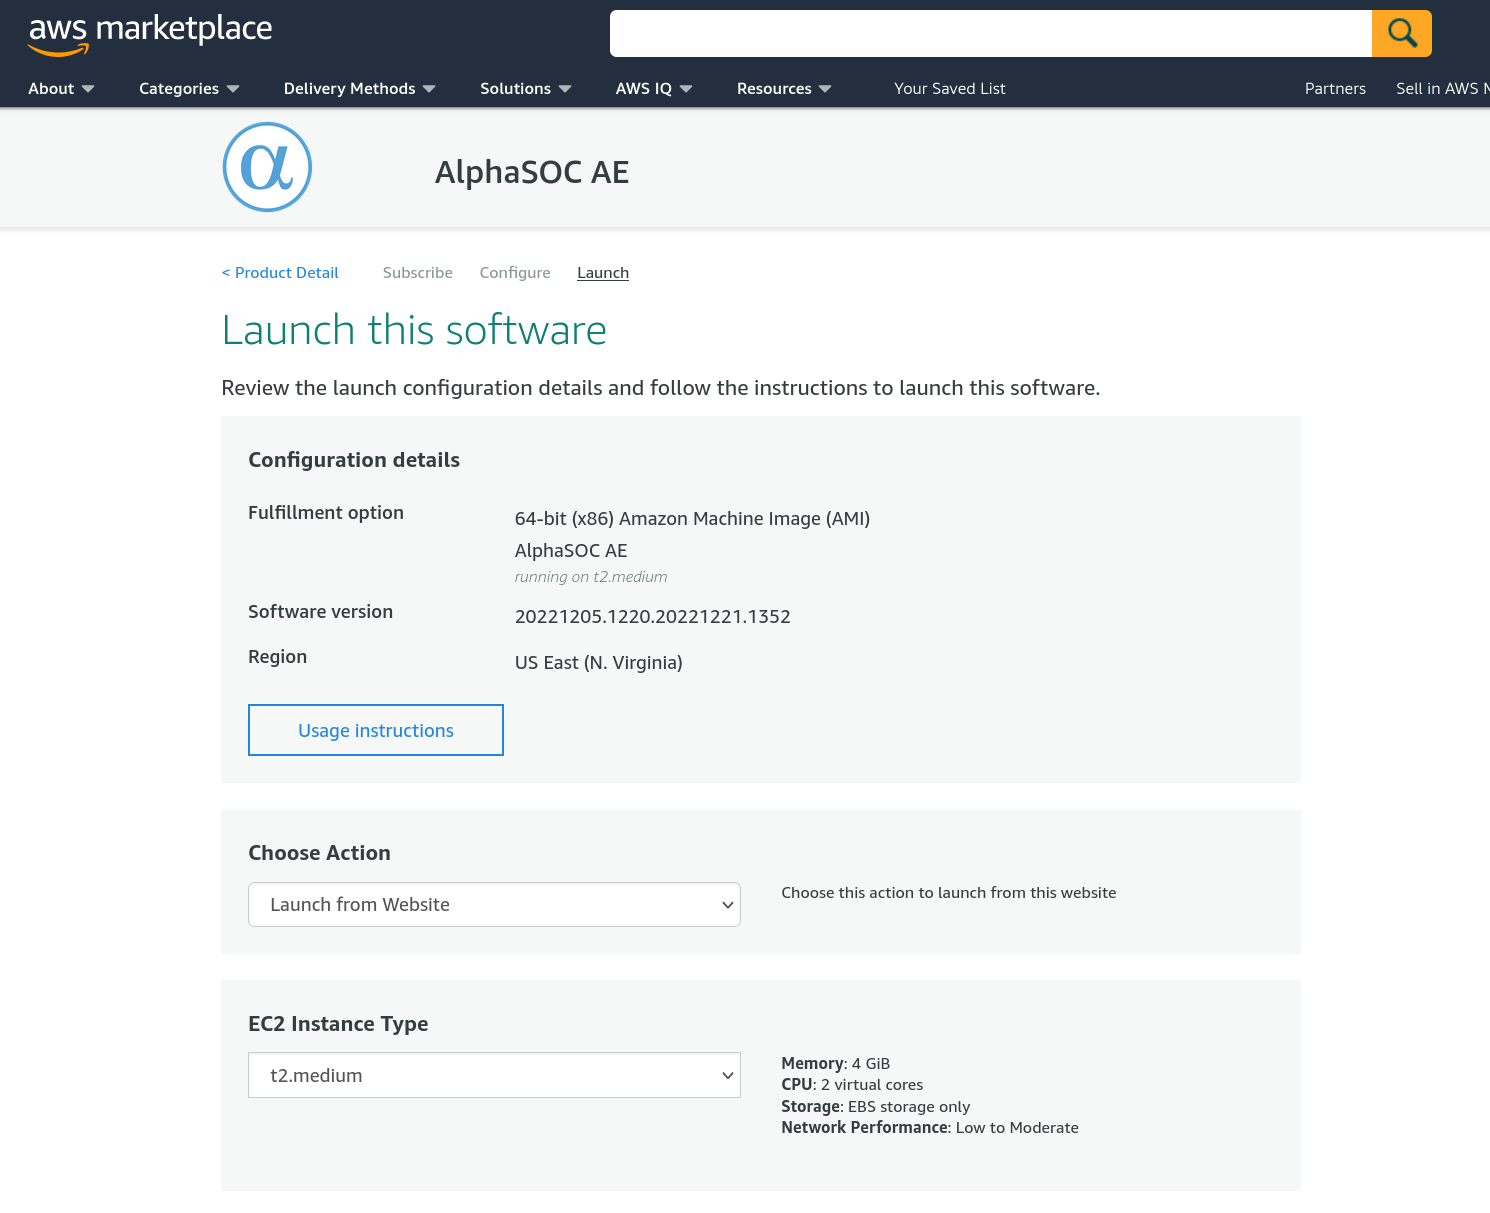
Read the terms and conditions, and on agreement, click on Accept Terms to subscribe. Subscription may take a few minutes to complete. Once subscribed, click on Continue to Configuration. From the configuration page, select the latest available Software version and a Region in which to launch. Finally, click on Continue to Launch.

AlphaSOC recommends a minimum t2.medium EC2 Instance Type to effectively run AE. Please also set any appropriate VPC Settings, Subnet Settings, Security Group Settings and Key Pair Settings. Once ready, click on Launch.
NOTE: Depending on how you will access the AE node, you may need to open TCP port 3001 in order
to use the bundled AE graphical configuration and monitoring tool. This tool will automatically start
on the AE node and initially listen for HTTP connections on port 3001.
Further instructions (ie. login, configuration) are detailed below.
Login
Once installed, the alphasoc-ae snap will automatically bring up the bundled AE graphical
configuration and monitoring tool. It is recommended to use this tool to configure AE. Make sure port
3001 is accessible on the AE node.
Preparing a Node with AE Installed via Snap
If the alphasoc-ae snap was installed via the Snap Store, an account must first be created in order
to use the UI. This can be done by SSH'ing into the node and performing the following:
sudo /snap/bin/alphasoc-ae.ui-config -user <USER> -password <PASSWORD>
For help, consult:
sudo /snap/bin/alphasoc-ae.ui-config -h
Preparing a Node based on the AlphaSOC AE AMI
The AlphaSOC AE AMI will pre-configure a default "admin" user with password "admin". These values should be modified via the Security tab once logged in.
Logging in
Point a browser at: http://your-ae-node:3001, and enter the appropriate
login credentials.

Password Management
Adding and changing user credentials can be performed via the UI as below.

If desired, the alphasoc-ae.ui-config may also be used if accessing the AE node via SSH.
For help, consult:
sudo /snap/bin/alphasoc-ae.ui-config -h
Configuration
Navigate to the Configuration tab in the UI.
At the bare minimum, a valid AlphaSOC API key must be entered. Such an API key can be generated from the credentials section of the AlphaSOC Console. If AWS-based telemetry sources or alert detinations will be used, then entering AWS credentials in CSV format is needed also.
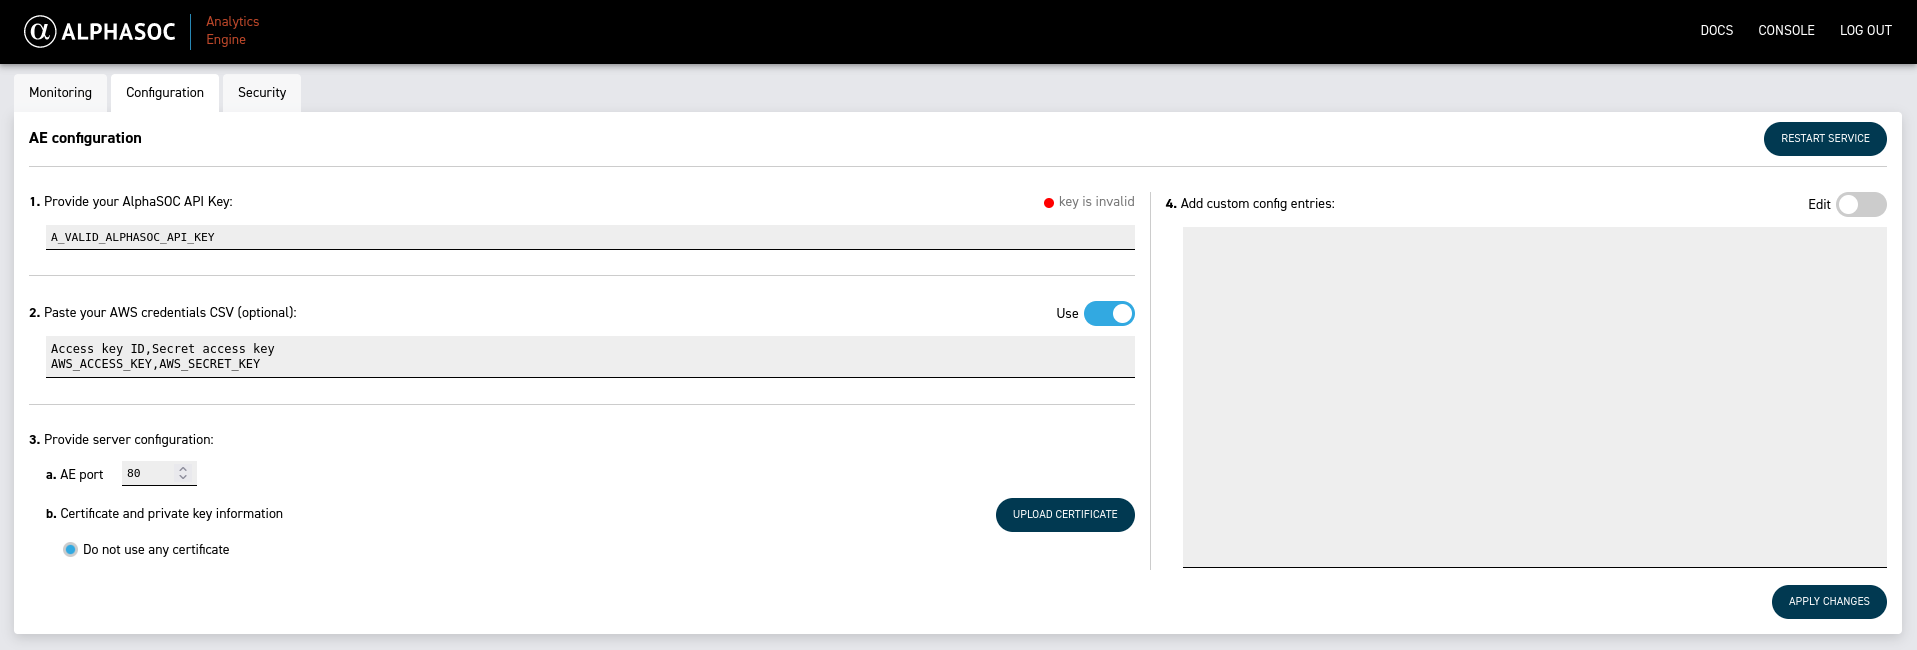
An SSL certificate can be uploaded by clicking UPLOAD CERTIFICATE, and the AE port can also be changed if needed. Below is an example.
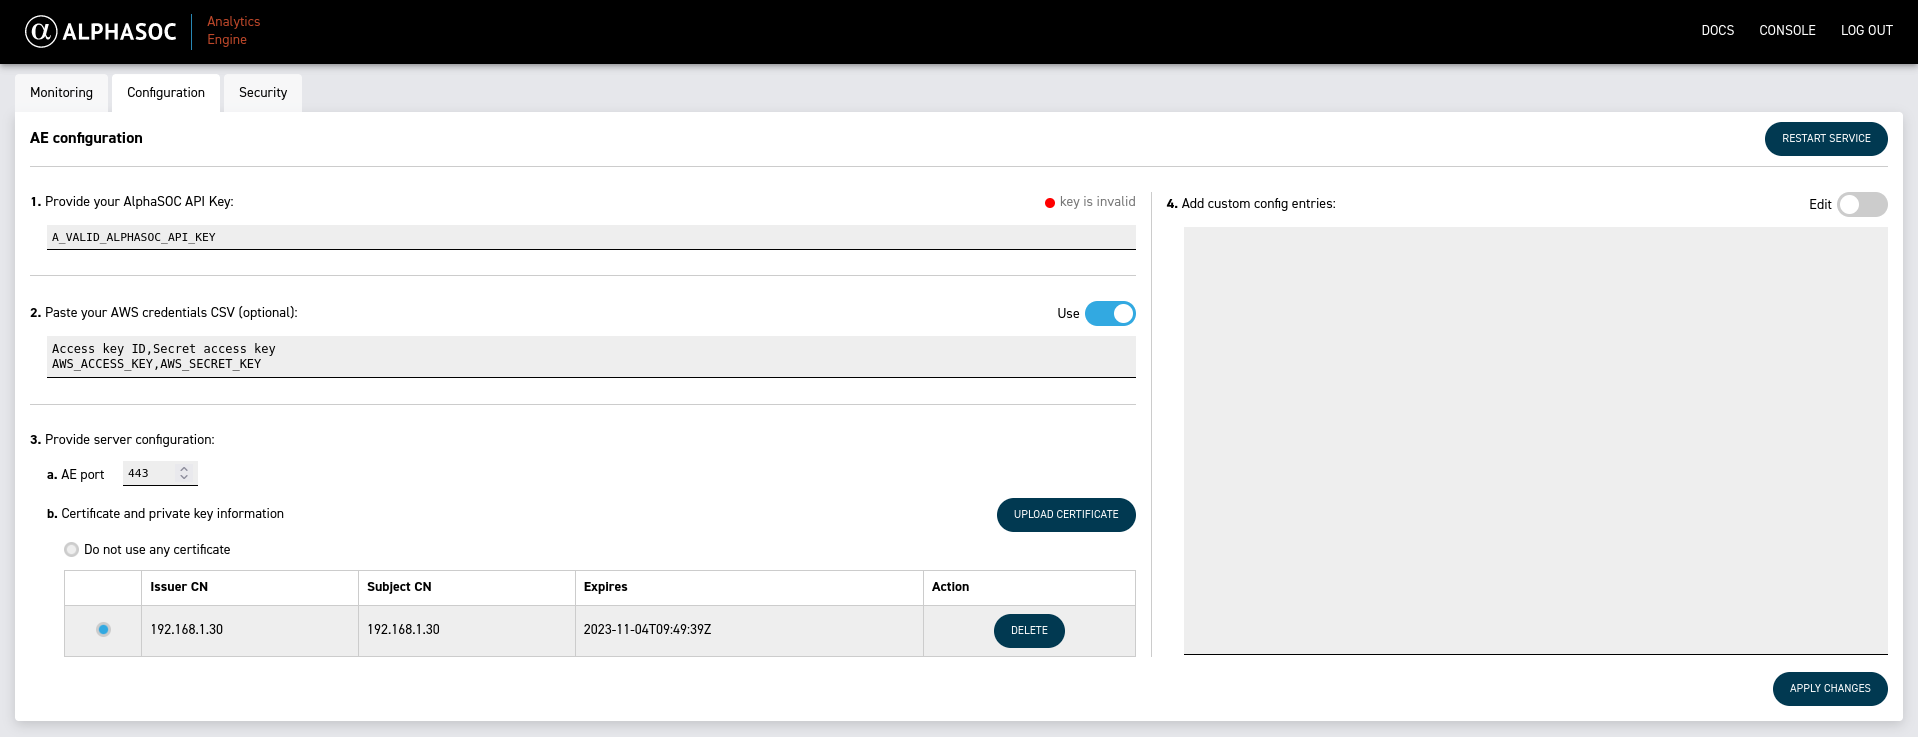
Once the configuration data has been entered, clicking APPLY CHANGES will save the configuration and start/restart the AE service.
Manual editing of the AE configuration is also possible in section 4. Add custom config entries of the UI by first clicking the Edit slider.
AE service log events can also be displayed by moving to the Monitoring tab and clicking REFRESH.
Finally, for AE to begin processing telemetry and generating alerts, telemetry sources and alert destinations need to be added. Visit the Sources and Destinations sections of this site to see how this can be done.