Cribl Stream
This guide provides step-by-step instructions on how to integrate Cribl with AlphaSOC. This integration allows you to send logs directly from Cribl Stream sources to AlphaSOC for analysis and alerting.
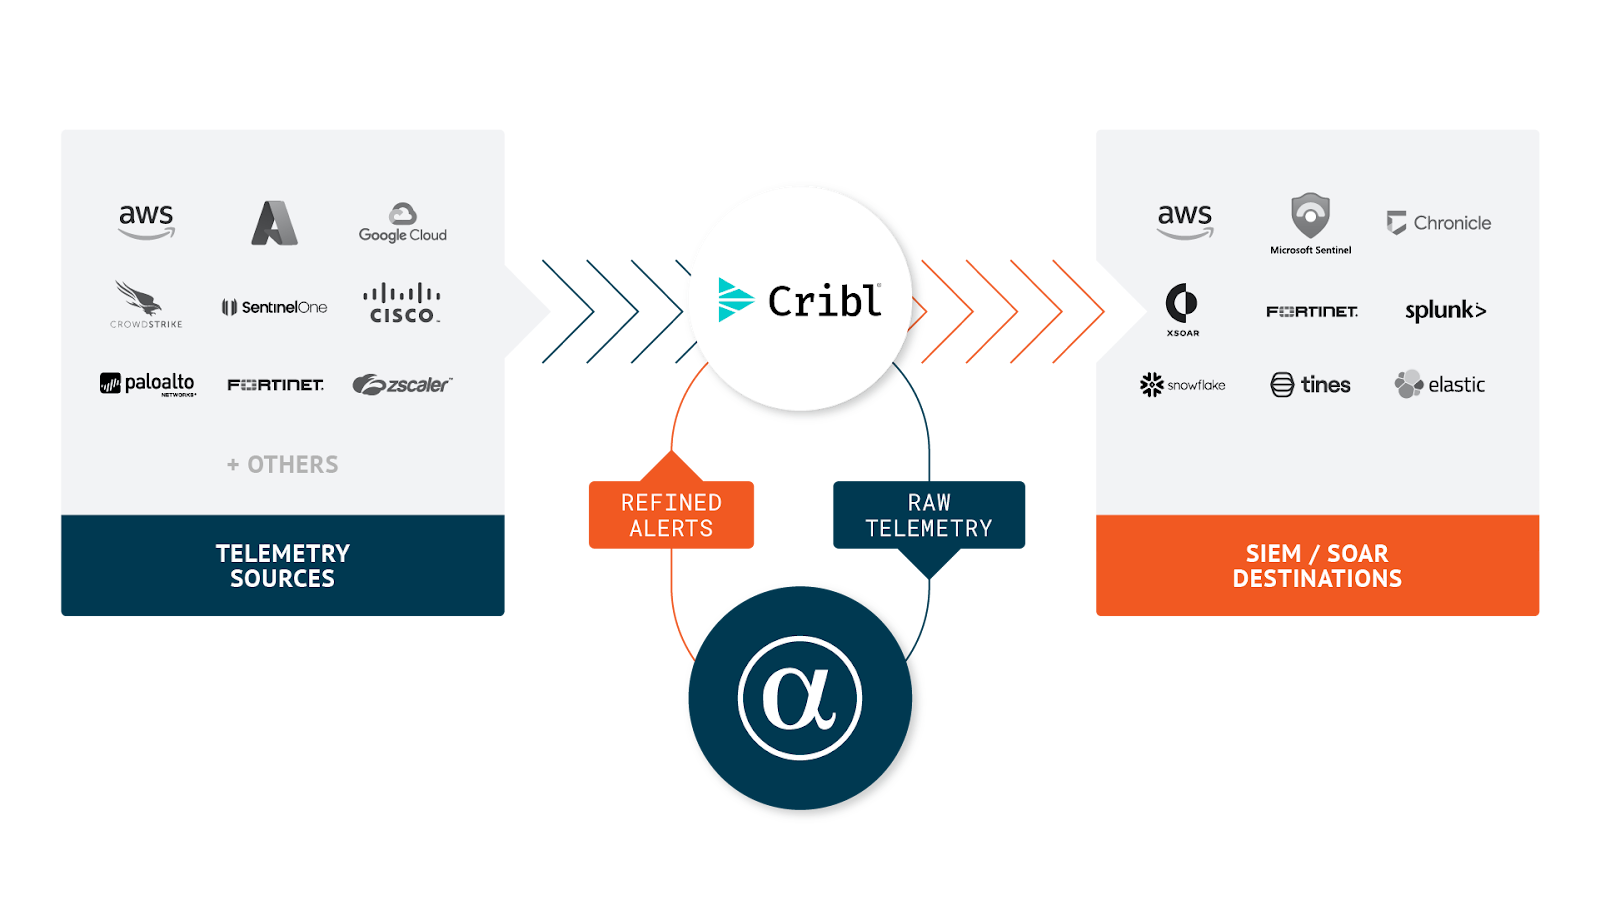
Architecture
AlphaSOC integrates with Cribl Stream as follows. You can send audit logs and telemetry to the AlphaSOC Analytics Engine using the instructions on this page and retrieve alerts for escalation using a REST Collector.
Prerequisites
- A running instance of Cribl Stream (cloud or on-premise)
- One or more sources set up and receiving telemetry data
- Access to the AlphaSOC Analytics Engine
- Credentials to the AlphaSOC destination (S3)
Set Up the AlphaSOC Destination
You can set up the destination either with QuickConnect or via the Routes. The steps below show how to configure it using QuickConnect.
-
On the top bar in the Cribl Stream web interface, select Products, and then select Cribl Stream. Under Worker Groups, select a Worker Group.
-
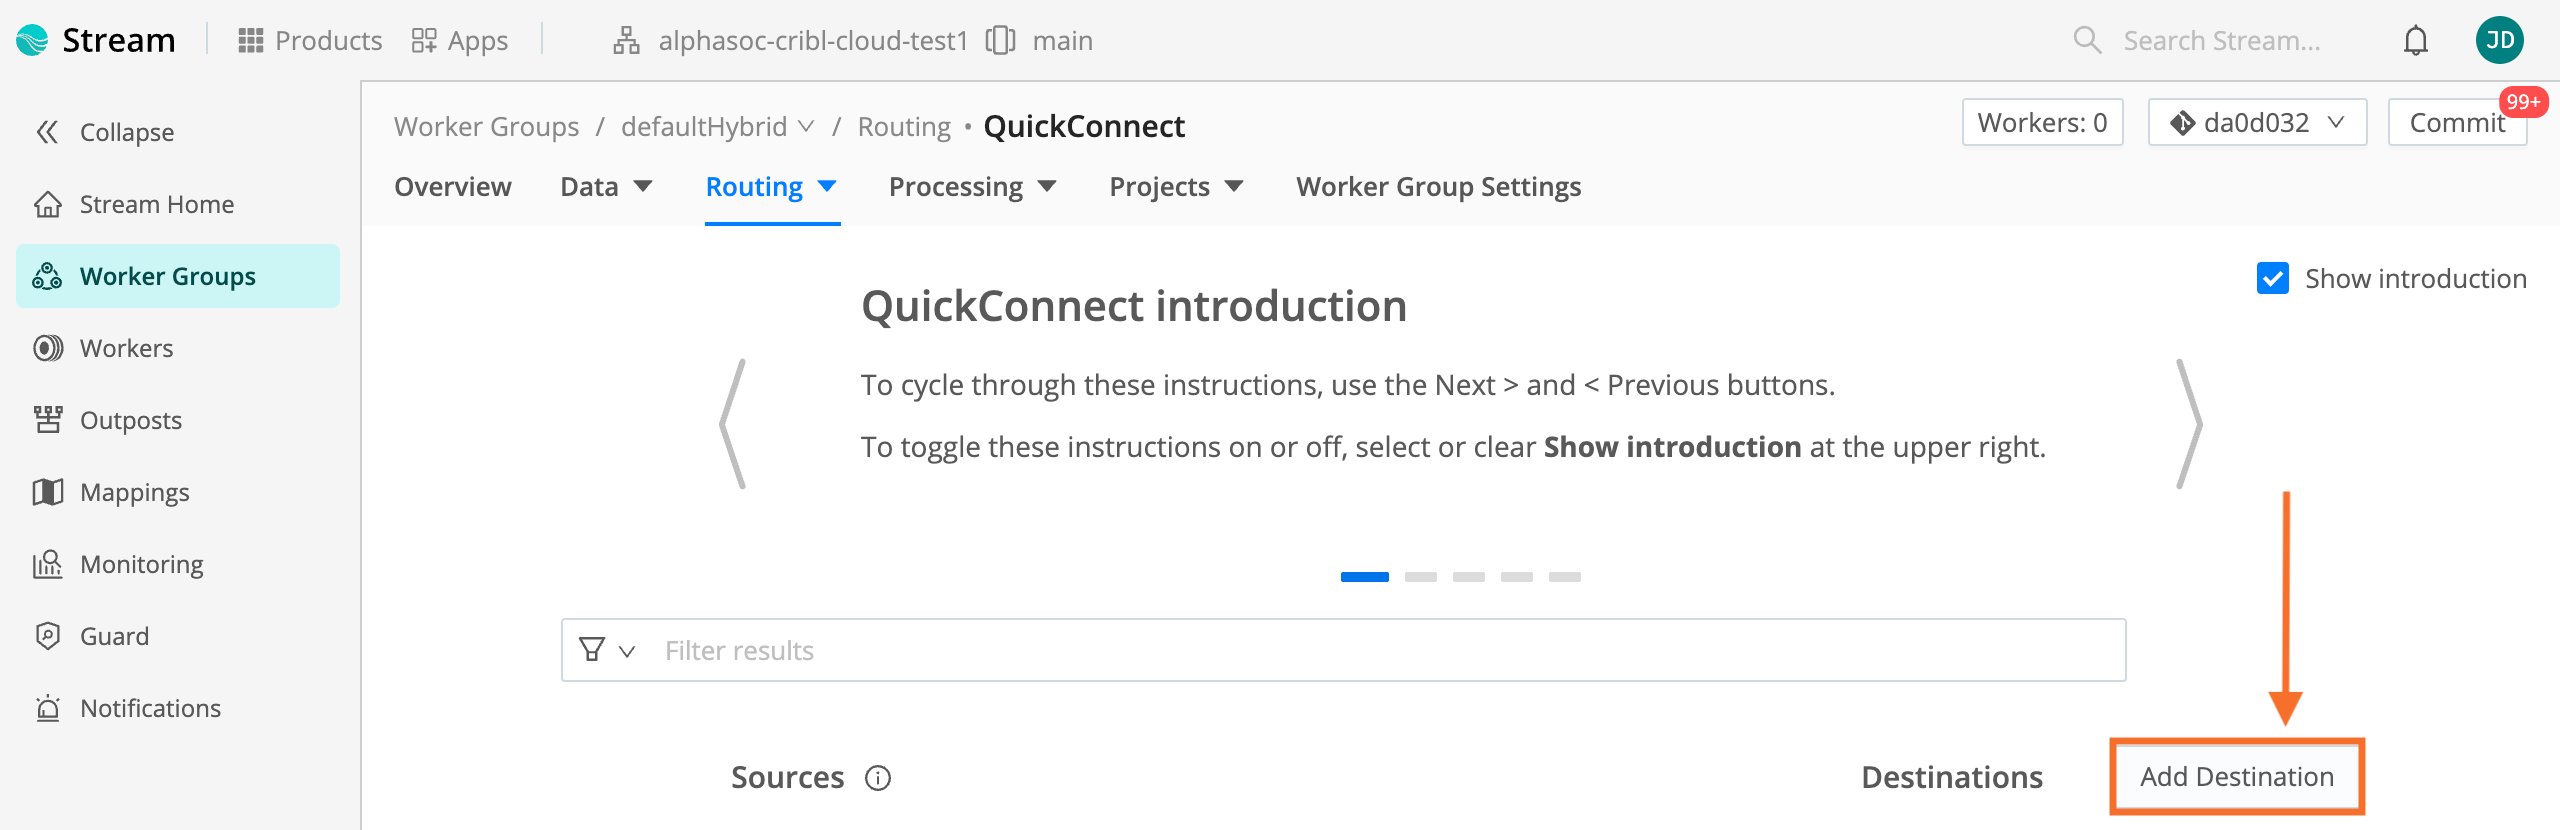
Navigate to Routing > QuickConnect and click Add Destination.
- Search for "AlphaSOC" to show the integration.
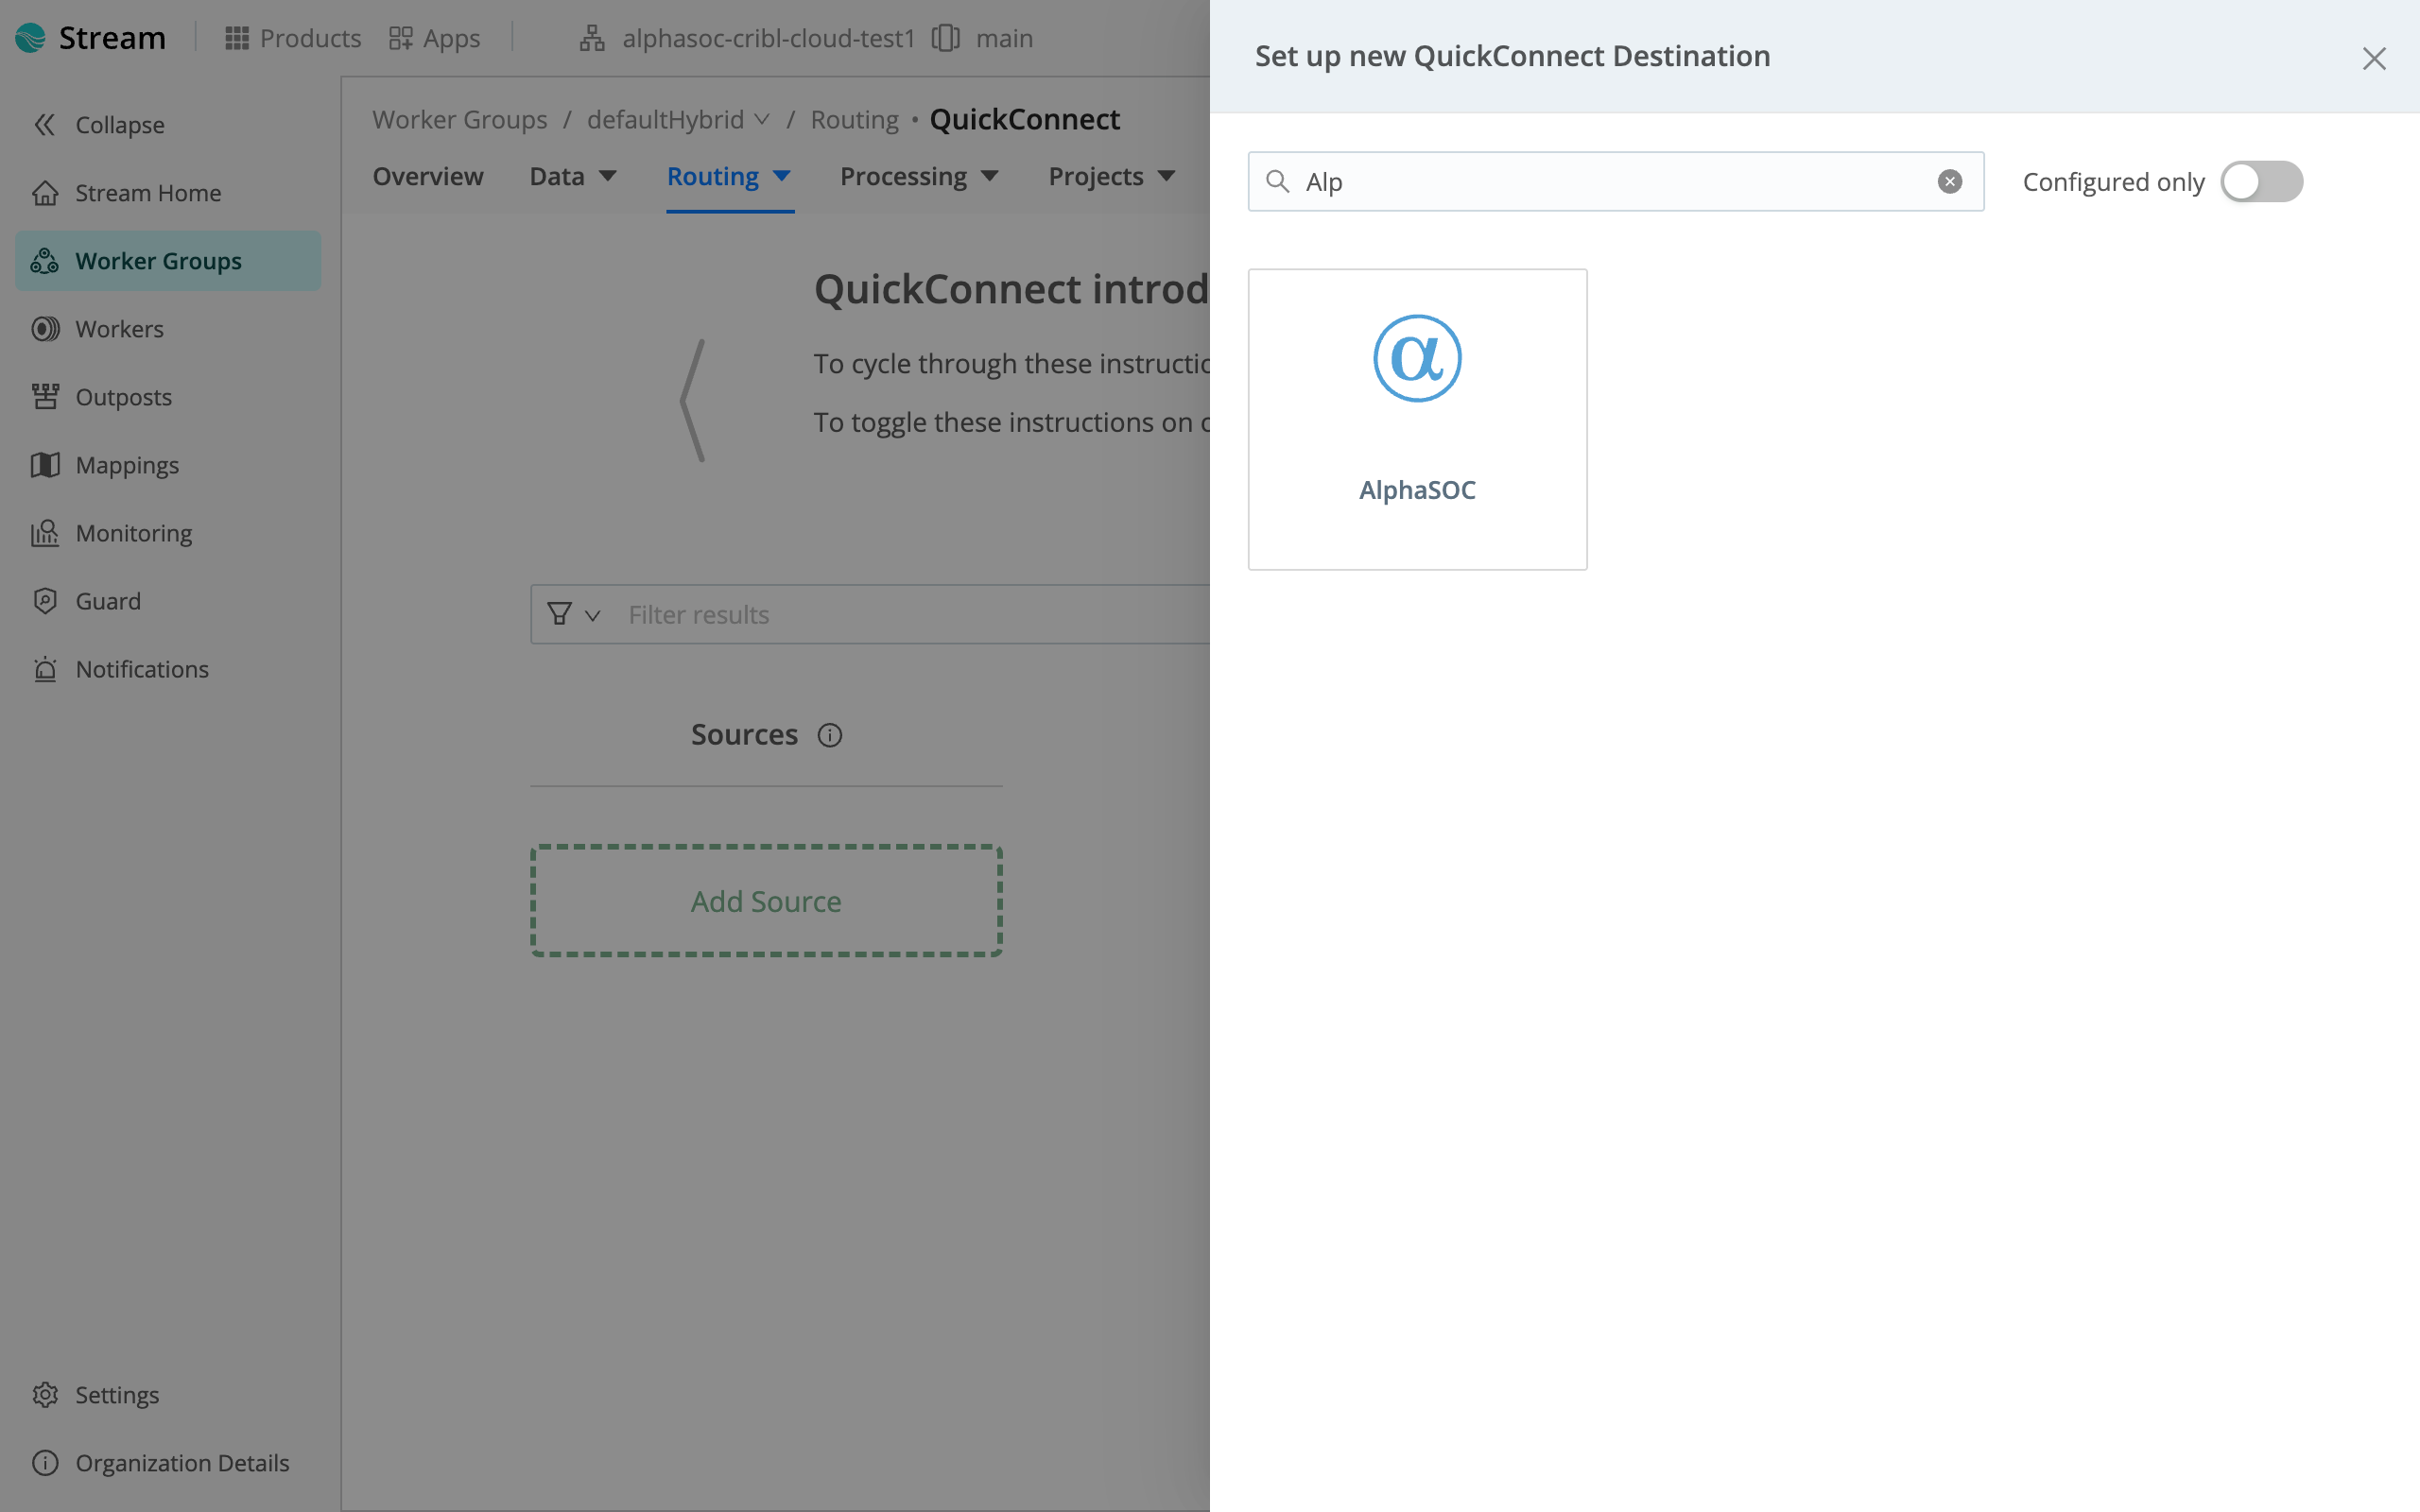
- Click on AlphaSOC and enter the Output ID and AlphaSOC bucket name (e.g.,
`events`).
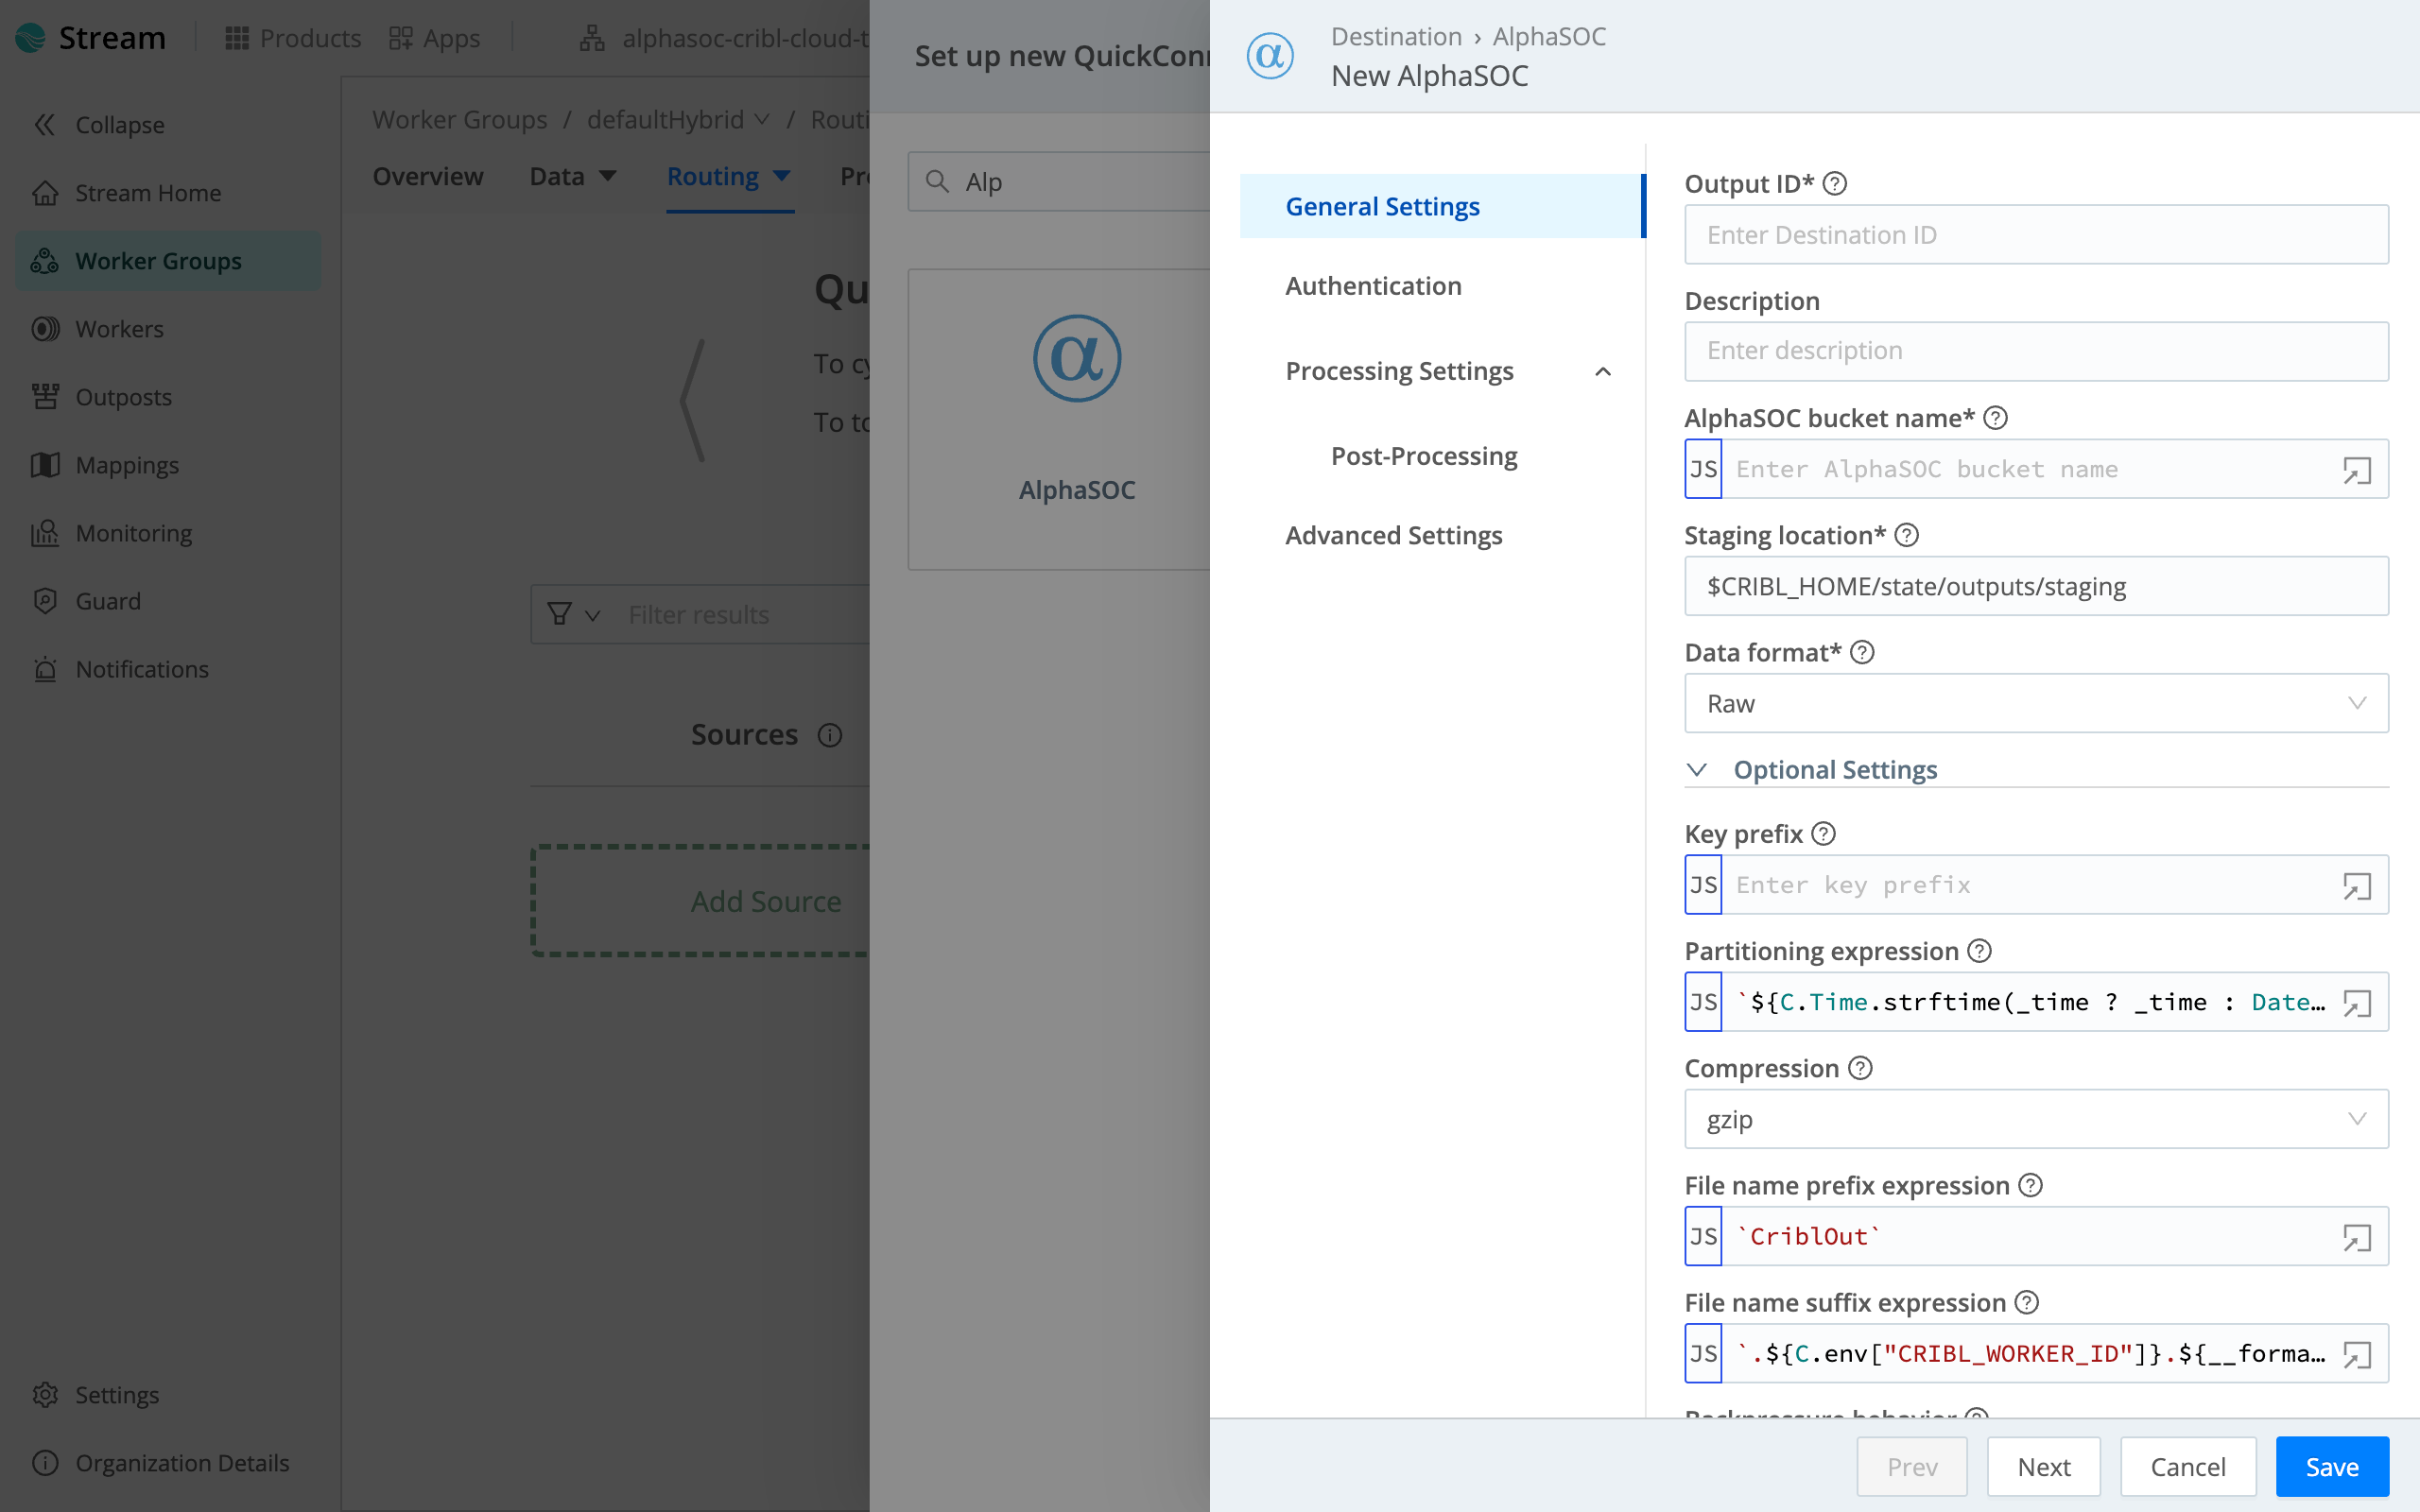
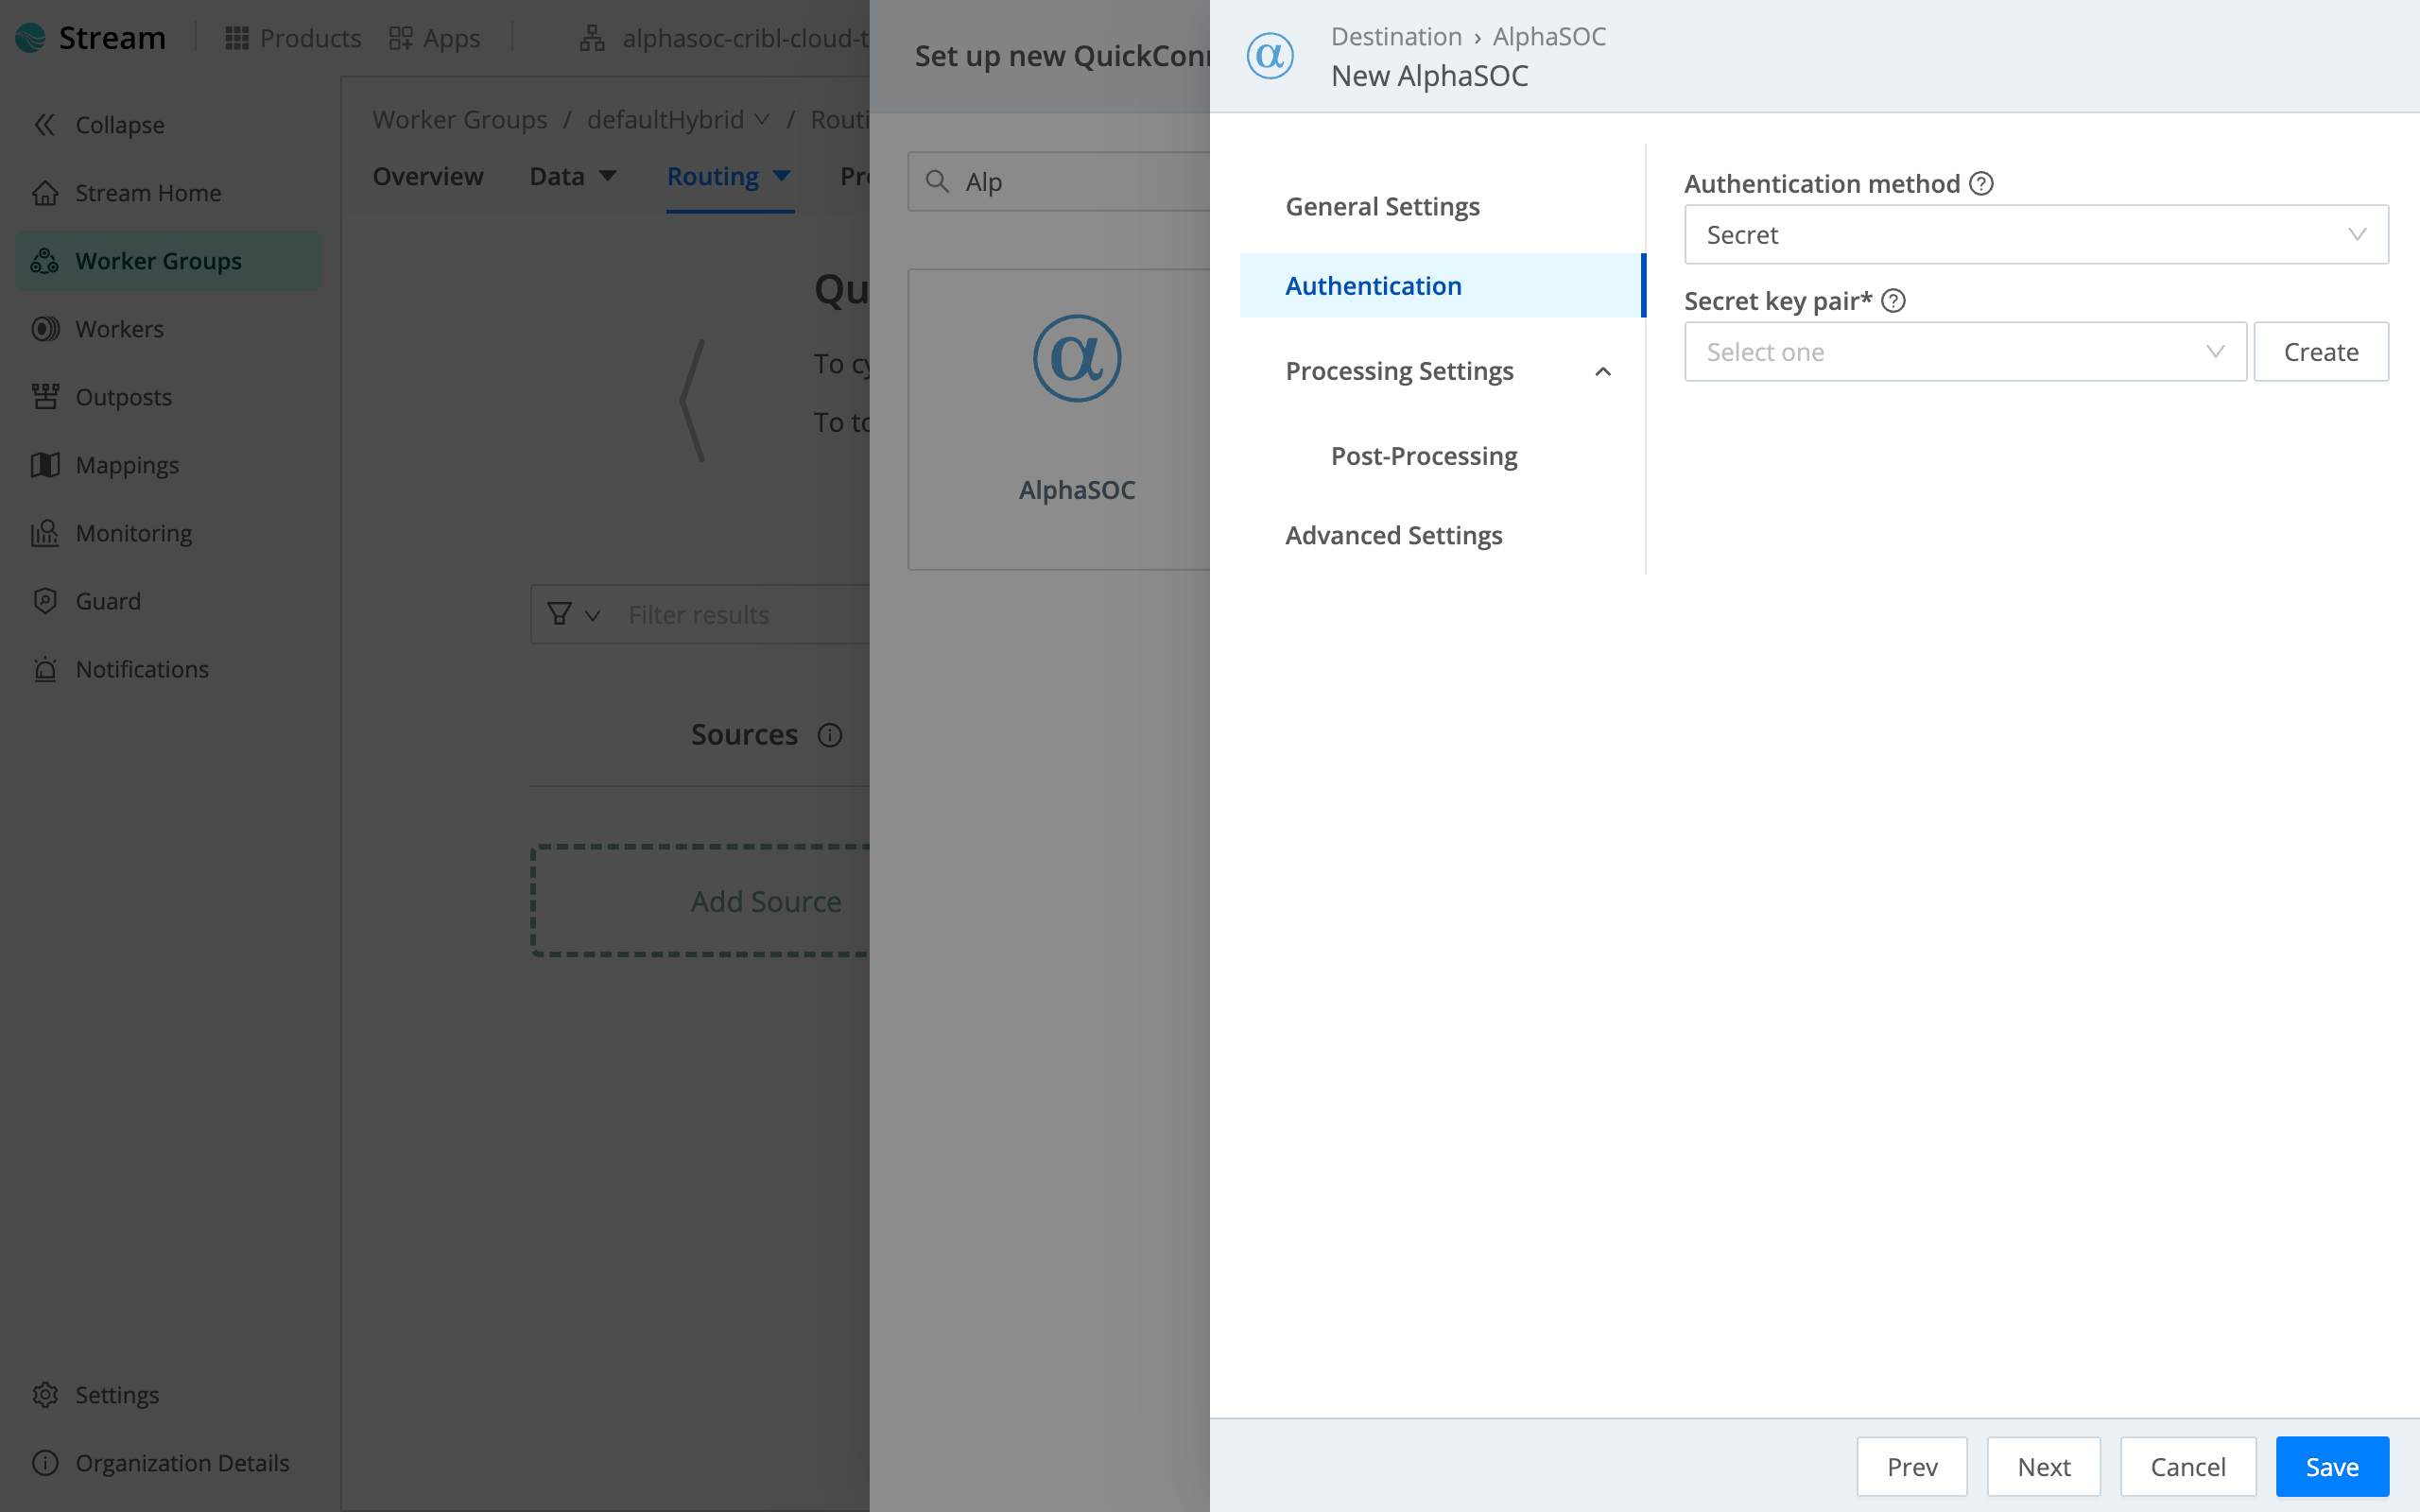
- Open Authentication then select existing credentials or press create to add new ones. Fill the values with AWS access key and secret, which you can obtain here.
- Click Save.
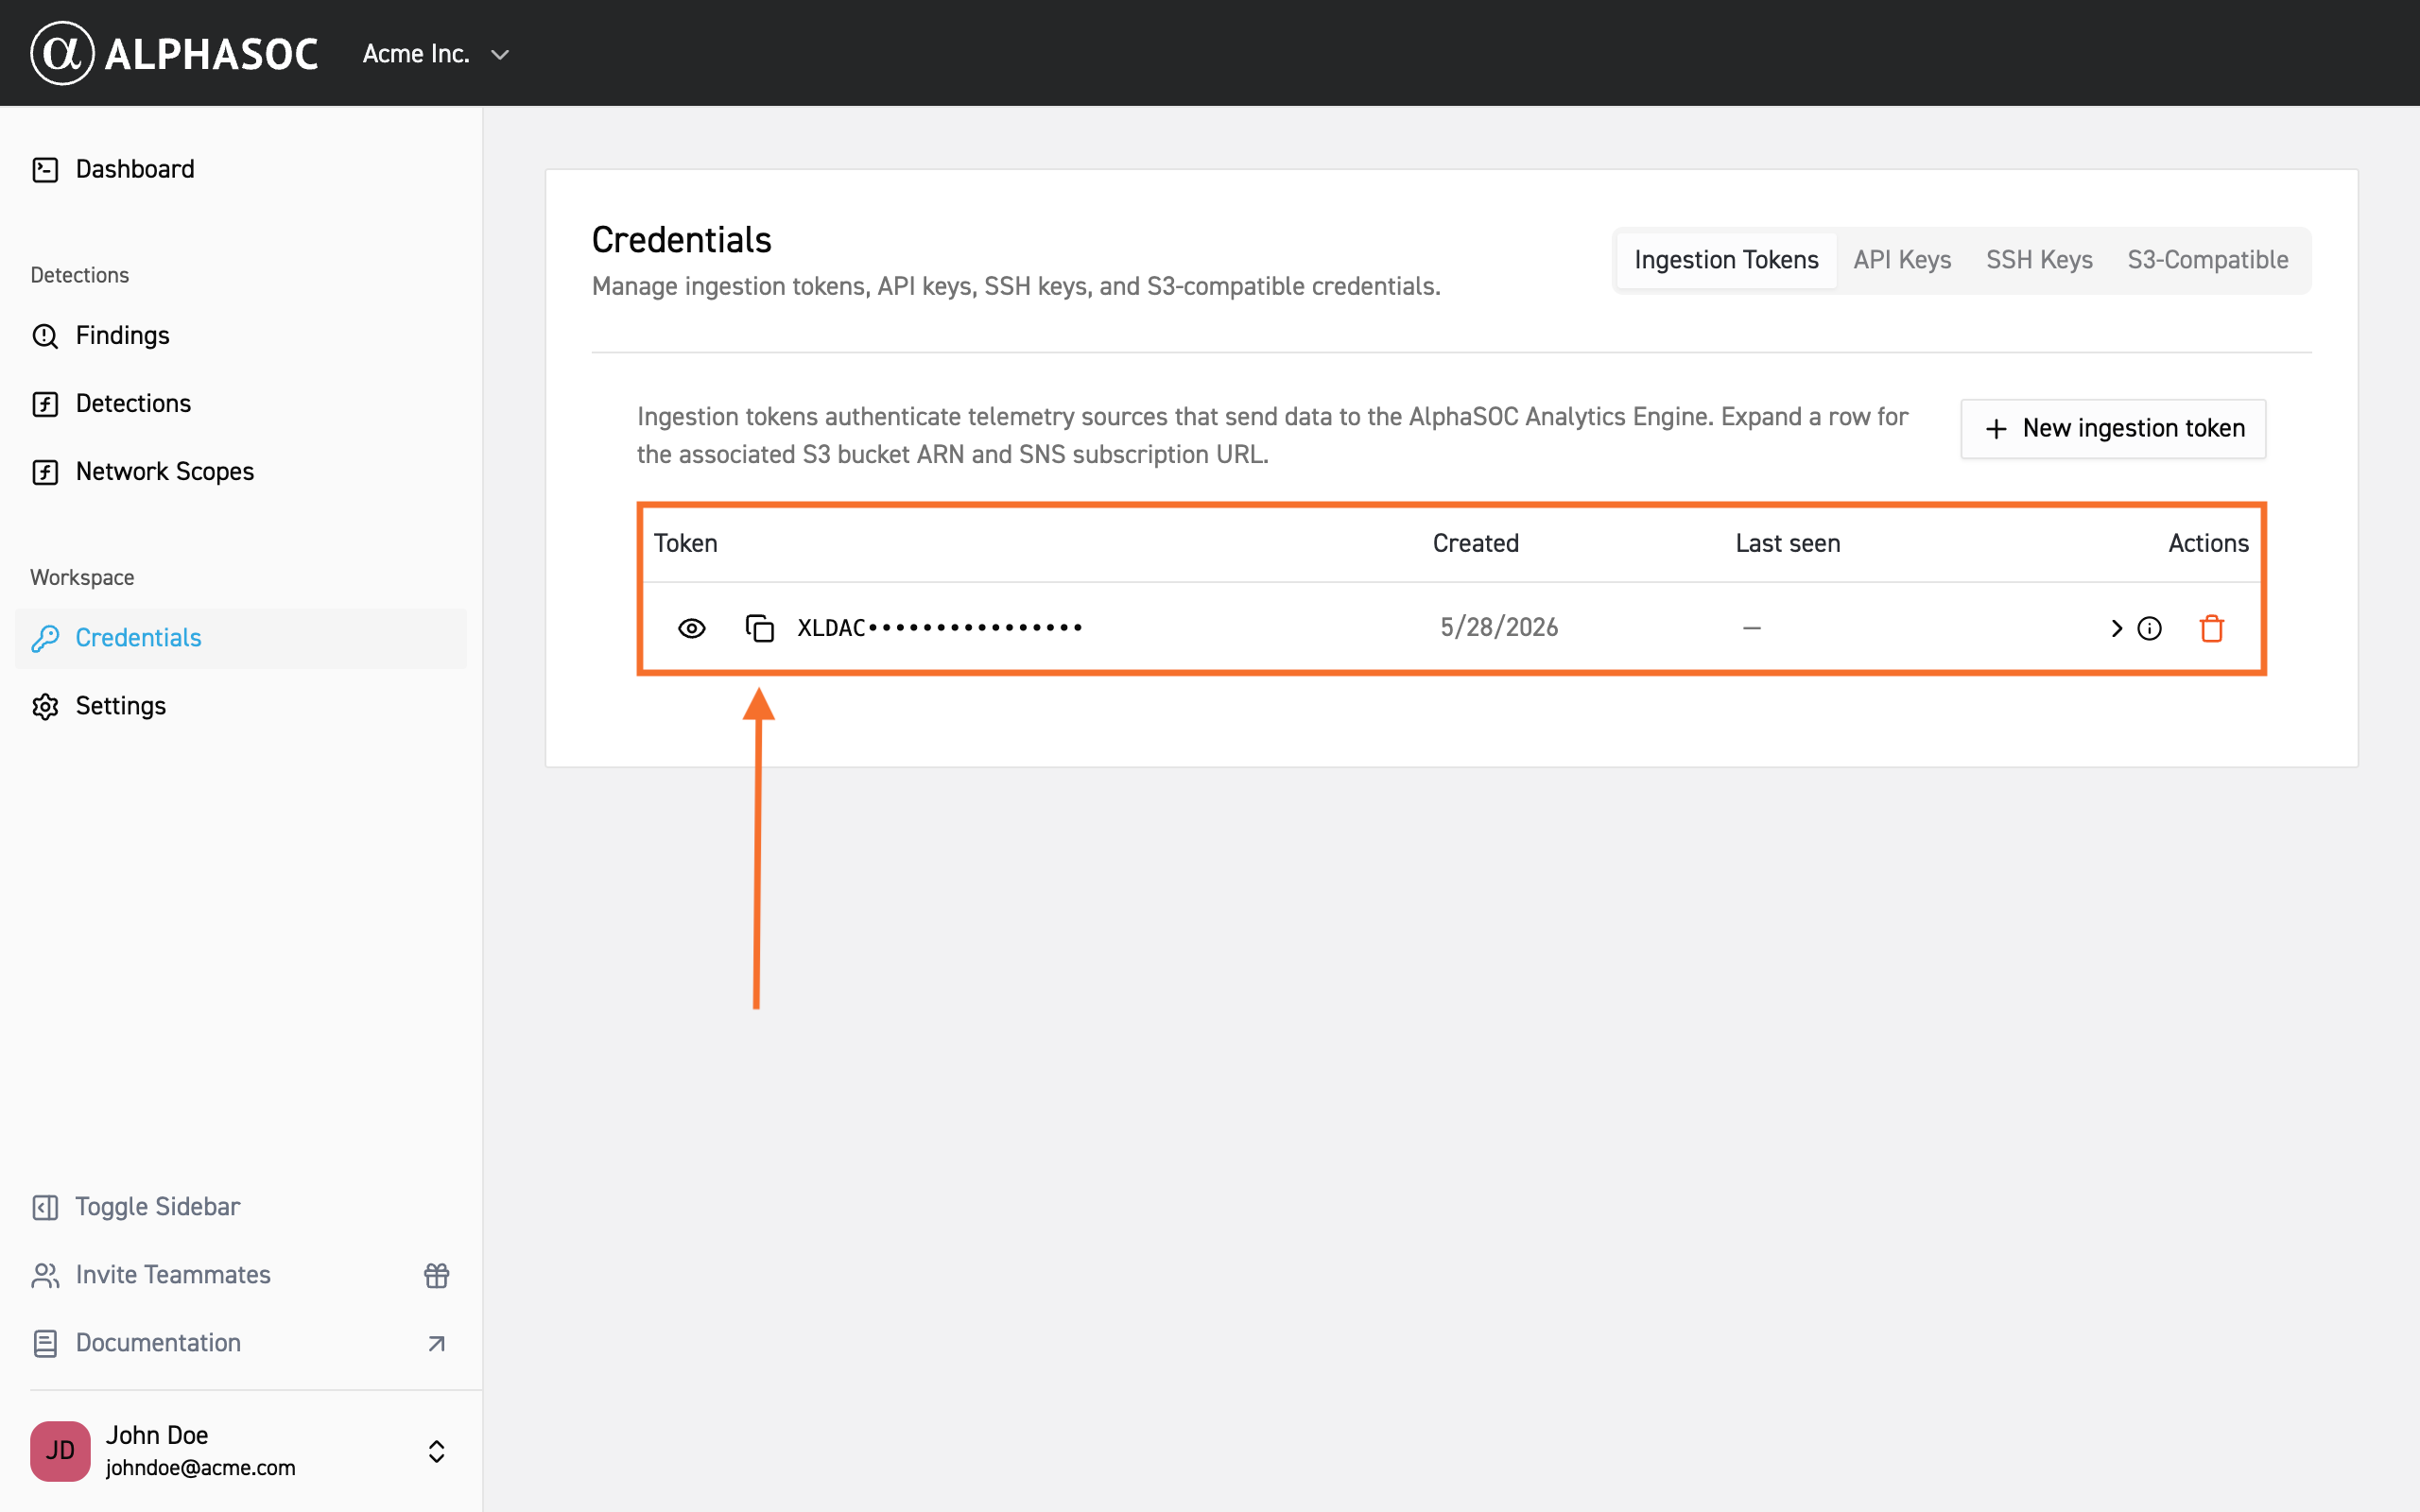
Obtaining the Access Key and Secret Key
Obtain your Access Key and Secret Key from the AlphaSOC Workspace. Log in, go to Credentials in the left menu, and copy the keys from the S3-Compatible section.