Okta SSO Integration
Overview
This guide explains how to enable Okta OpenID Connect (OIDC) Single Sign-On (SSO) for the AlphaSOC Console.
Supported features:
- SP-initiated SSO: users of an SSO-enabled email domain sign in from the AlphaSOC sign-in page and authenticate with Okta.
- IdP-initiated SSO: allows users to log in to the AlphaSOC Console from the Okta End-User Dashboard.
- Just-In-Time (JIT) provisioning (optional): automatically creates a user in your AlphaSOC workspace on first Okta login.
SSO is enabled by AlphaSOC after verification. A workspace Owner submits the
Okta details through the console's SSO tab, as described below, and
AlphaSOC verifies that the email domain belongs to your organization before
activating it.
Configuring Okta Integration with AlphaSOC
Prerequisites
Before proceeding, ensure you have the following:
- An Okta account with administrative privileges for a tenant.
- Access to the AlphaSOC console
Owneraccount.
Step 1: Add AlphaSOC Console Application in Okta
- Log in to your Okta workspace administrator account.
- Navigate to Applications > Applications on the left pane and click Browse App Catalog.
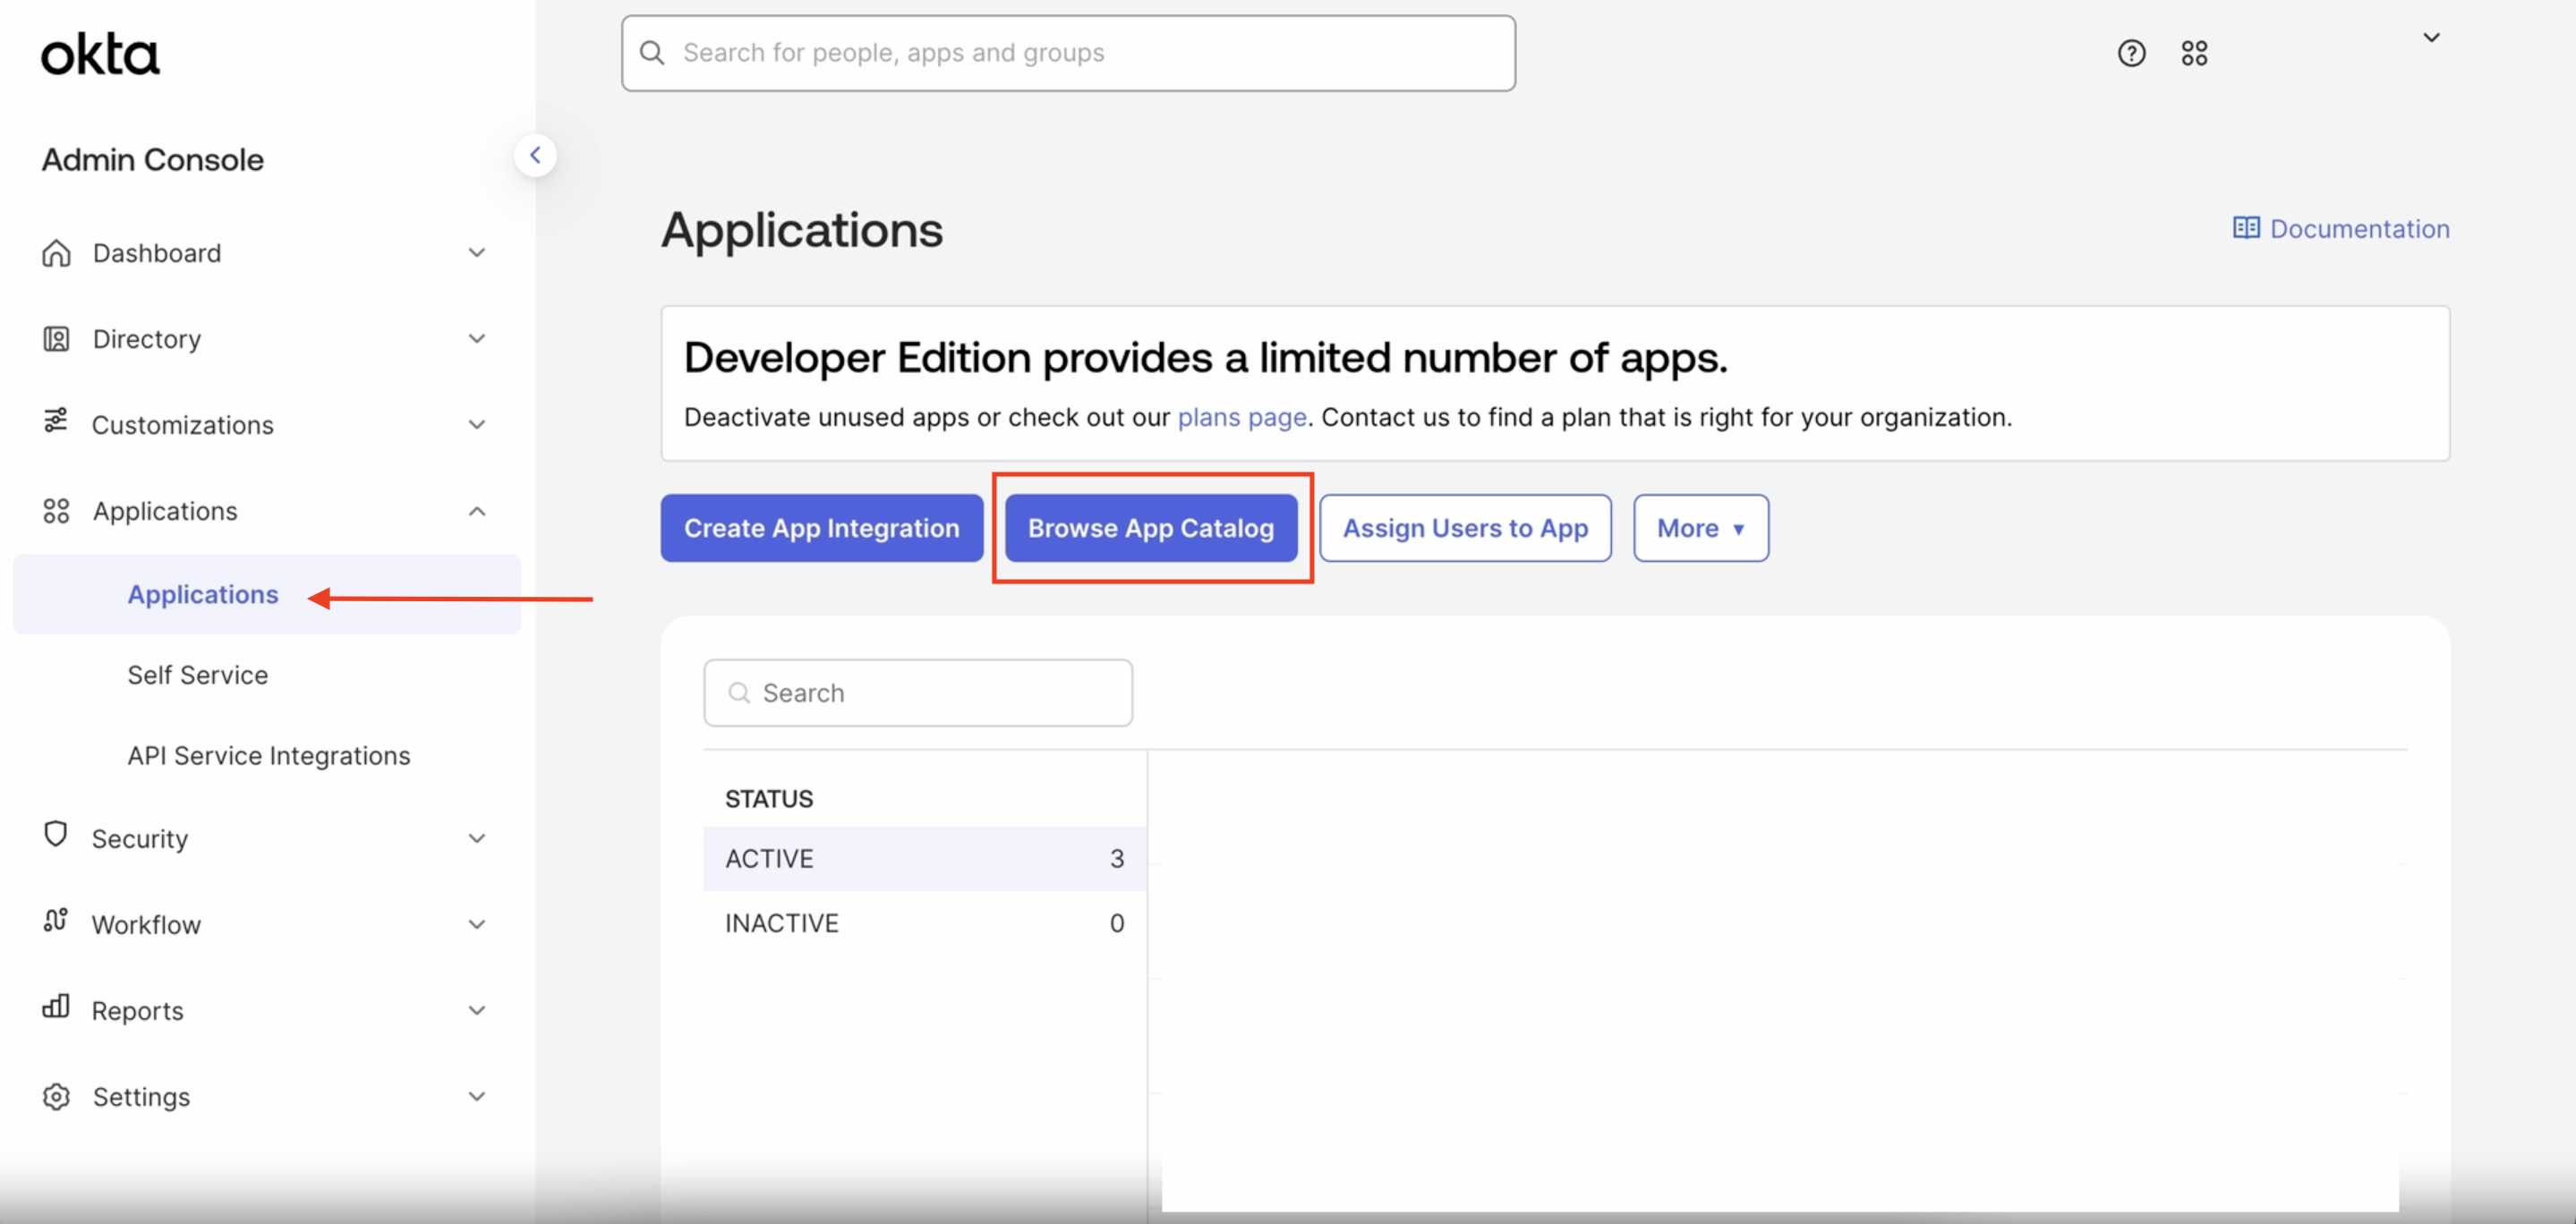
- Search for "AlphaSOC Console" or click here.
- Click Add Integration.
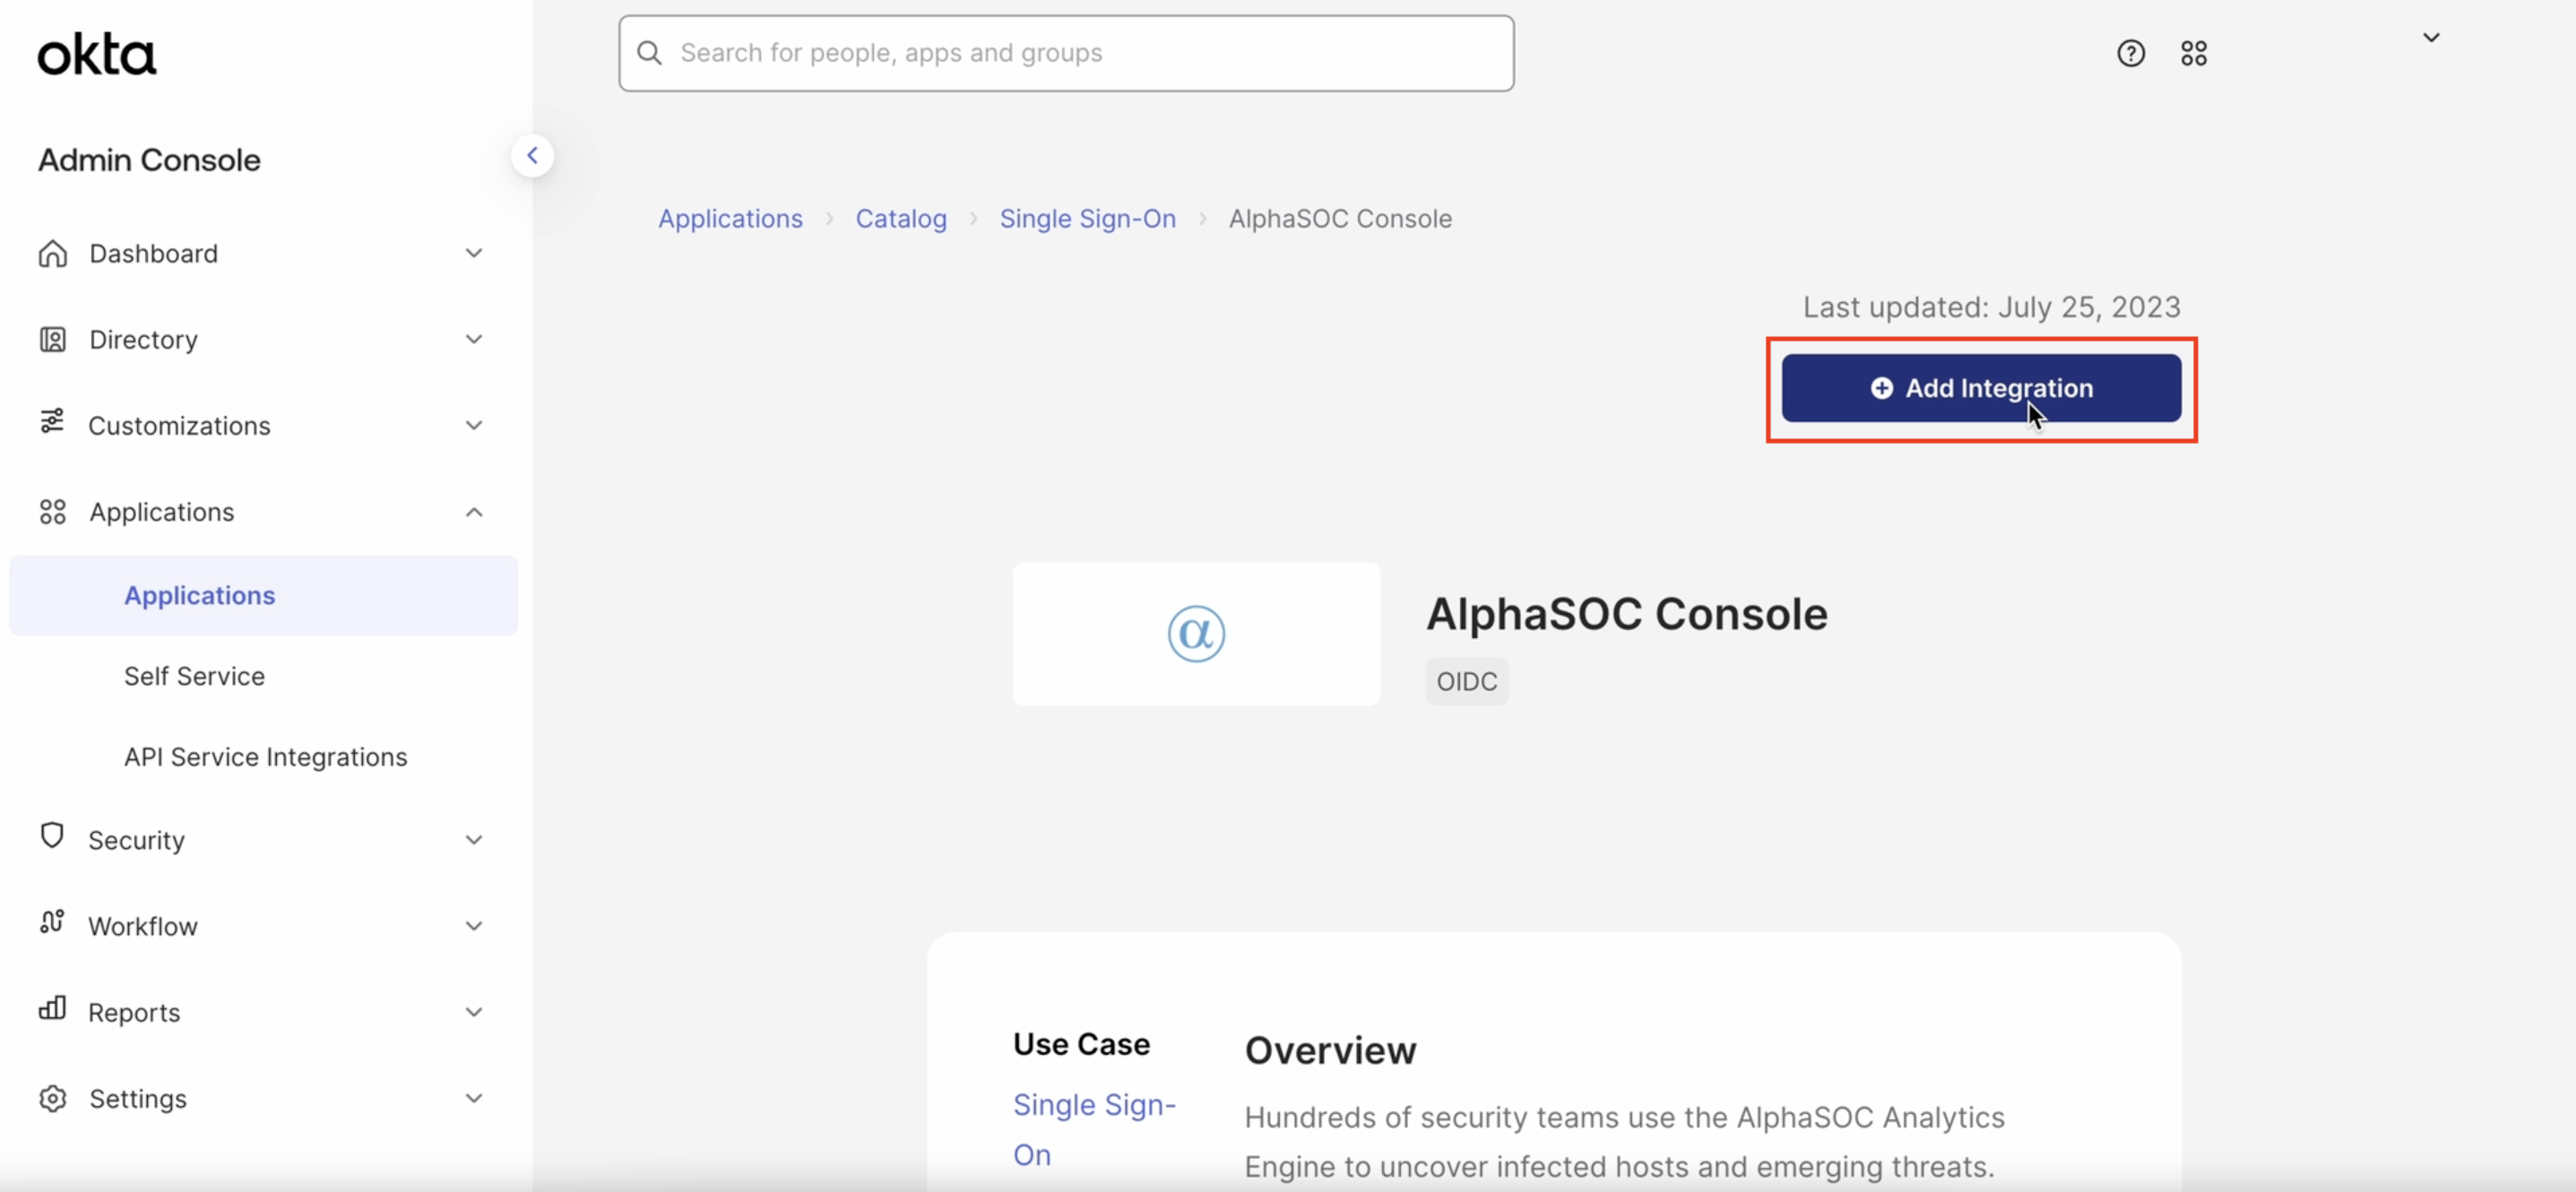
- Set the application label (display name) and click Done to add the application to your Okta workspace.
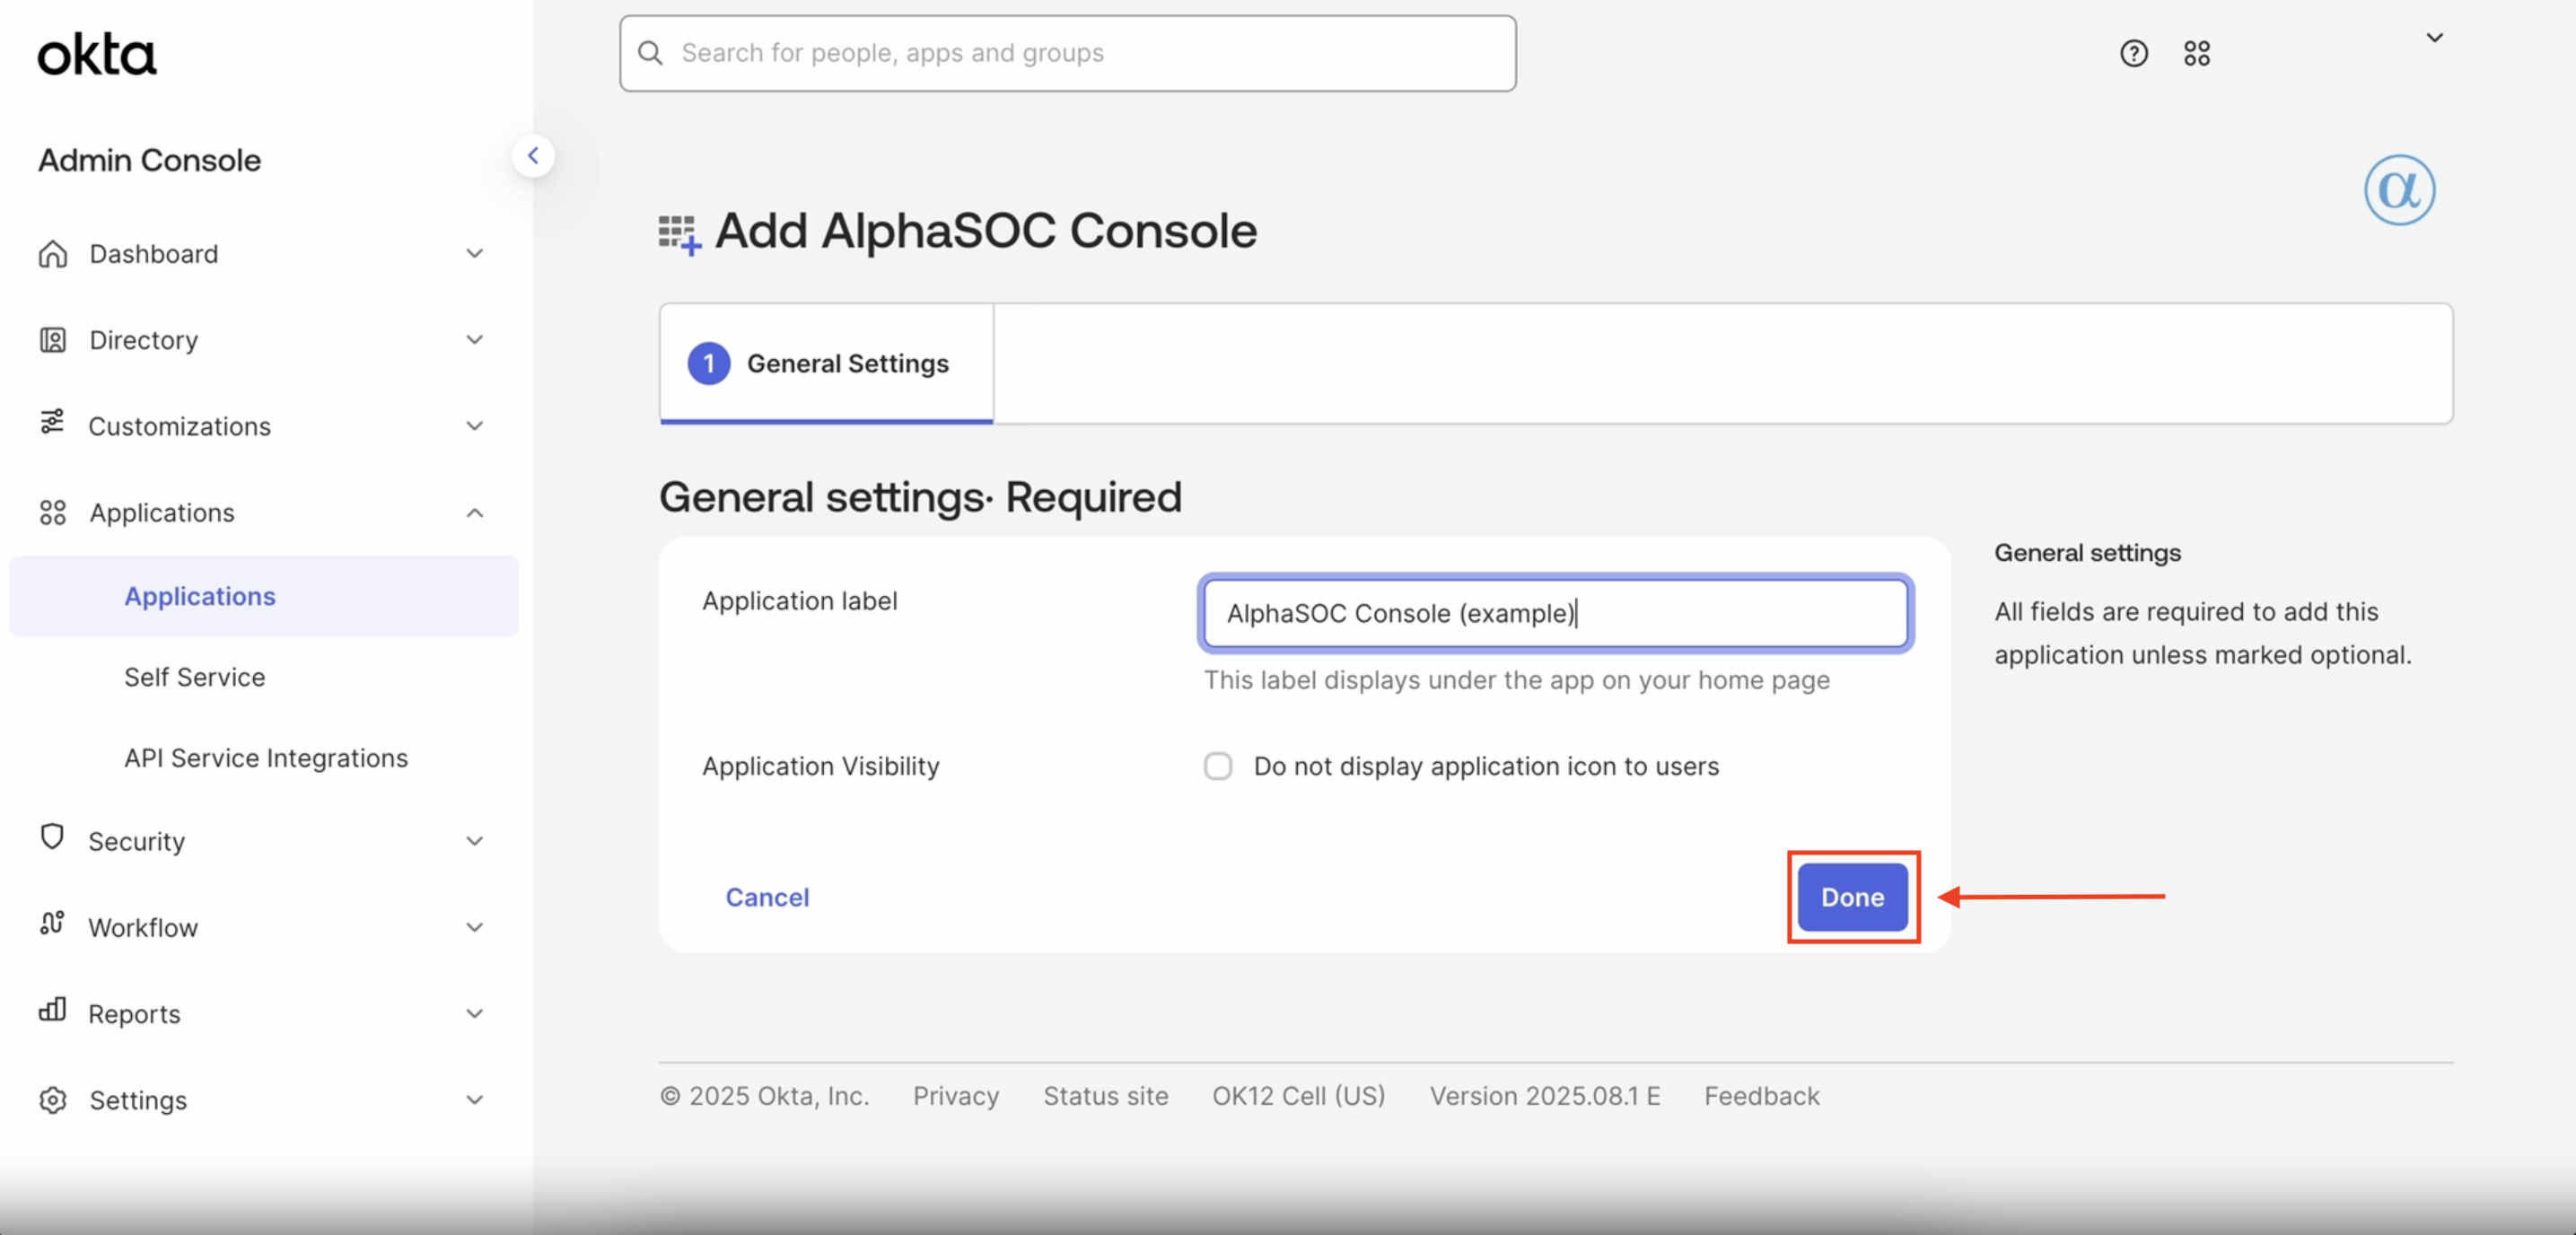
The AlphaSOC Console integration already has AlphaSOC's sign-in redirect URI registered, so no further application configuration is needed in Okta.
If you prefer to create your own OIDC web application in Okta instead of using
the catalog integration, register the sign-in redirect URI shown in the
console's SSO tab, https://console.alphasoc.net/login-okta/callback. To
also allow sign-in from the Okta End-User Dashboard, set the initiate login URI
to https://console.alphasoc.net/login-okta.
Step 2: Assign Users or Groups to Grant Access to the AlphaSOC Console Application
After adding the application to your Okta workspace:
-
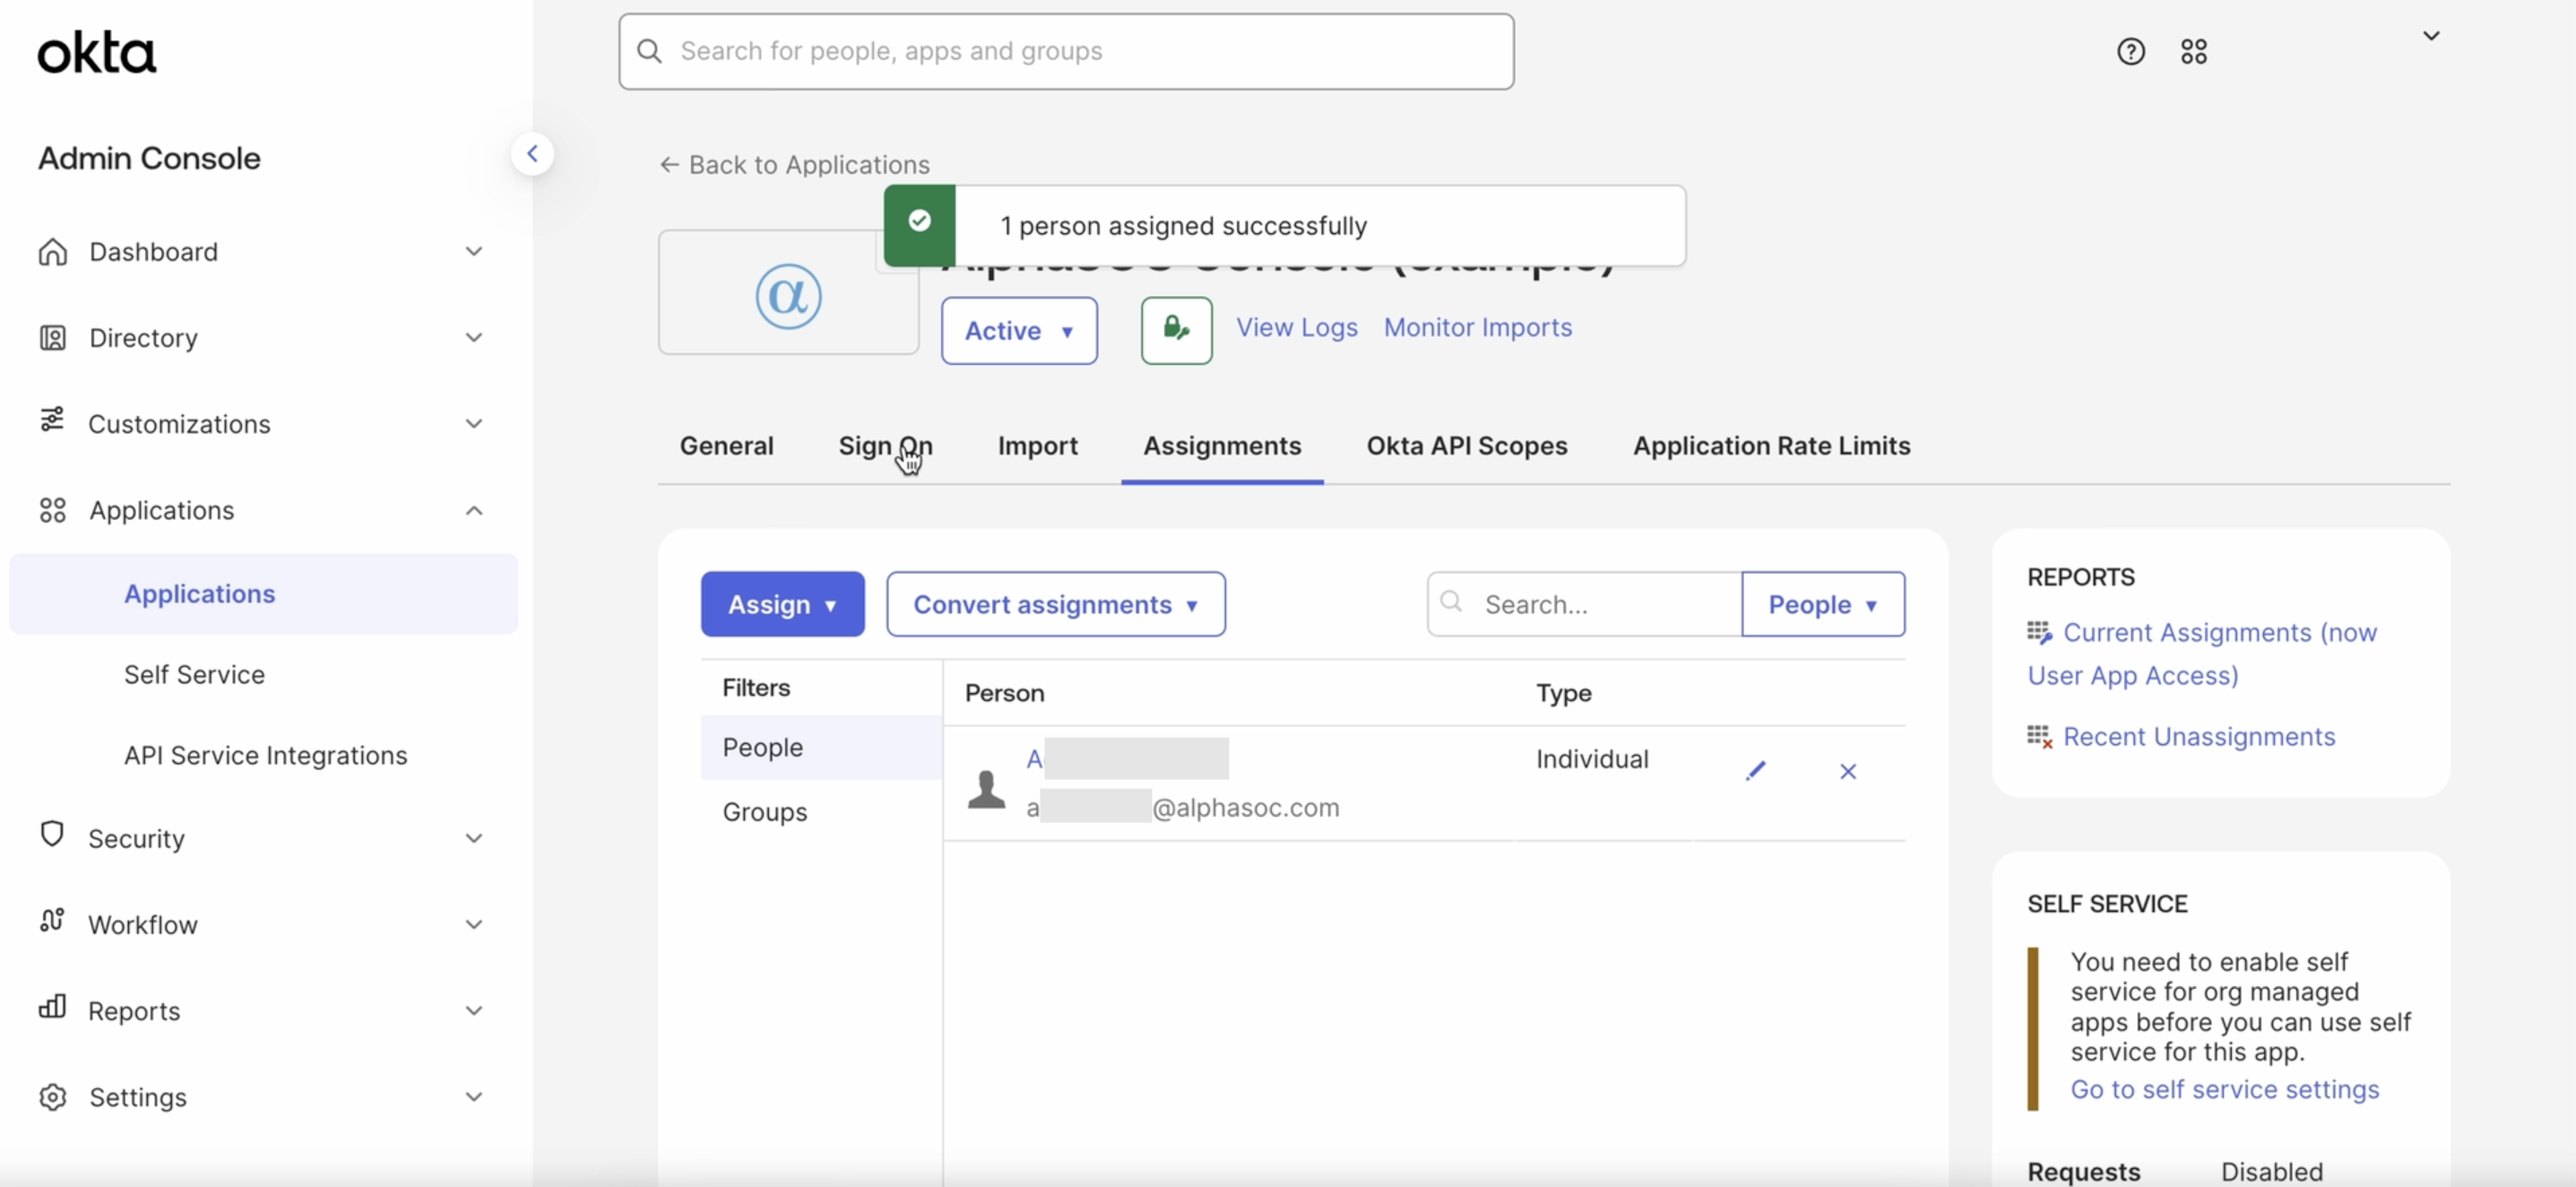
Navigate to the Assignments tab of the AlphaSOC Console application.
-
Click Assign and select who you want to grant access to the AlphaSOC Console through Okta SSO. You can choose to assign individual users or groups.
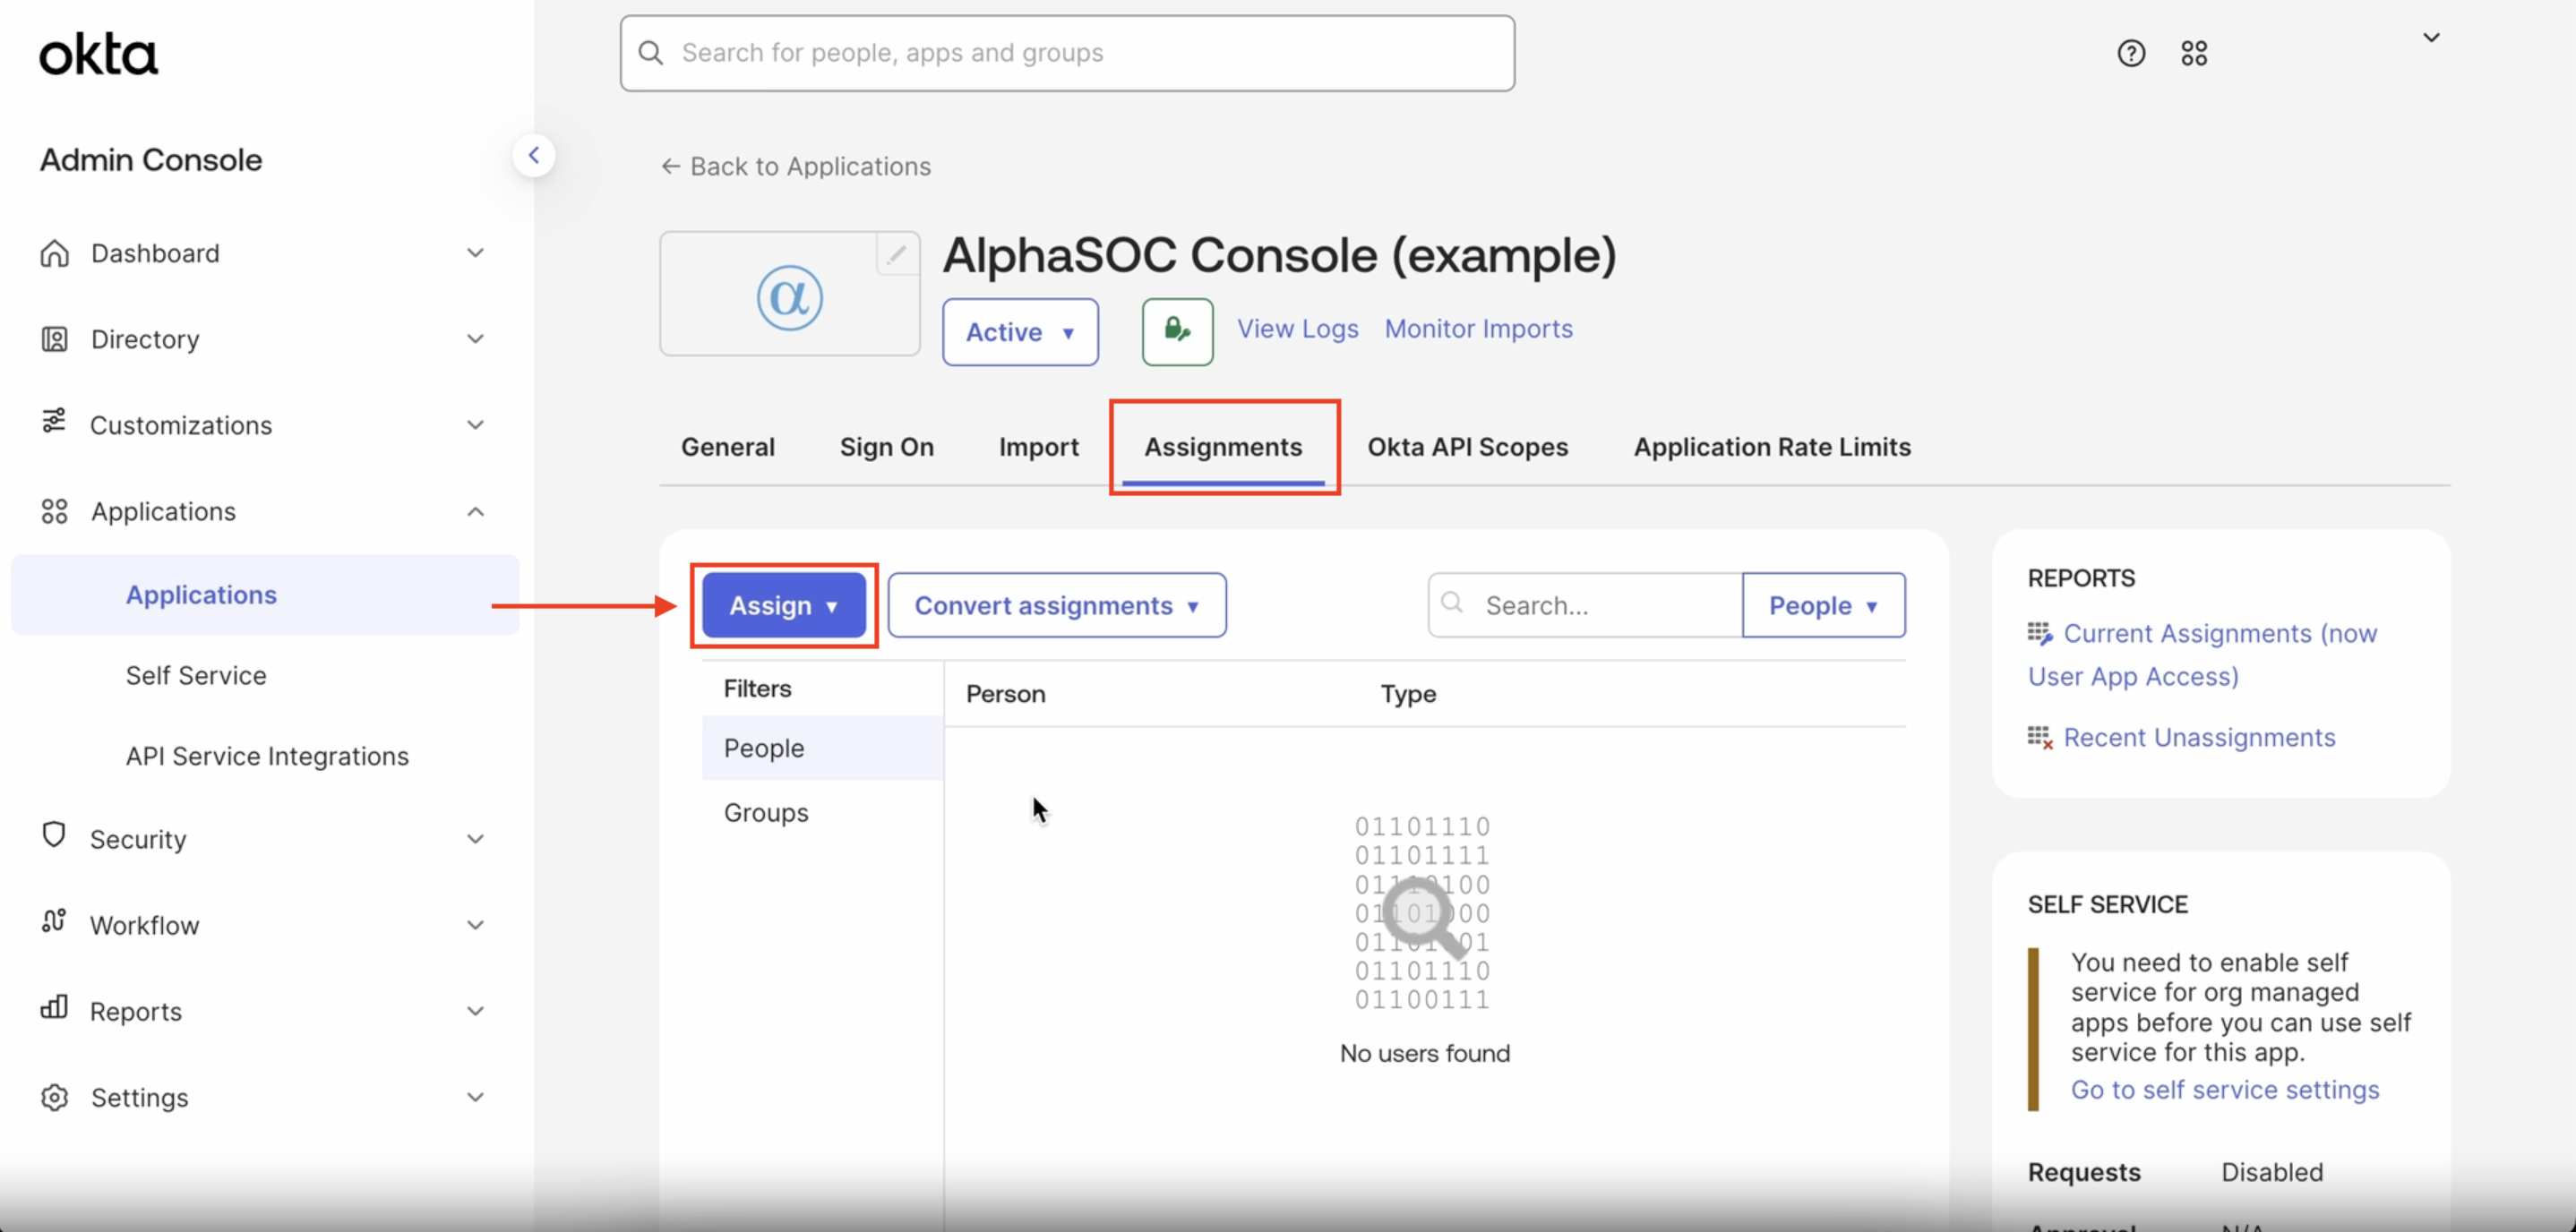 After you save
the configuration, you should be able to see a list of assigned users in the
Assignments tab:
After you save
the configuration, you should be able to see a list of assigned users in the
Assignments tab:
Step 3: Collect Your Okta Details
You need three values from Okta to request SSO in the AlphaSOC Console.
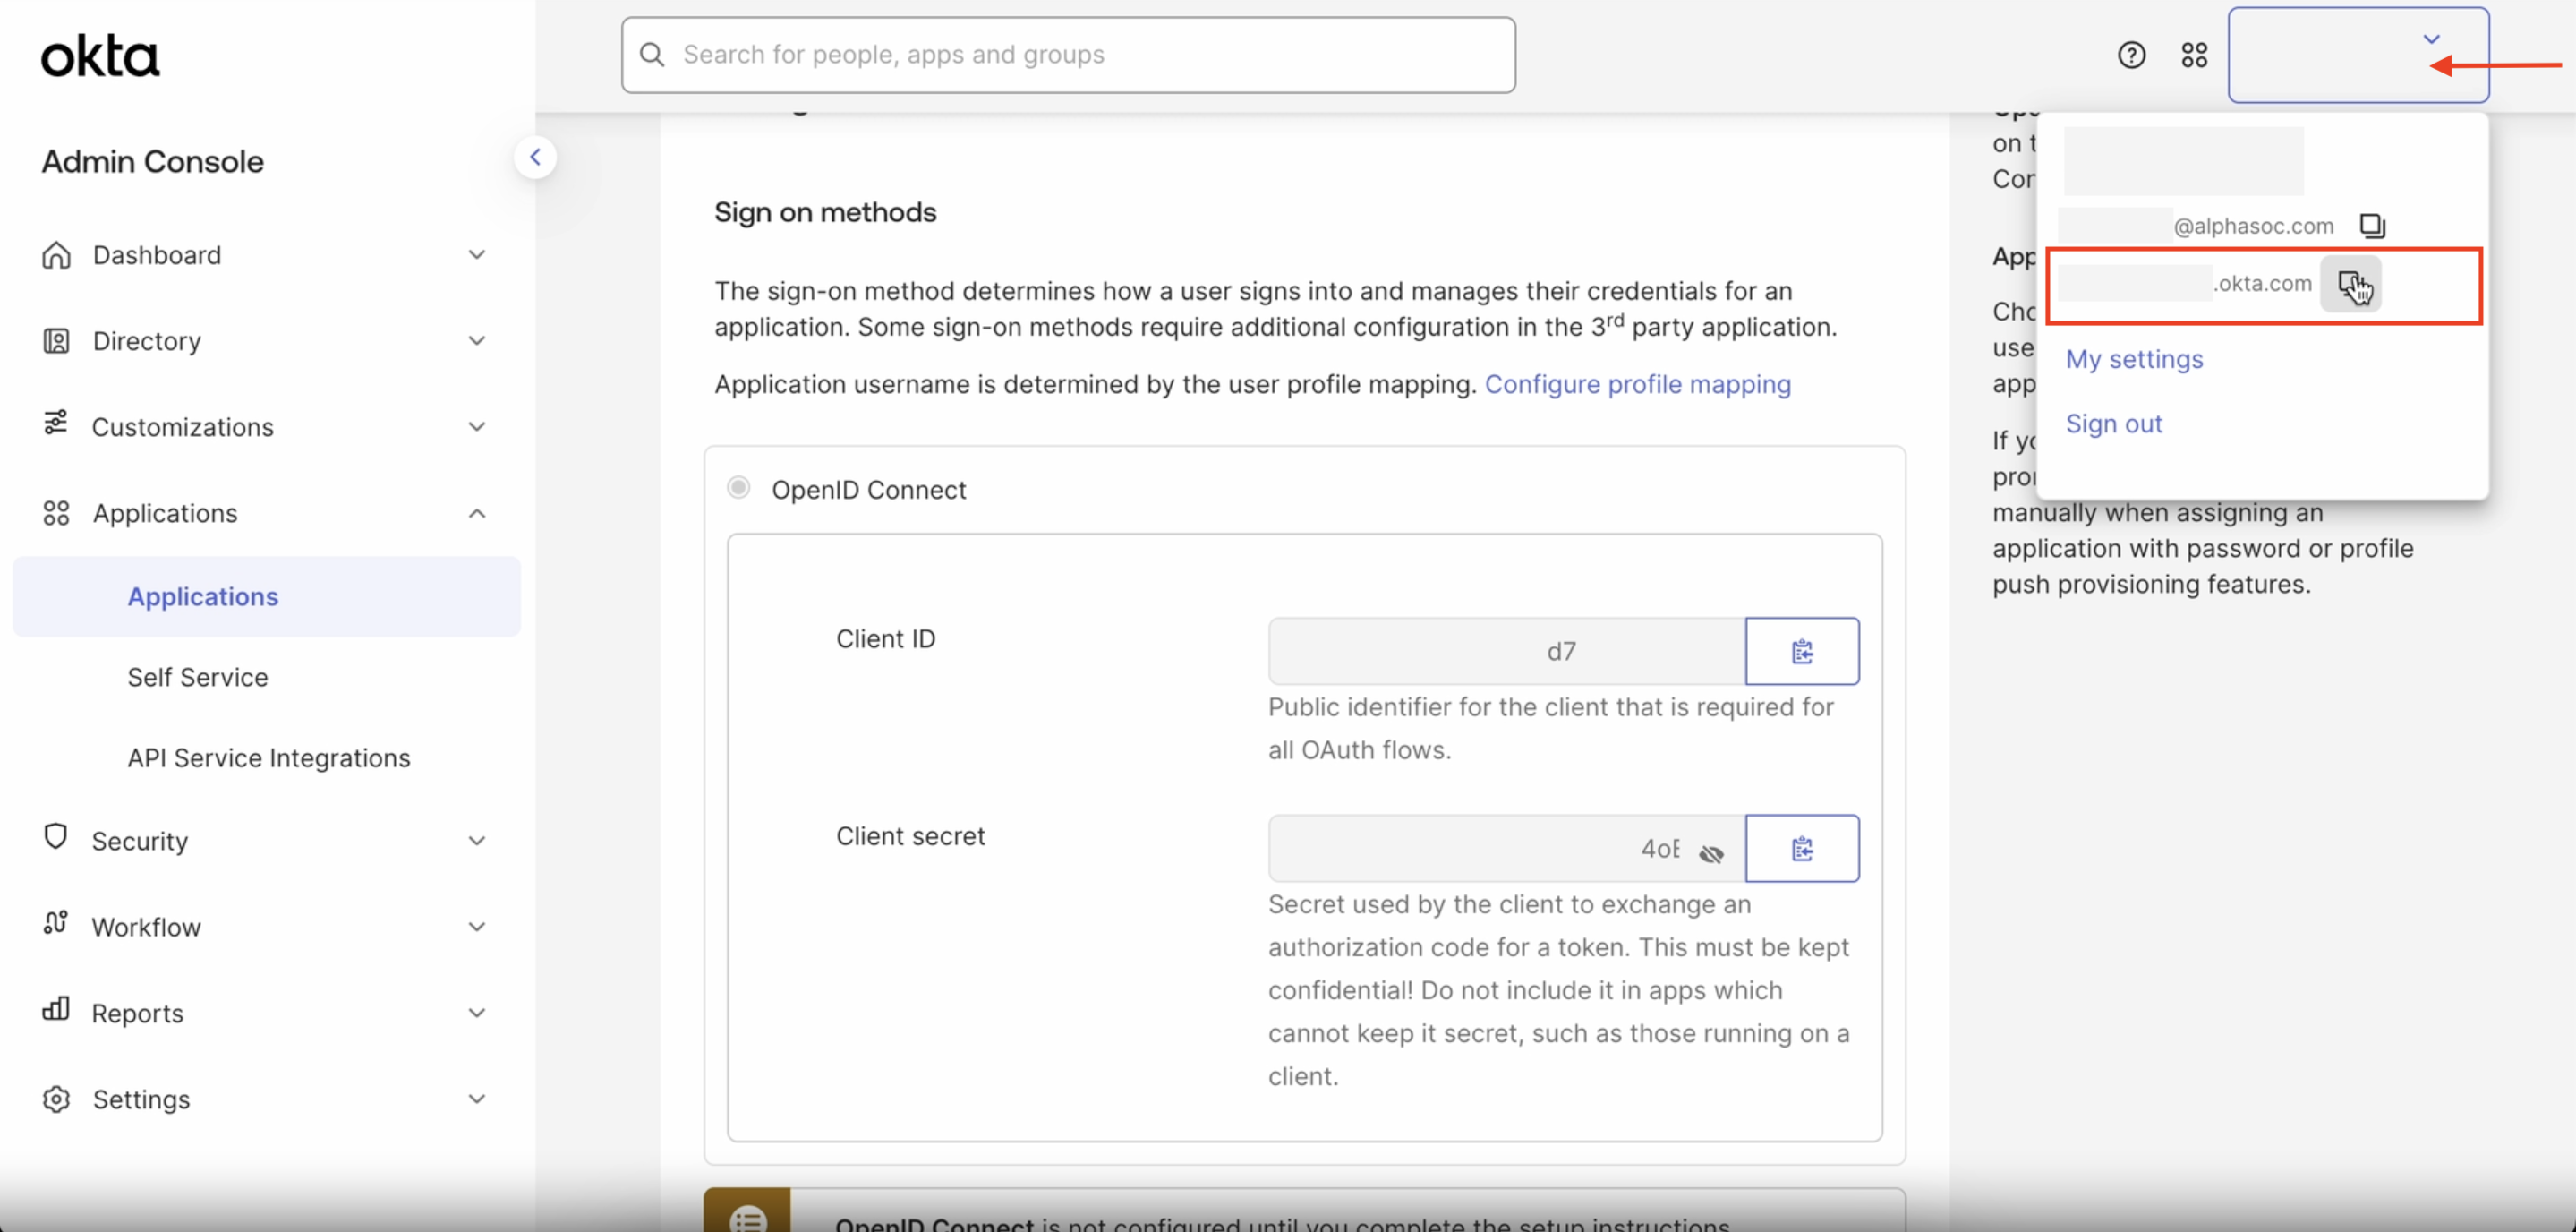
To find your Okta domain, click your name in the top right corner of your
Okta workspace. Click the icon to copy the domain (for example
acme.okta.com).
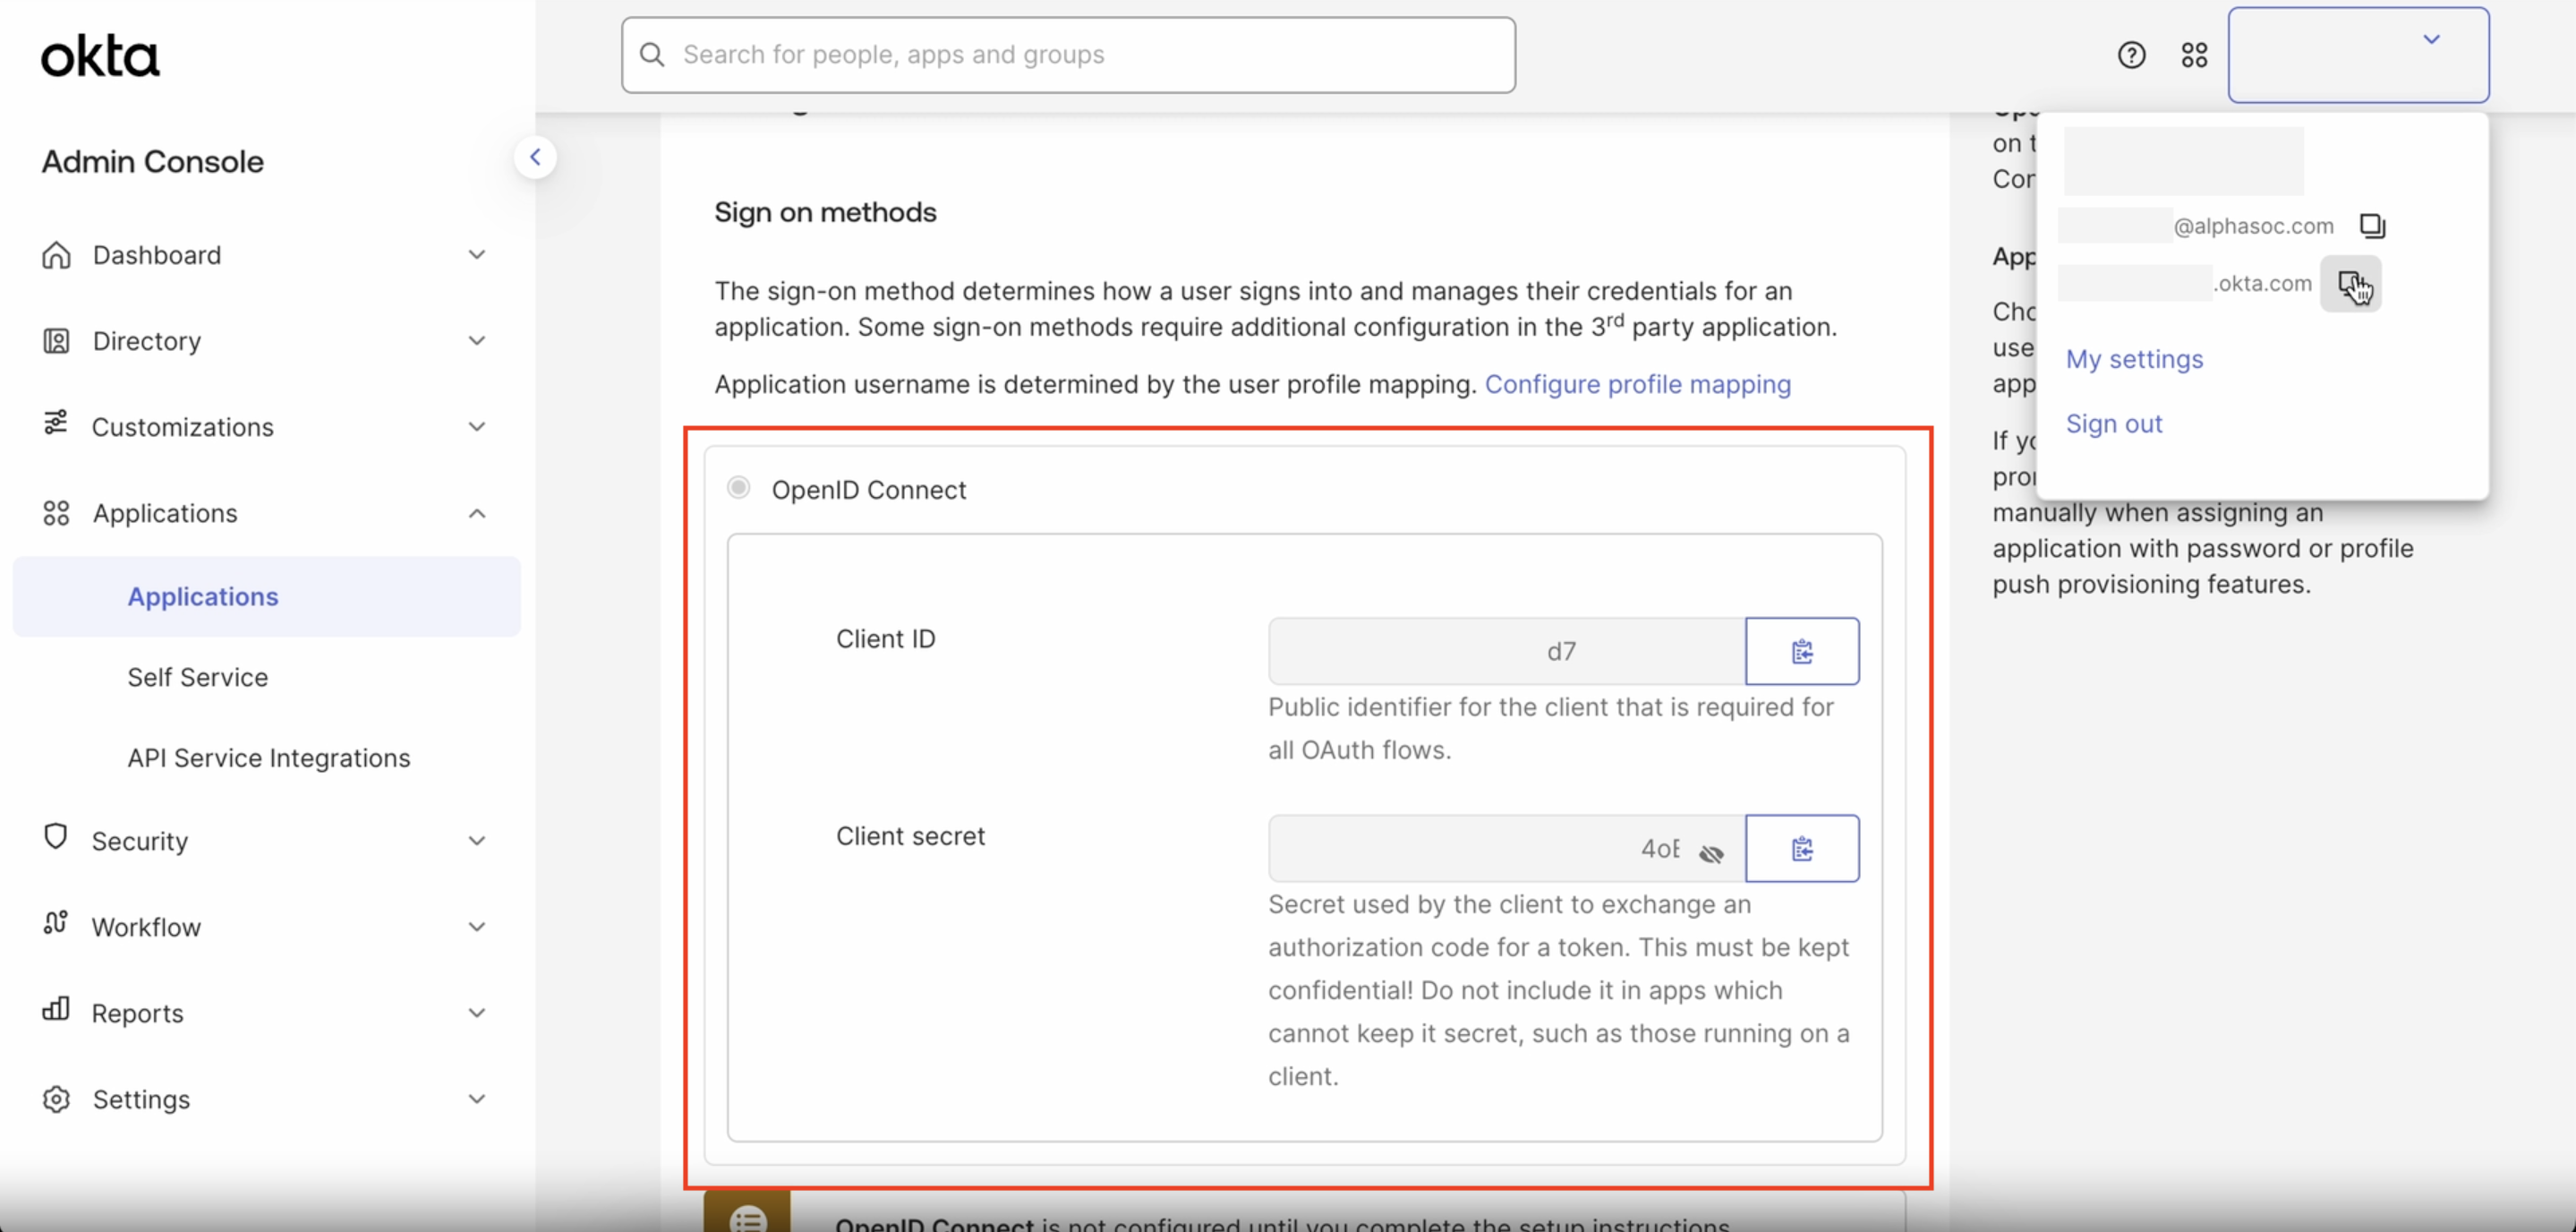
To find your Client ID and Client secret, navigate to the Sign On tab of the AlphaSOC Console application in Okta. In the Sign on methods section, locate OpenID Connect and copy both values.
Step 4: Request SSO in AlphaSOC Console
- Sign in to the AlphaSOC Console with an
Owneraccount. - Click Settings in the left sidebar and open the SSO tab.
If you don't see the SSO tab, make sure you are signed in as an Owner. The
tab is not available in the demo workspace.
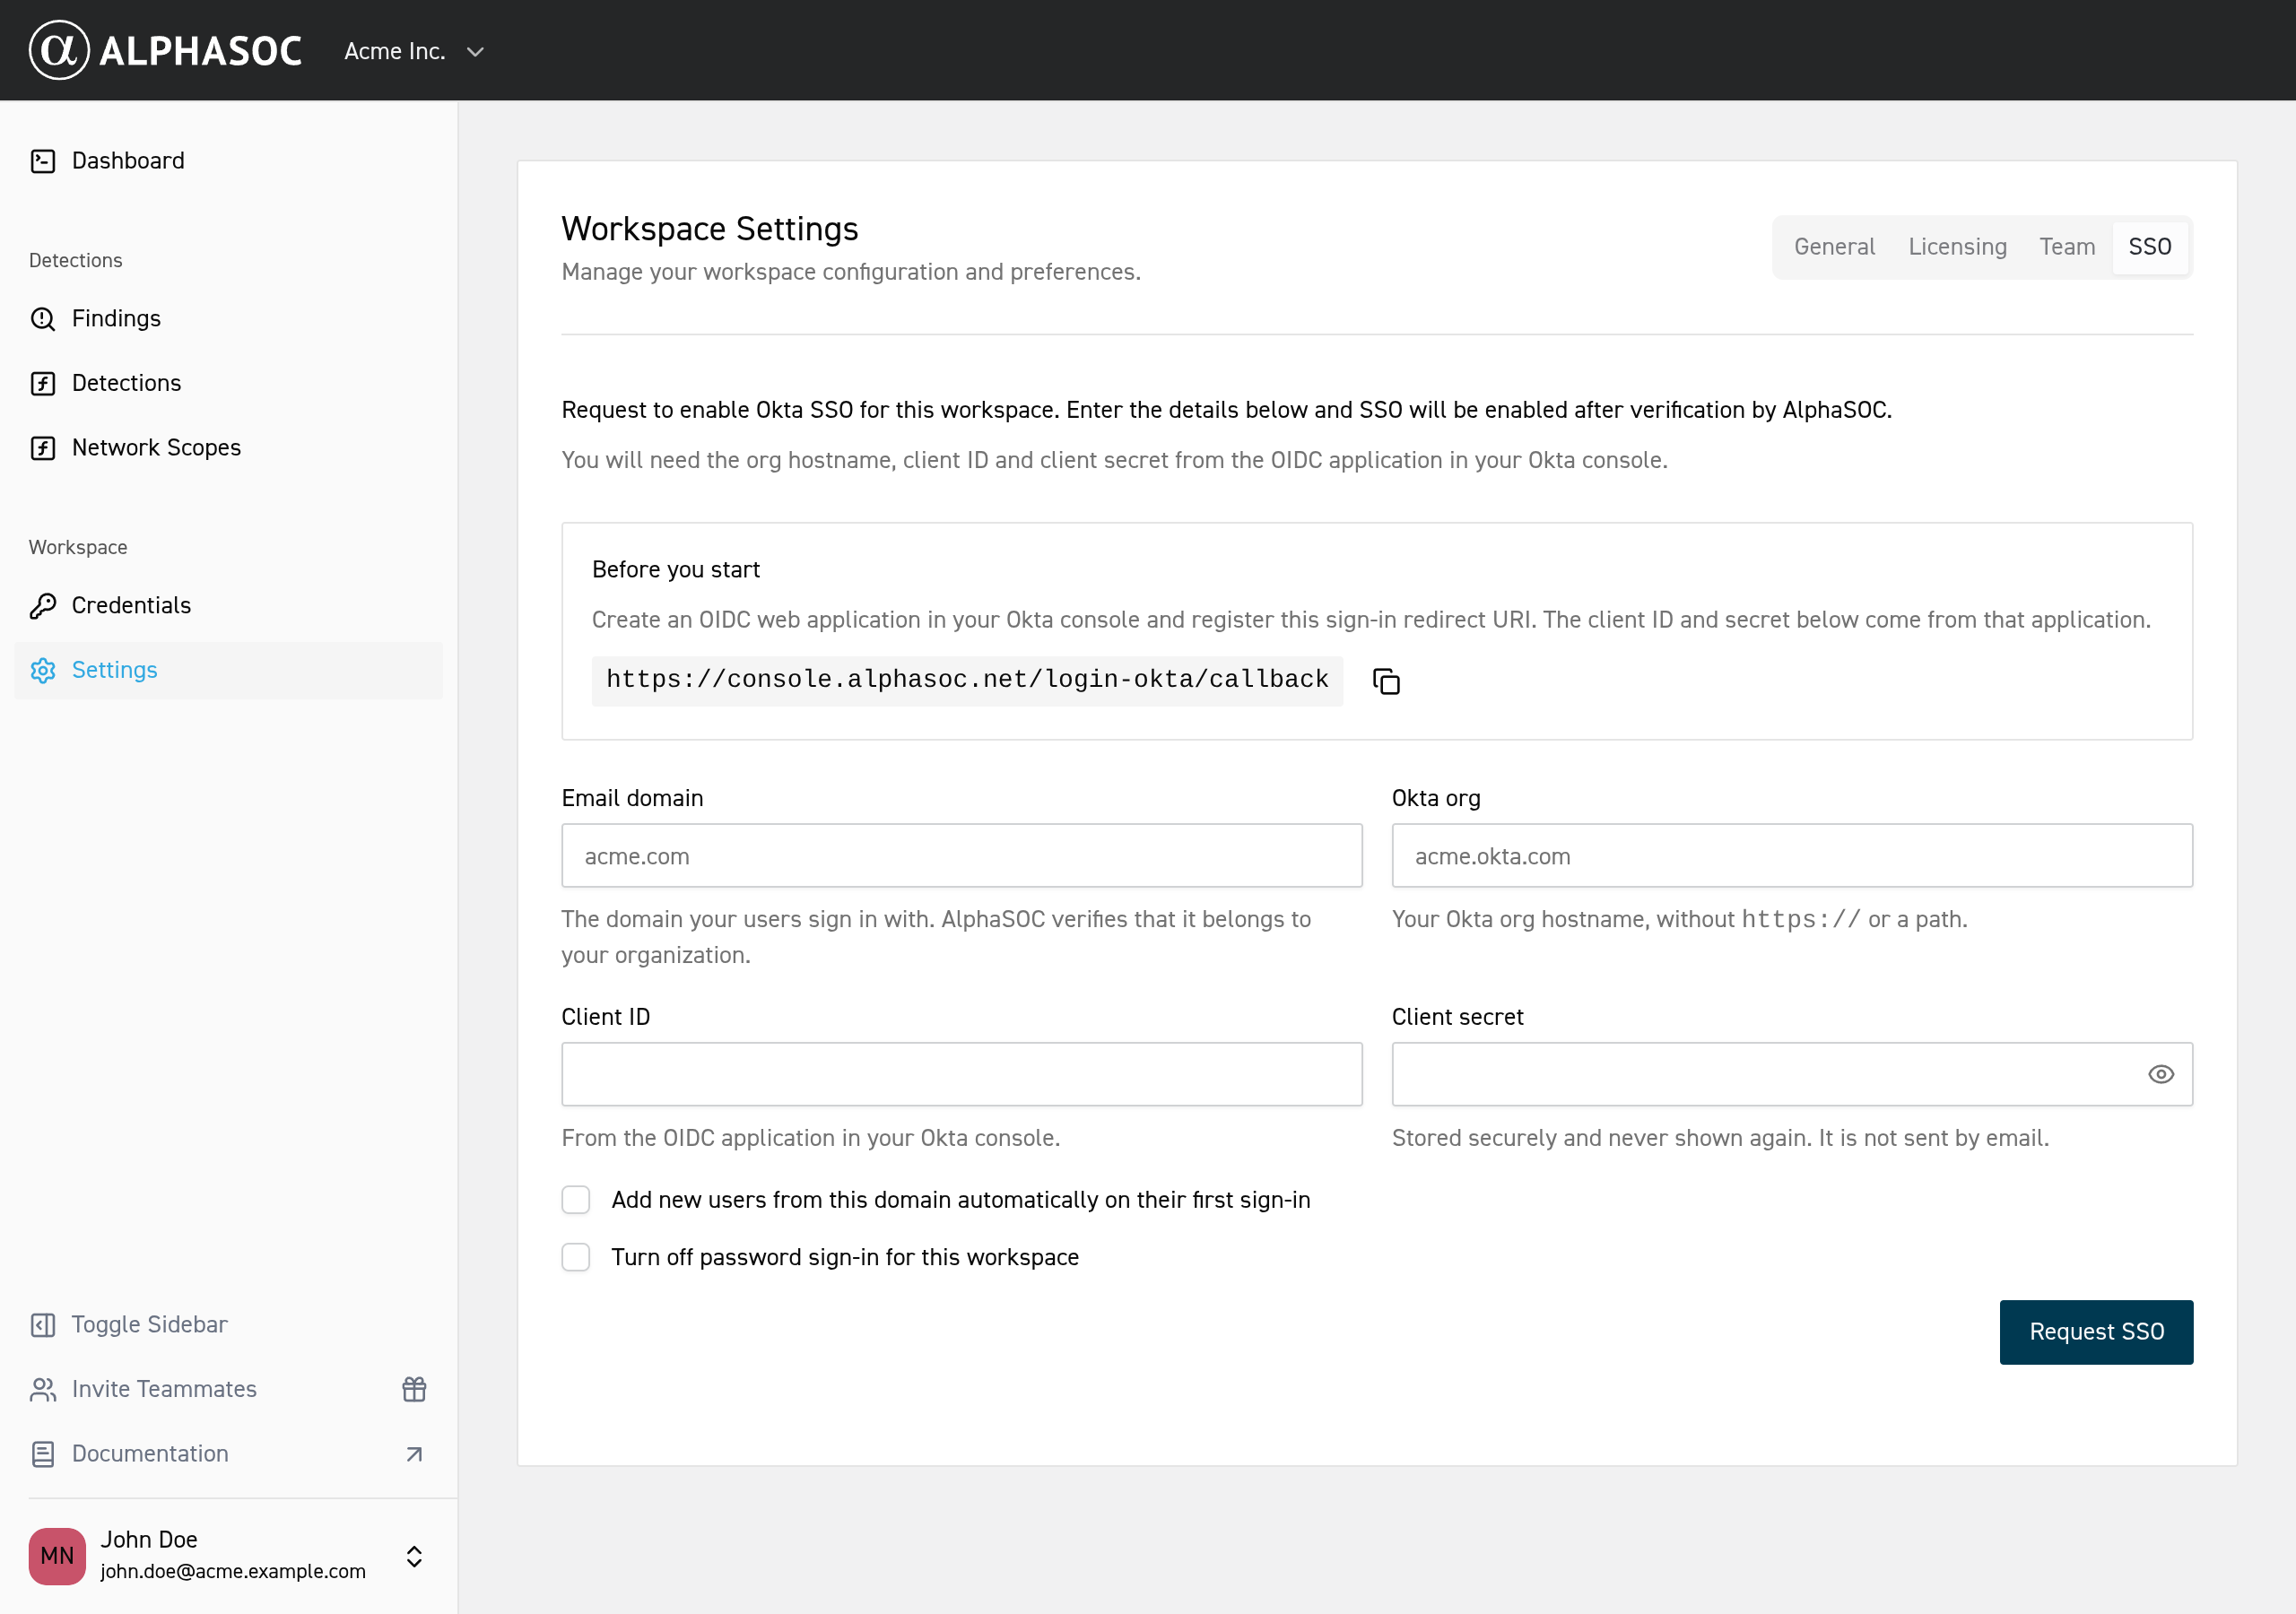
- Fill in the request form:
- Email domain: the domain your users sign in with (for example
acme.com). AlphaSOC verifies that it belongs to your organization. - Okta org: your Okta domain from Step 3, without
https://or a path (for exampleacme.okta.com). - Client ID and Client secret: the values from Step 3. The secret is stored securely, is never shown again, and is not sent by email.
- Add new users from this domain automatically on their first sign-in:
enables JIT provisioning. When checked, a user from your email domain who
signs in through Okta for the first time gets an AlphaSOC account and joins
the workspace with the
Userrole. When unchecked, only users who already have an AlphaSOC account can sign in through Okta, so invite new team members first. - Turn off password sign-in for this workspace: requests SSO-only sign-in. See Disabling Password Authentication.
- Click Request SSO.
The SSO tab now shows the submitted details and confirms that your request is being verified. While the request is pending, you can click Withdraw request to cancel it, for example to correct a typo or rotate the client secret, and then submit a new request.
Step 5: Verification by AlphaSOC
AlphaSOC reviews the request and verifies, above all, that the email domain belongs to your organization. Once SSO is enabled, the SSO tab reads "Okta SSO is enabled for this workspace". Contact AlphaSOC to change the configuration later, including disabling SSO.
Logging in with Okta SSO
After SSO has been enabled, users assigned to the AlphaSOC Console application in Okta can sign in either from the AlphaSOC sign-in page or from Okta.
From the AlphaSOC sign-in page
- Go to the AlphaSOC Console and enter your email address.
- If password sign-in is still enabled for your workspace, click Continue with Okta below the password field. If password sign-in has been turned off, you are sent to Okta straight away.
- Authenticate with Okta if you don't have an active Okta session. You are then redirected back to the AlphaSOC Console.
From the Okta End-User Dashboard
- Navigate to your Okta End-User Dashboard and select the AlphaSOC Console application.
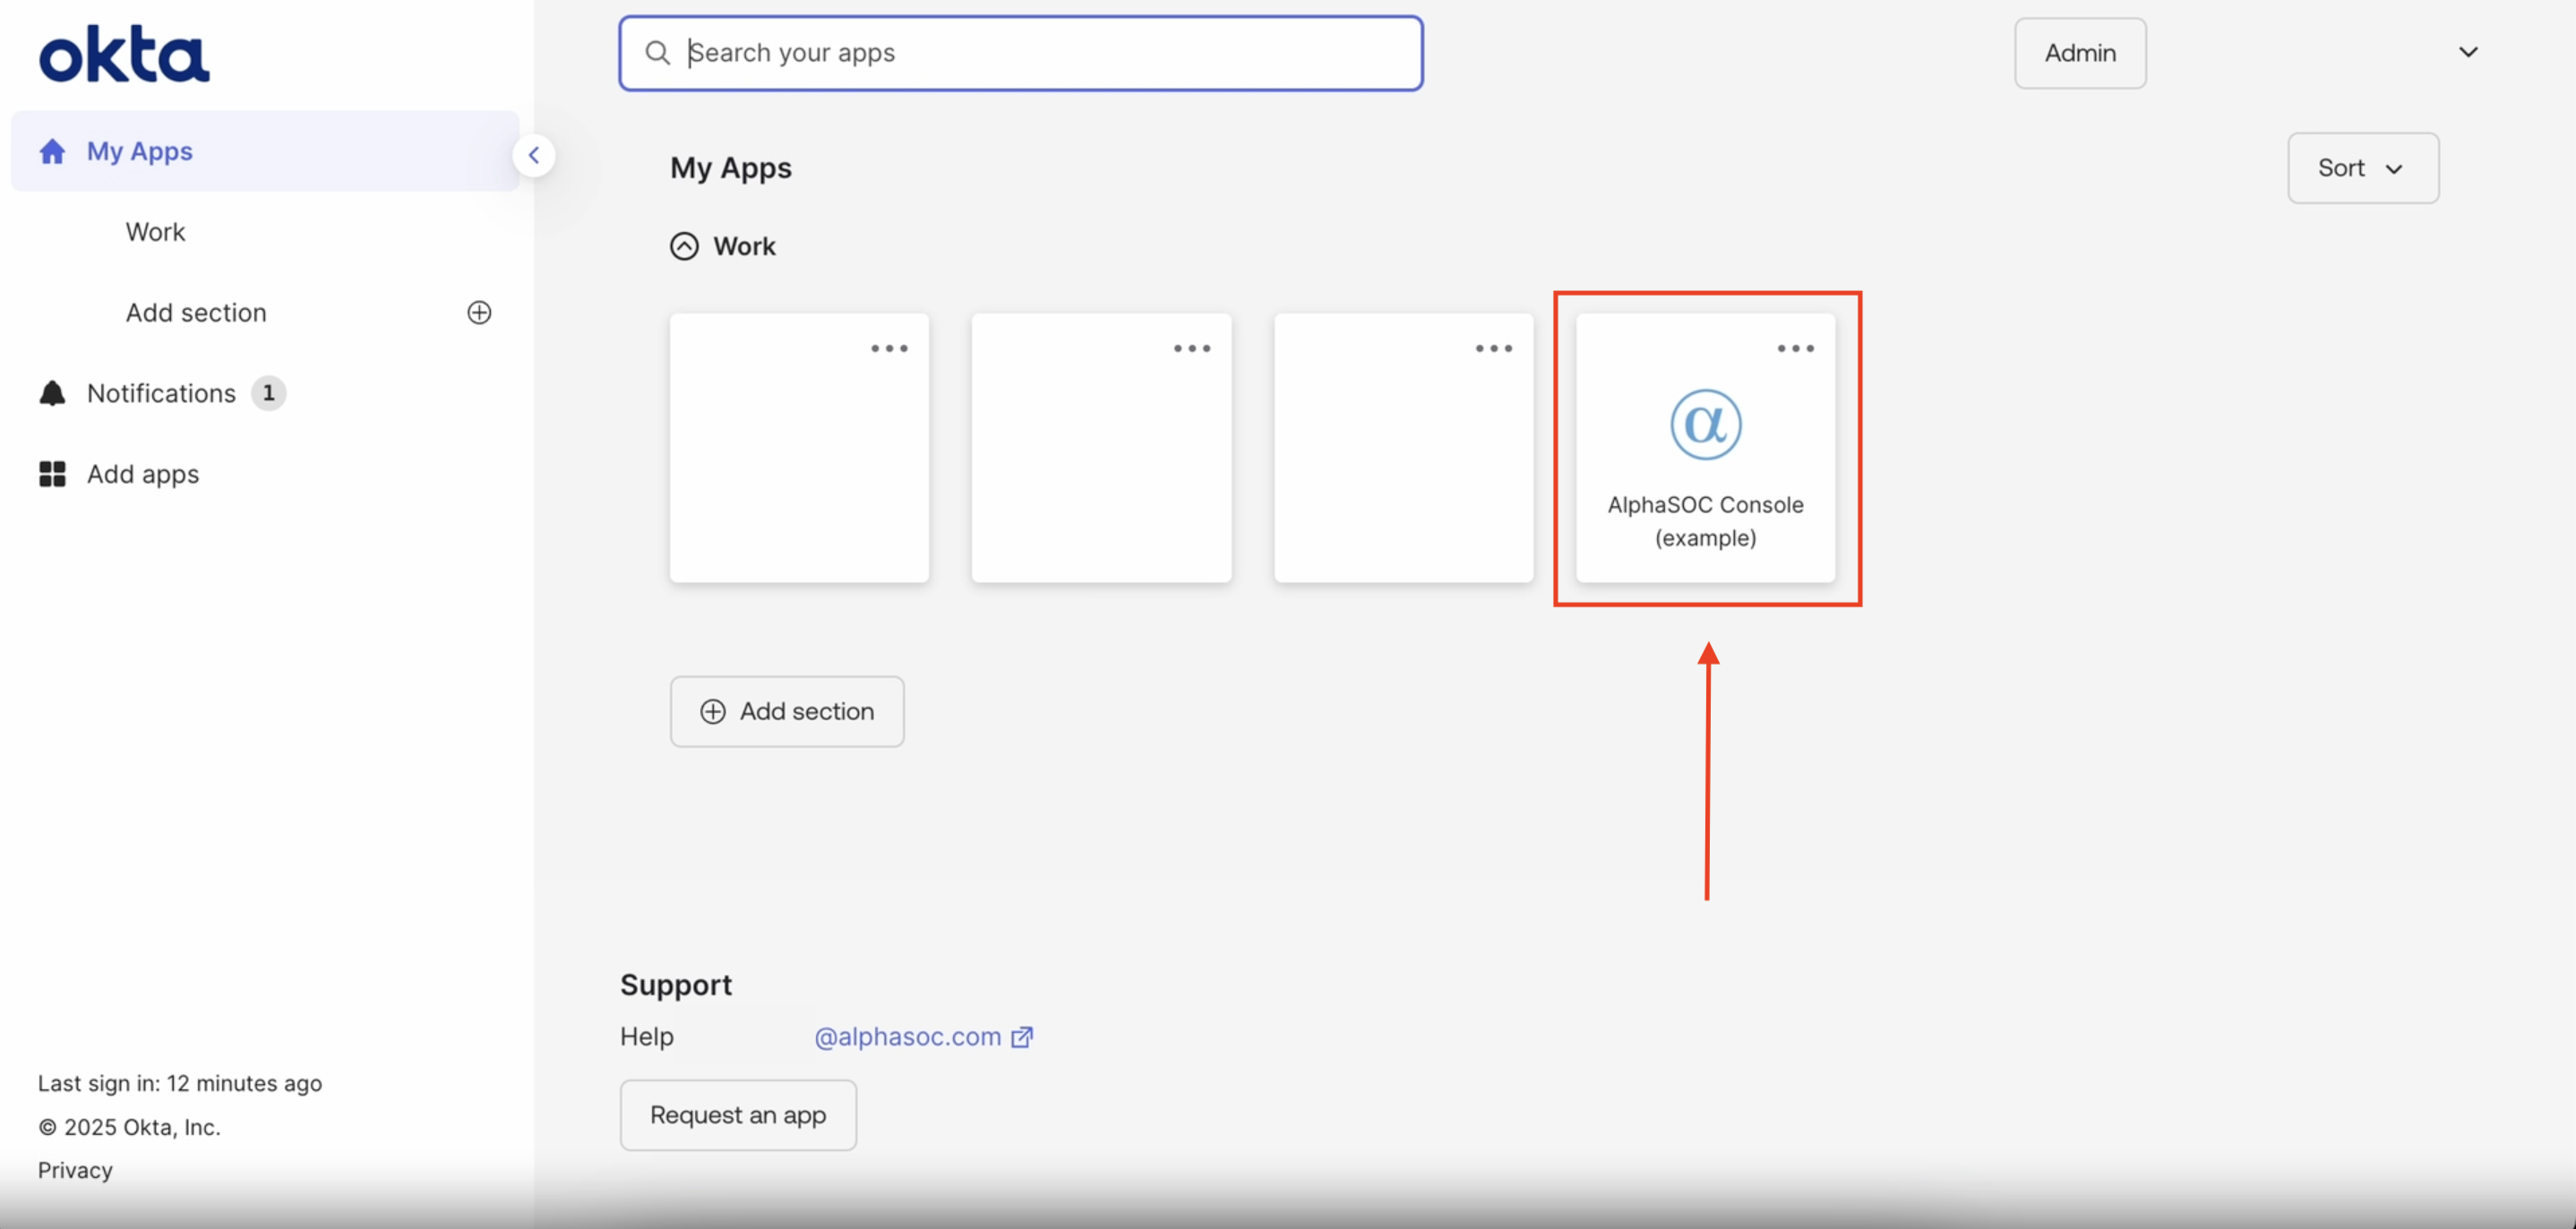
- You are taken to the AlphaSOC sign-in page. Enter your email address and continue with Okta as described above. Because you already have an active Okta session, no further Okta prompt is shown.
First sign-in with an existing account
If you already have an AlphaSOC account, the first time you sign in through Okta you are asked for your AlphaSOC password, and for your authenticator code if you have multi-factor authentication enabled, to link the account with Okta.
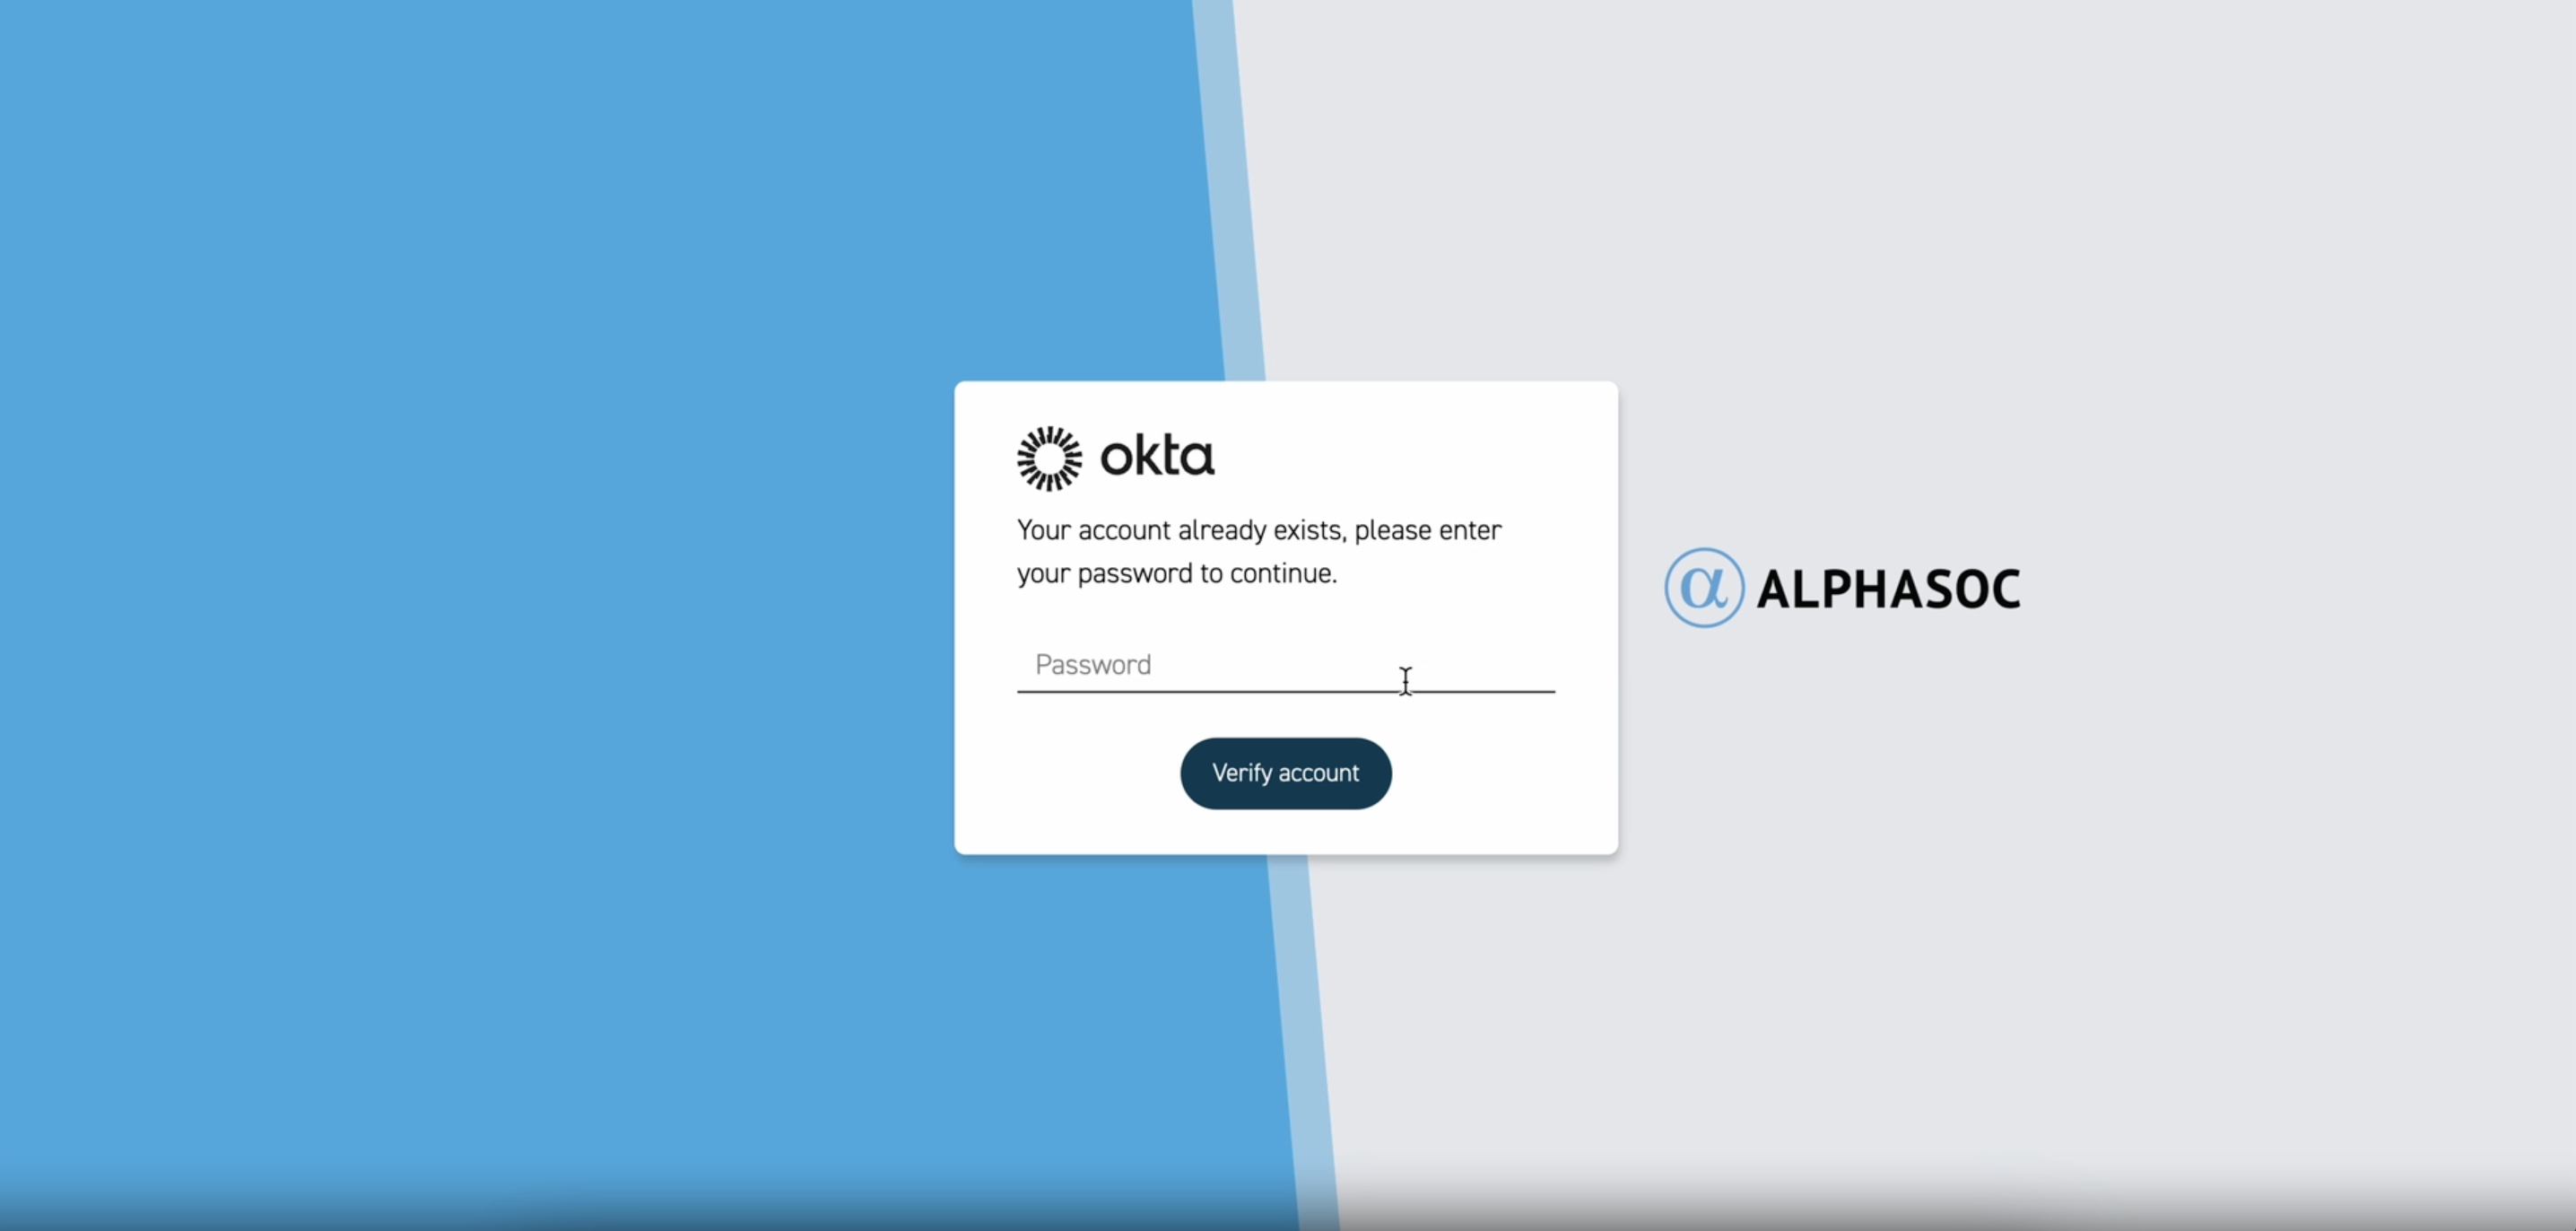
After you verify your account, you are logged in to the AlphaSOC Console. Later sign-ins go straight through.
Disabling Password Authentication
By default, password authentication stays enabled and Okta SSO is offered alongside it. If you want users to sign in only through Okta SSO, check Turn off password sign-in for this workspace when submitting the request, or contact AlphaSOC after SSO has been enabled.
AlphaSOC turns password sign-in off only after confirming that a user in your workspace has successfully signed in through Okta, so a misconfiguration can never lock your team out. After password sign-in is disabled, all users in the workspace can only sign in with Okta SSO. Make sure everyone who needs access is assigned to the AlphaSOC Console application in Okta.