Microsoft Entra ID SSO Integration
Overview
This guide explains how to enable Microsoft Entra ID OpenID Connect (OIDC) Single Sign-On (SSO) for AlphaSOC.
Supported features:
-
IdP-initiated SSO: allows users to log in to the AlphaSOC Console from the Microsoft's Apps dashboard.
-
Just-In-Time (JIT) provisioning: automatically creates a user in your AlphaSOC organization on first Entra ID login.
SSO is available upon request. Contact AlphaSOC to enable Microsoft Entra ID SSO.
Configuring Microsoft Entra ID Integration with AlphaSOC
Prerequisites
Before proceeding, ensure you have the following:
- A Microsoft account with administrative privileges.
- Access to the AlphaSOC console
Owneraccount.
Step 1: Register an Application in Microsoft Entra ID
To use Microsoft Entra ID as an identity provider, you need to register an application in Microsoft Entra.
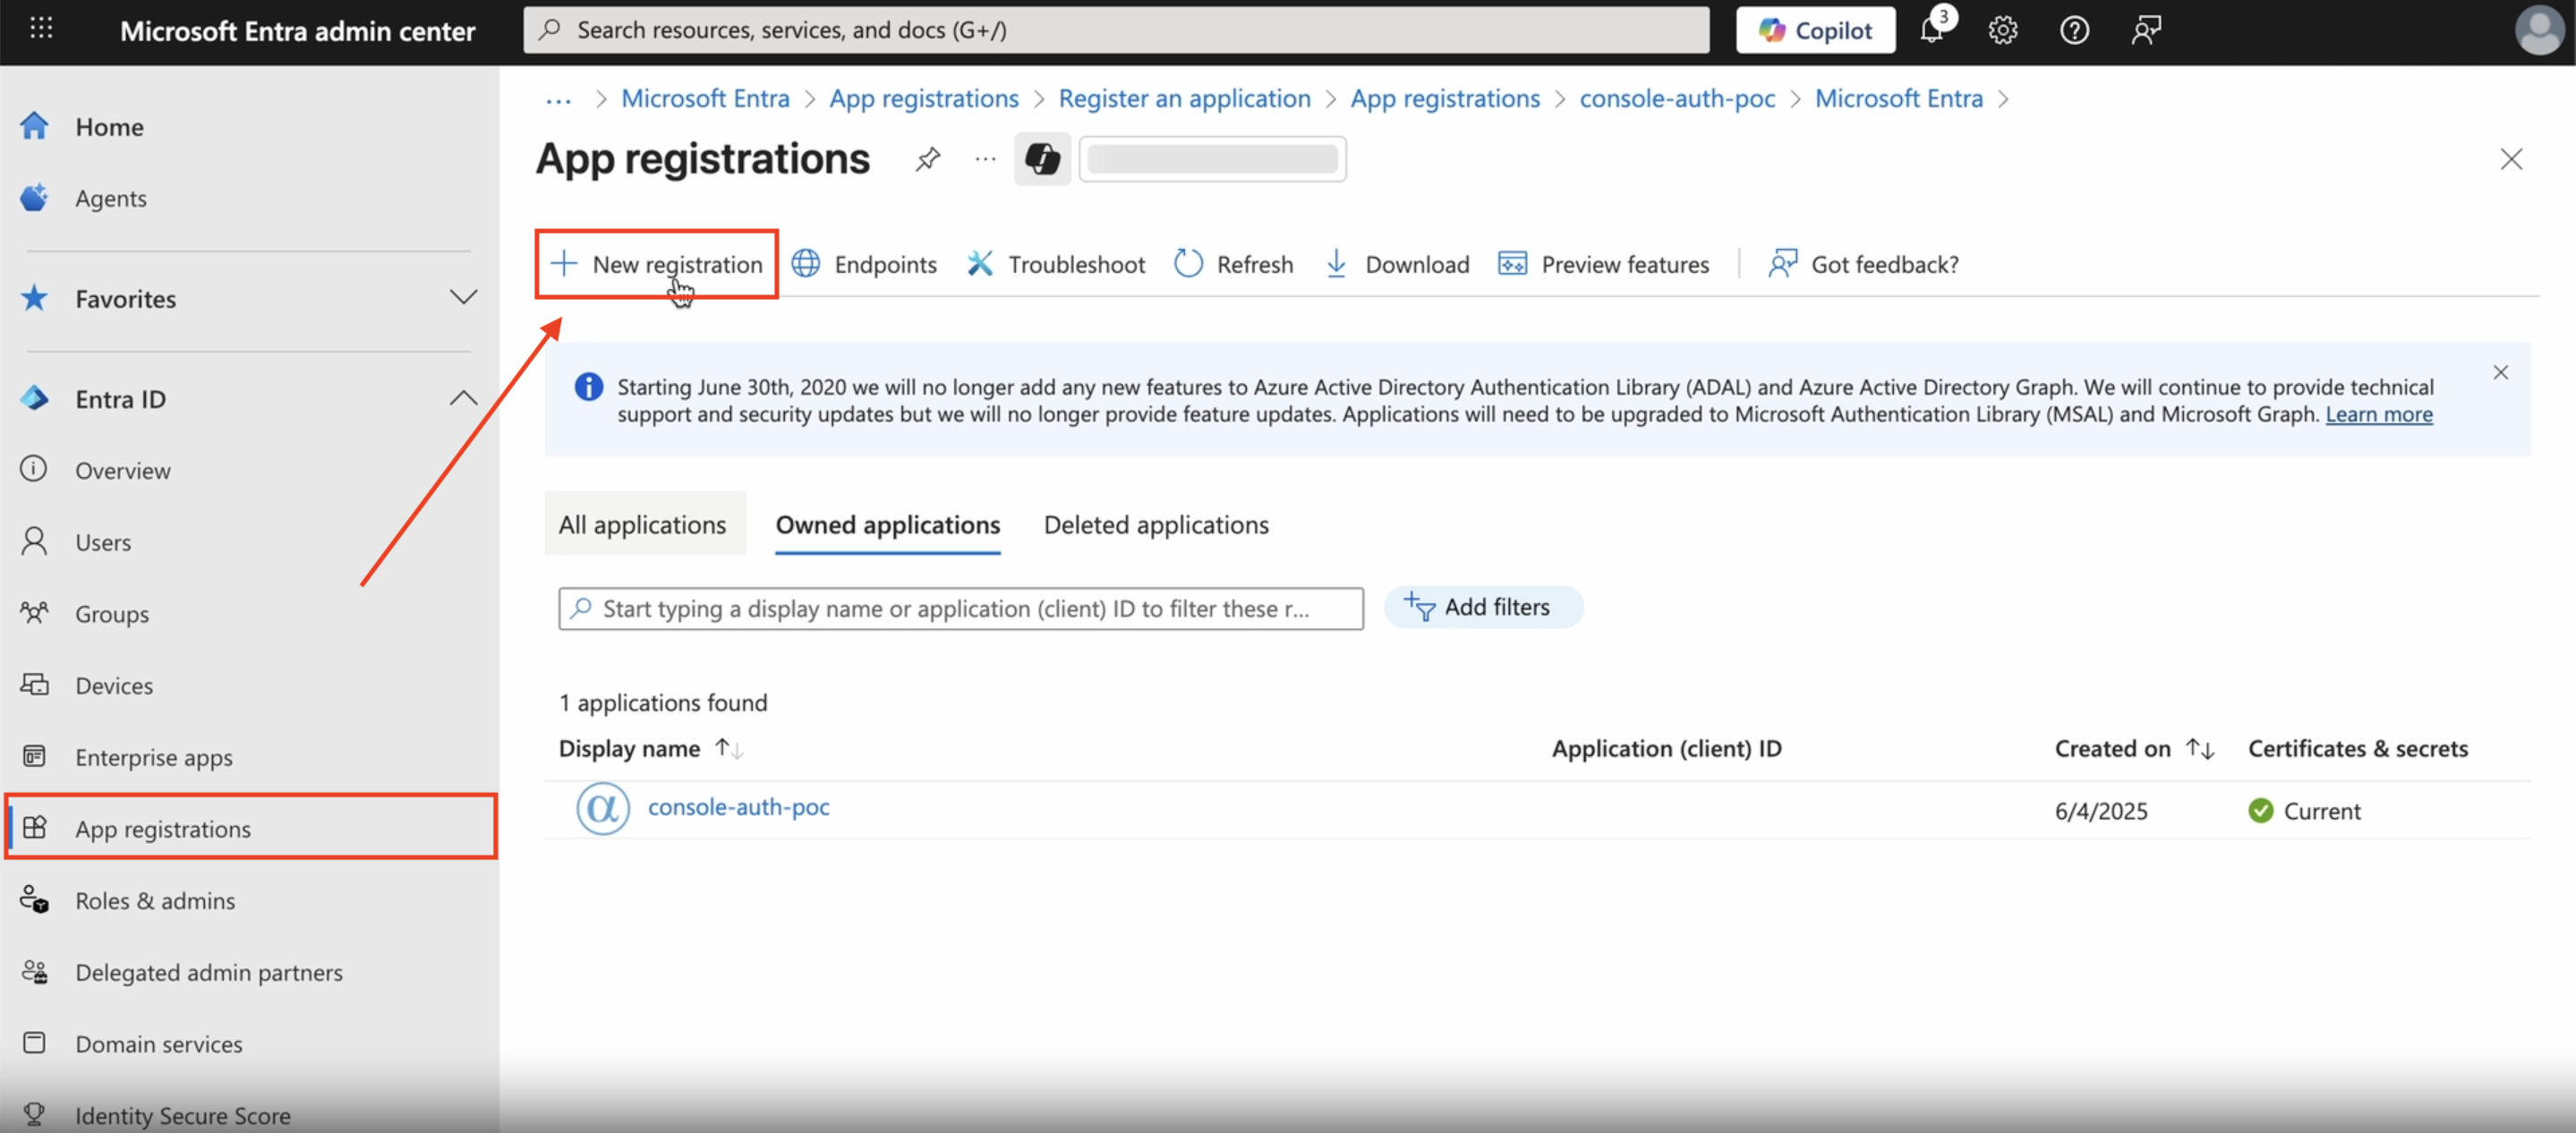
- Navigate to the Microsoft Entra ID admin center and sign in with your admin account.
- In the left menu, select App registrations, then click the New registration button.
- Enter the display name for the application (e.g., "AlphaSOC Console") and select "Accounts in this organizational directory only (Default Directory only - Single tenant)" for supported account types.
- Add a redirect URI of type "Web" with the value:
https://auth.console.alphasoc.net/login/entra/callback.
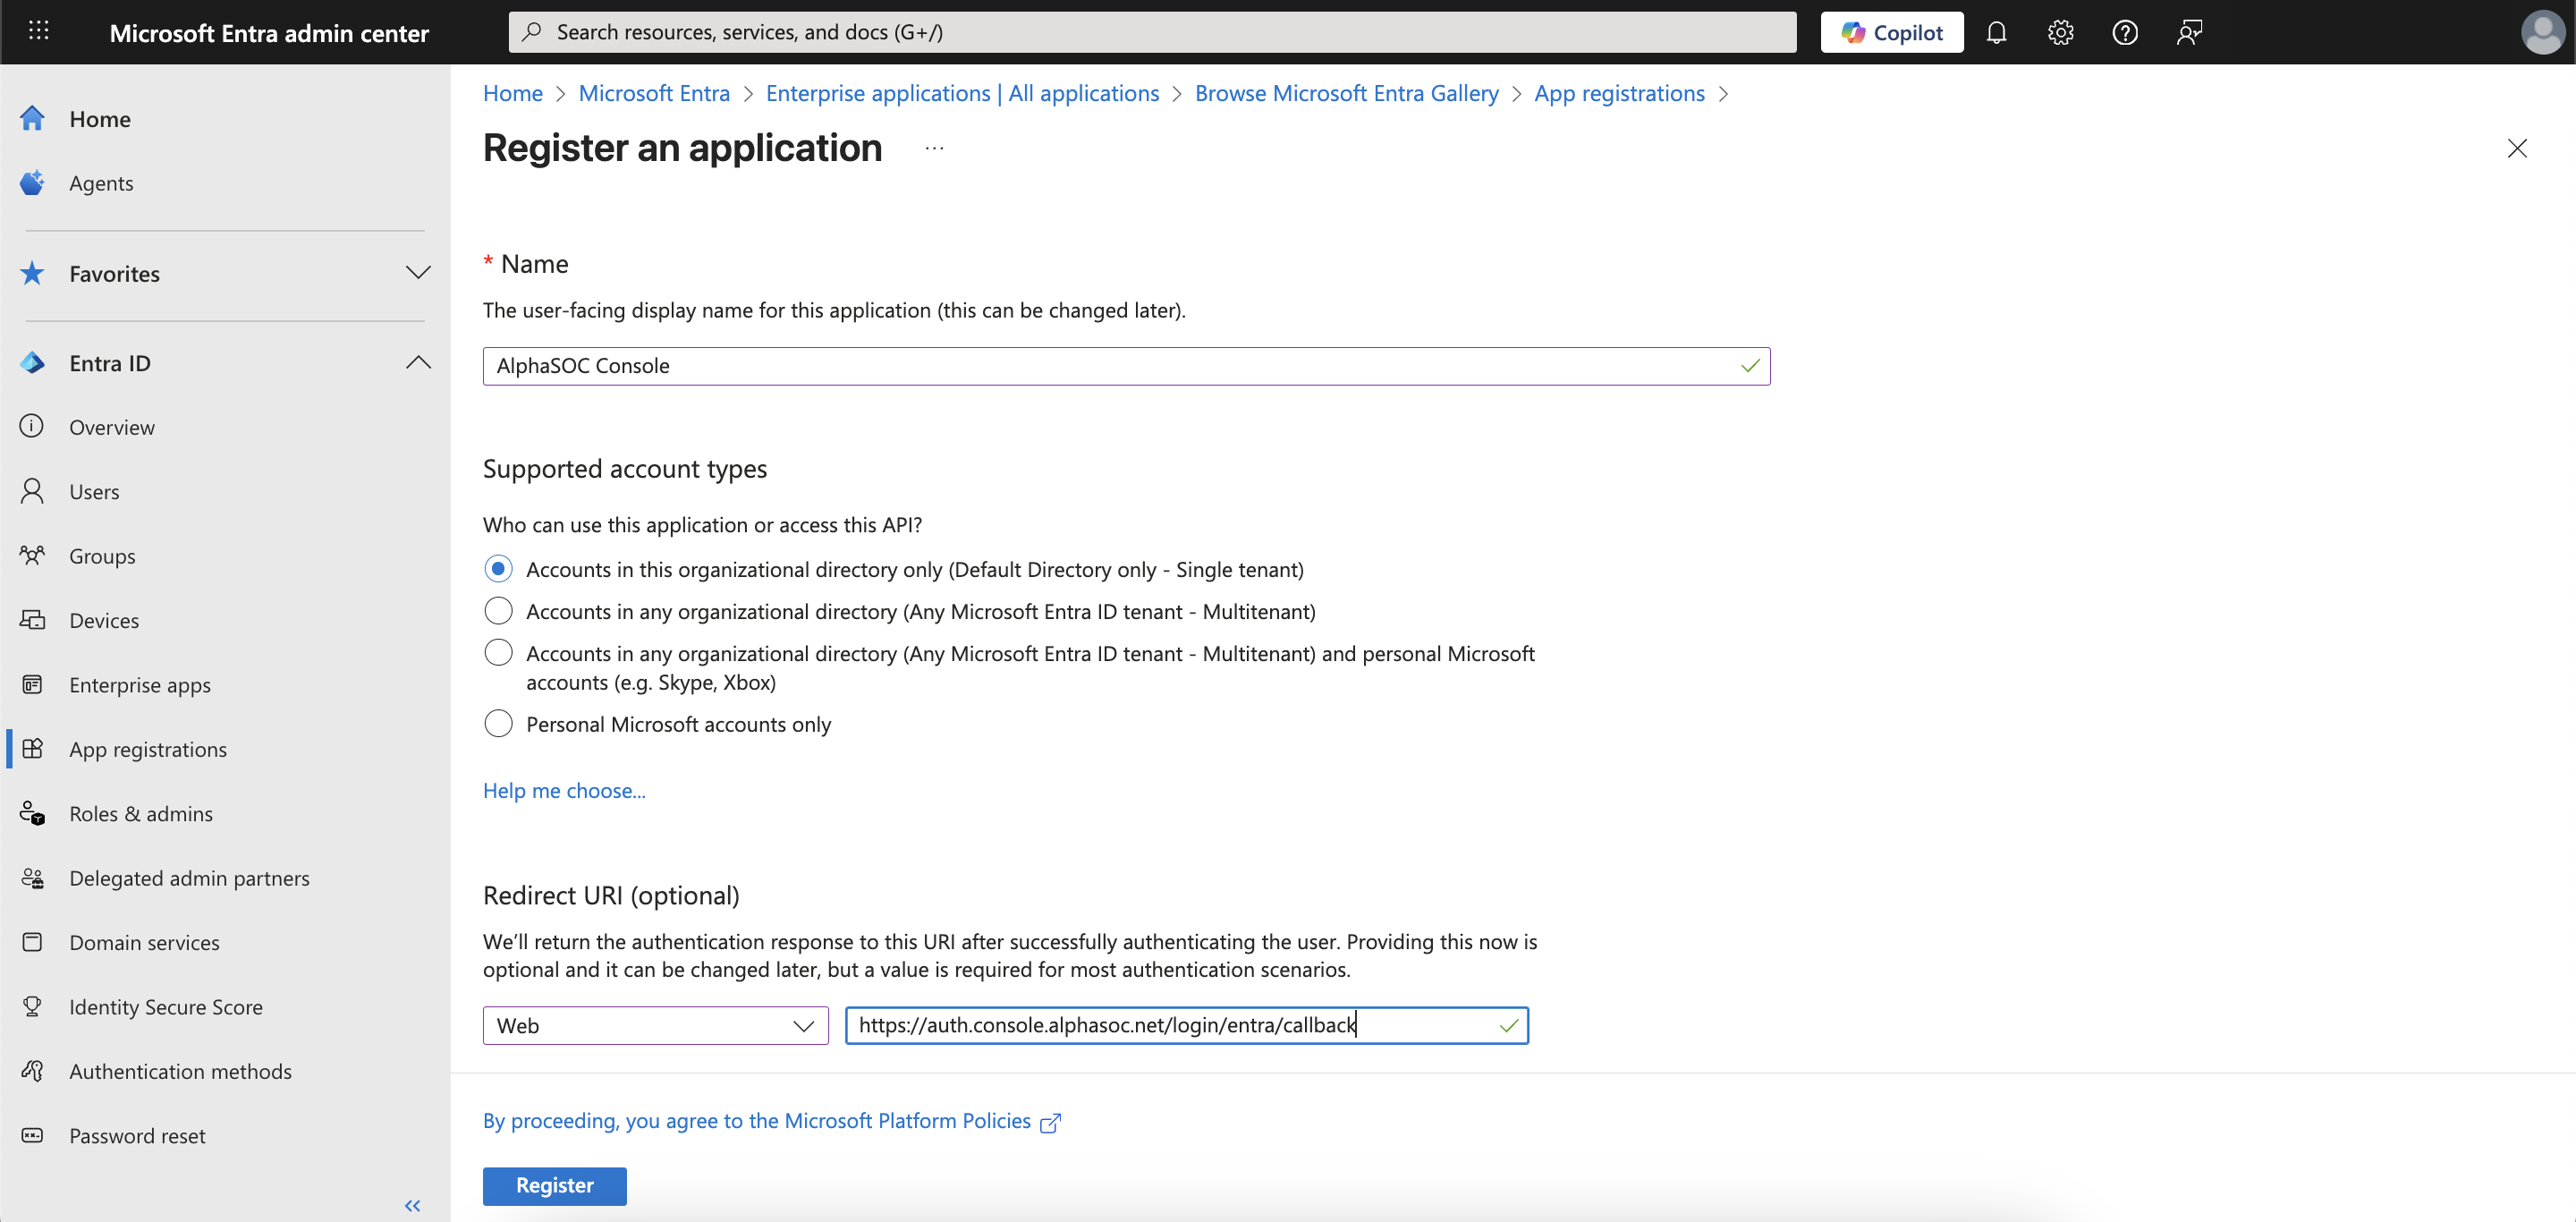
- Click Register to create the application.
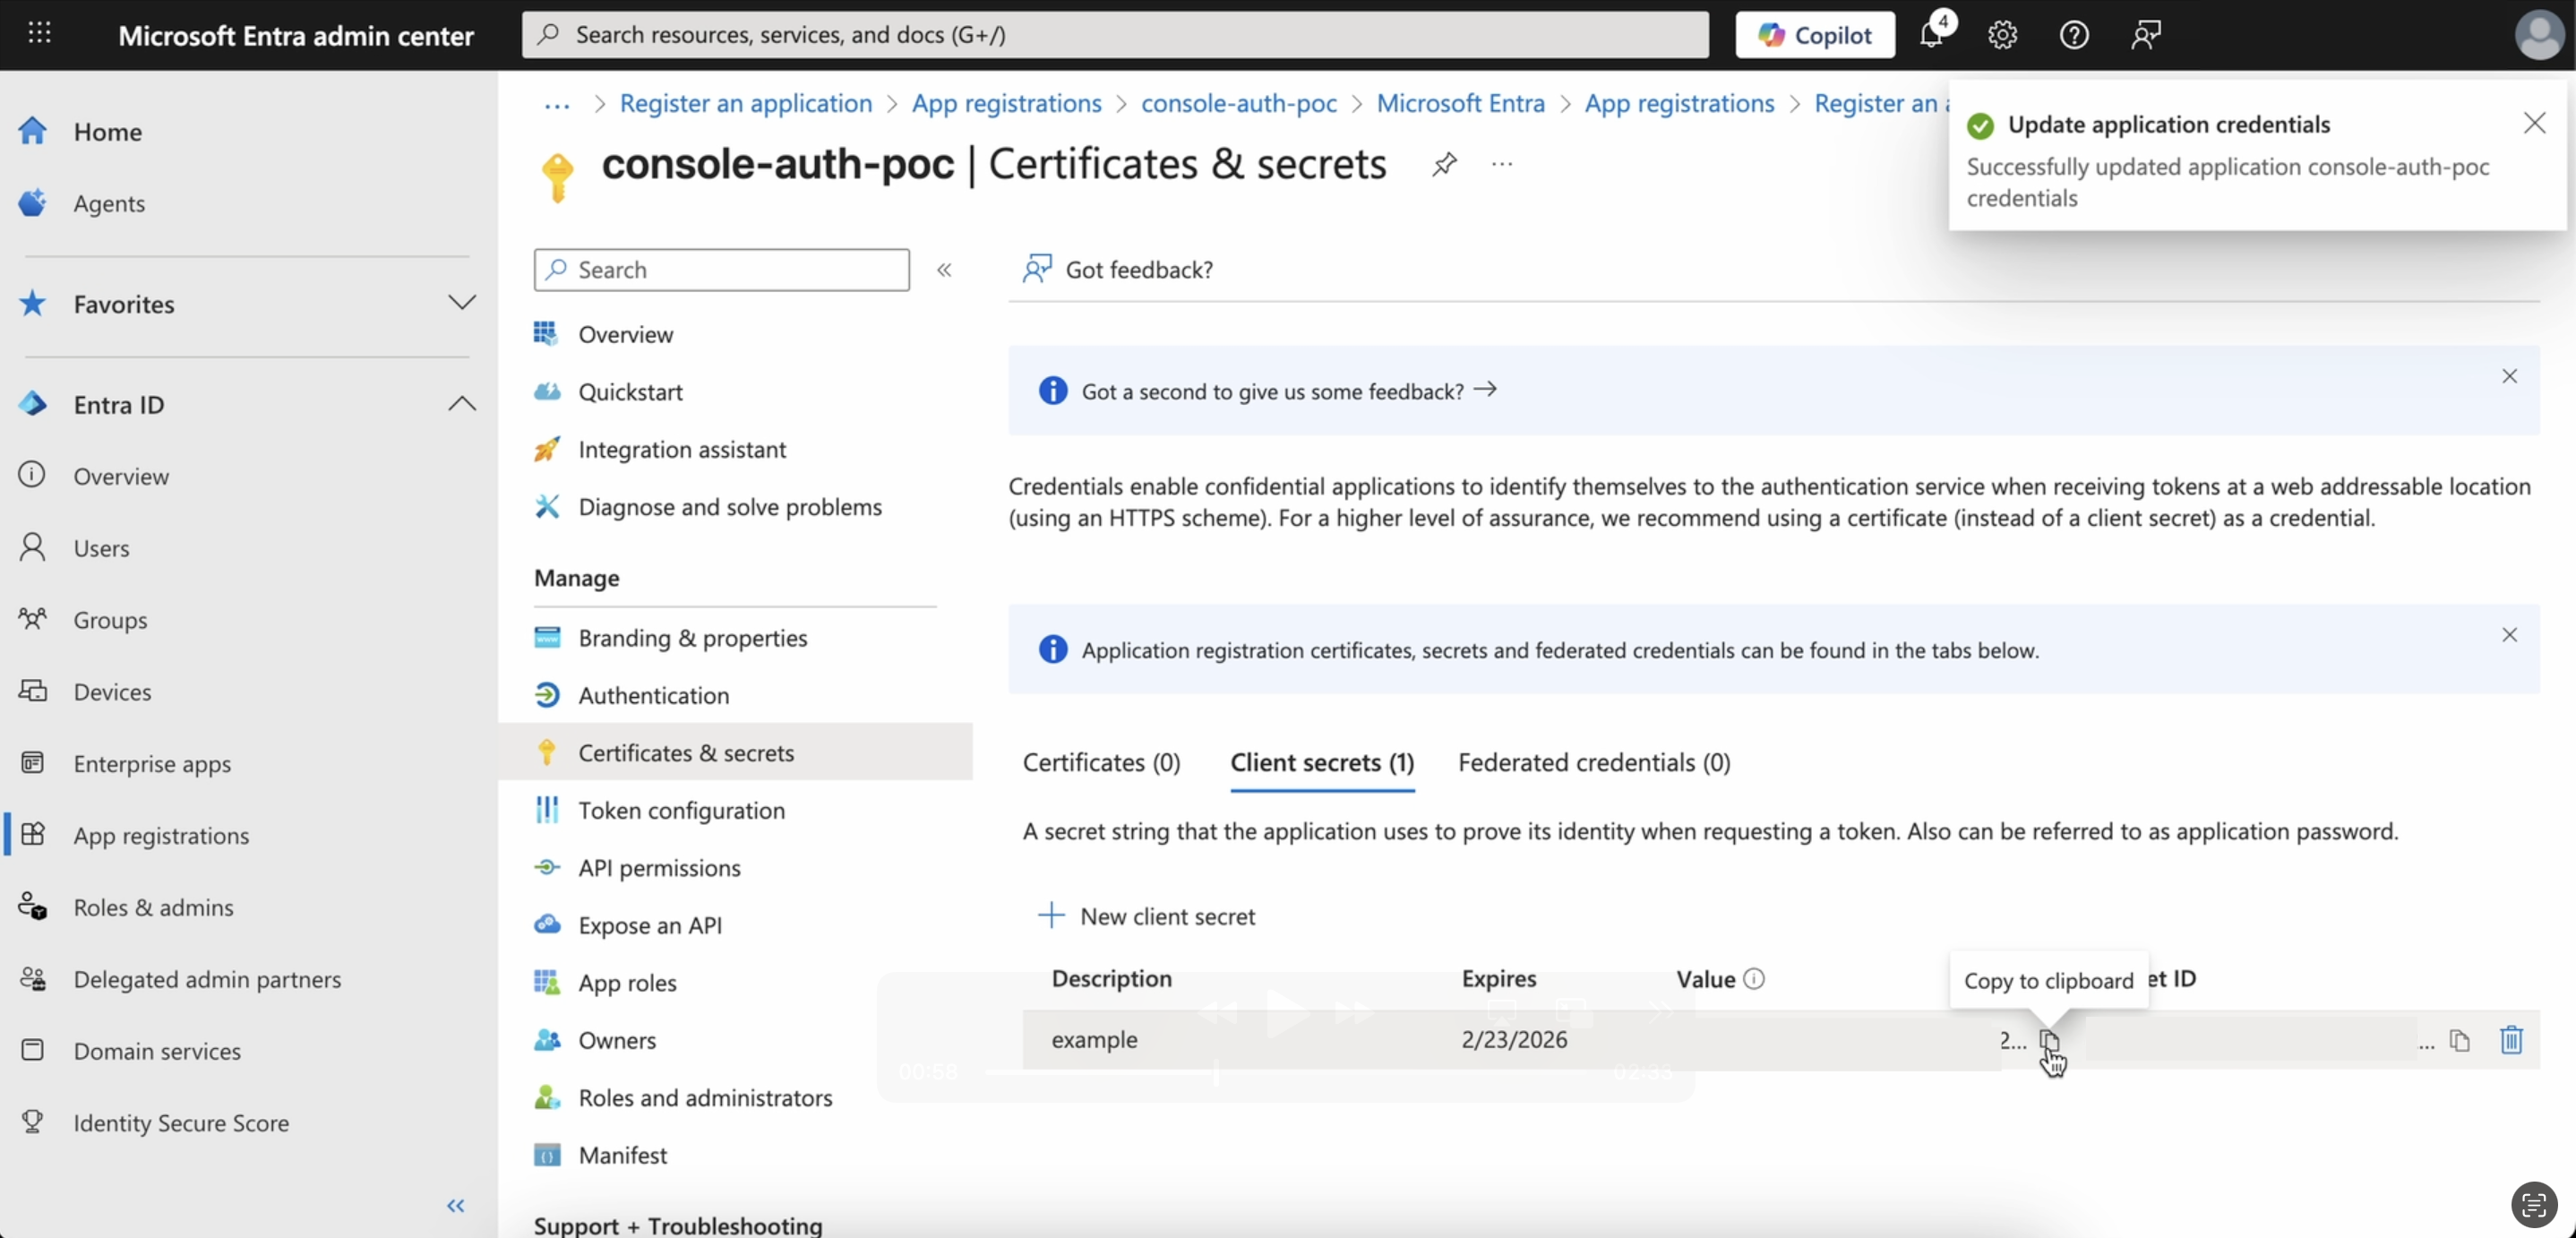
Step 2: Add a New Client Secret for Your Application
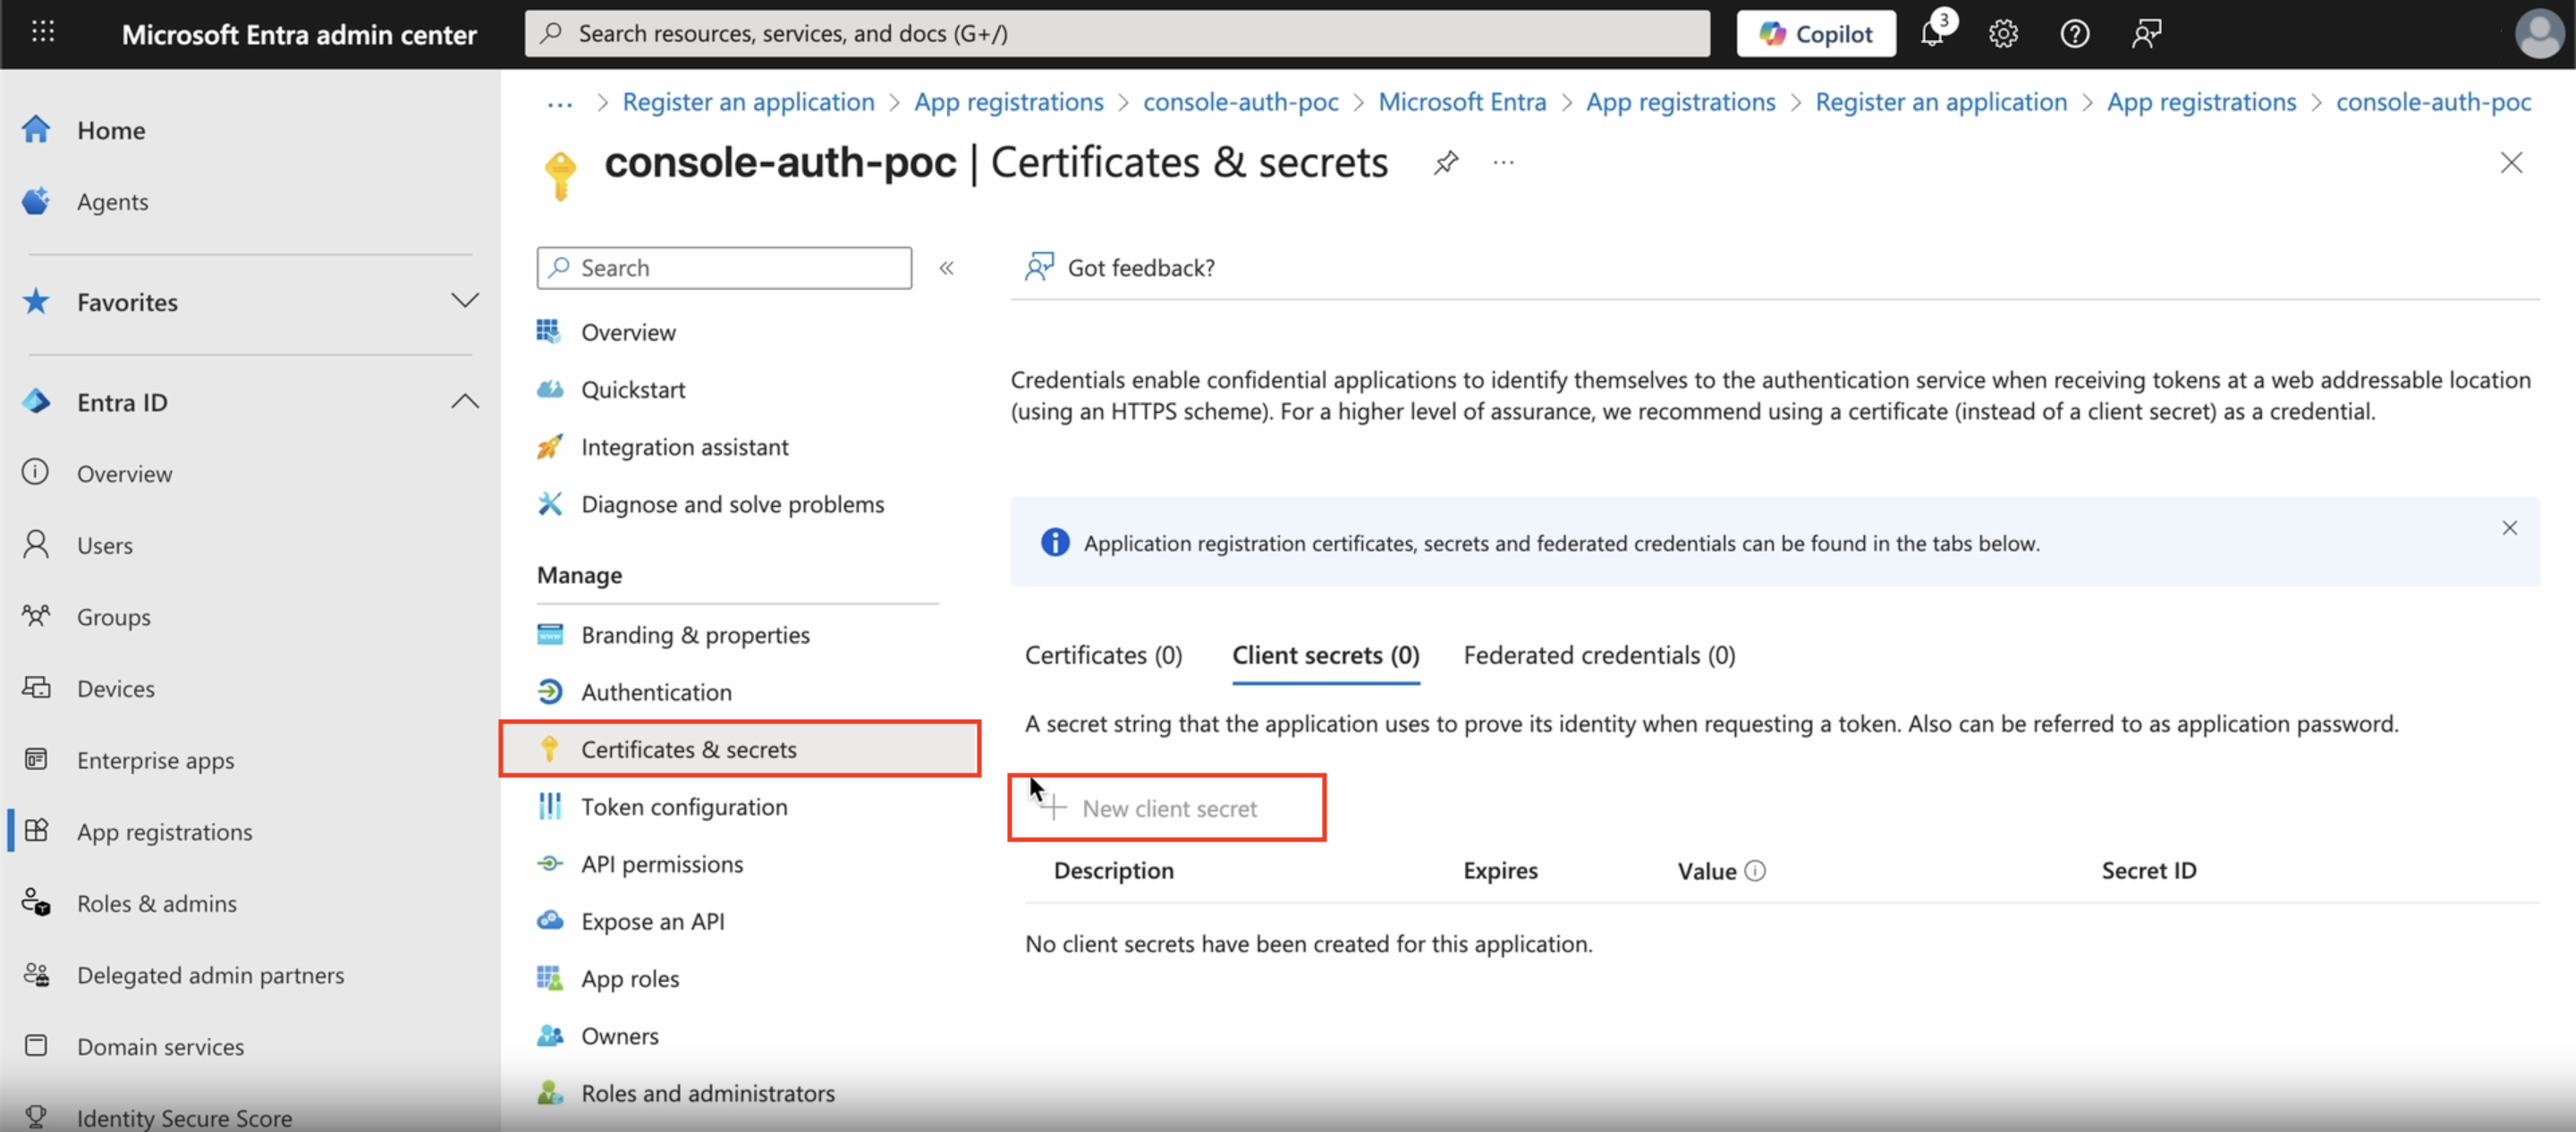
- In the left menu of your newly created application, go to the Certificates & secrets tab.
- Click the New client secret button.
- Enter a description (e.g., "AlphaSOC Console Secret") and select an expiration date.
- Click Add to create a new client secret.
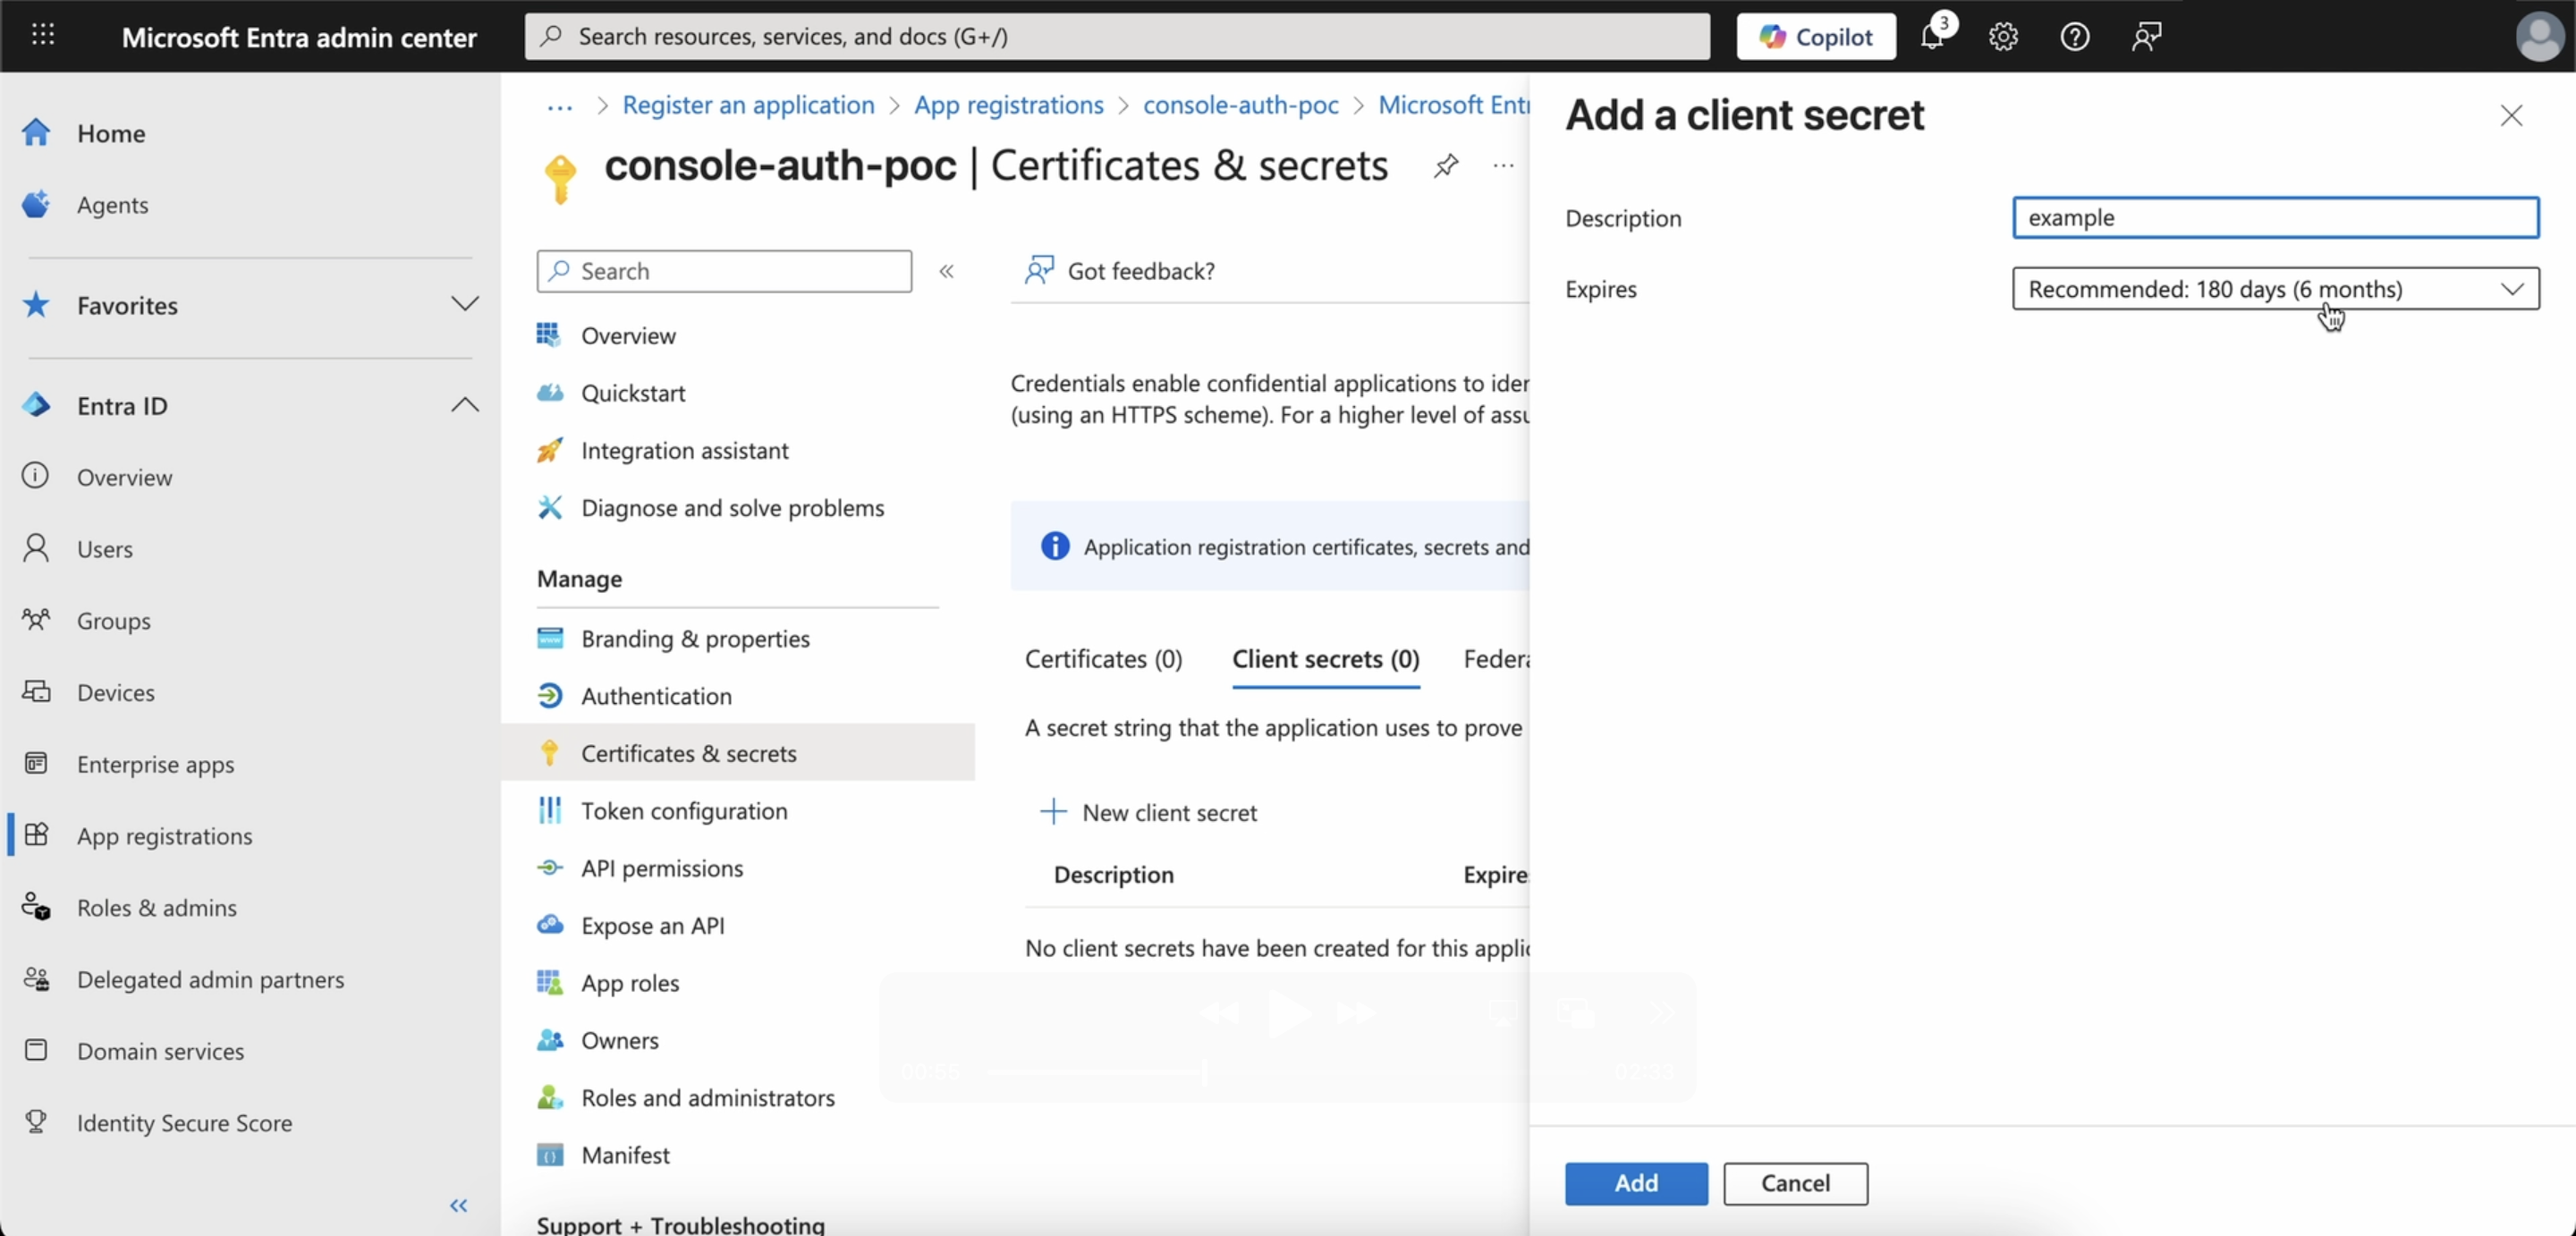
- Copy the client secret value and store it securely. You will need this value later to configure the SSO settings in the AlphaSOC Console.
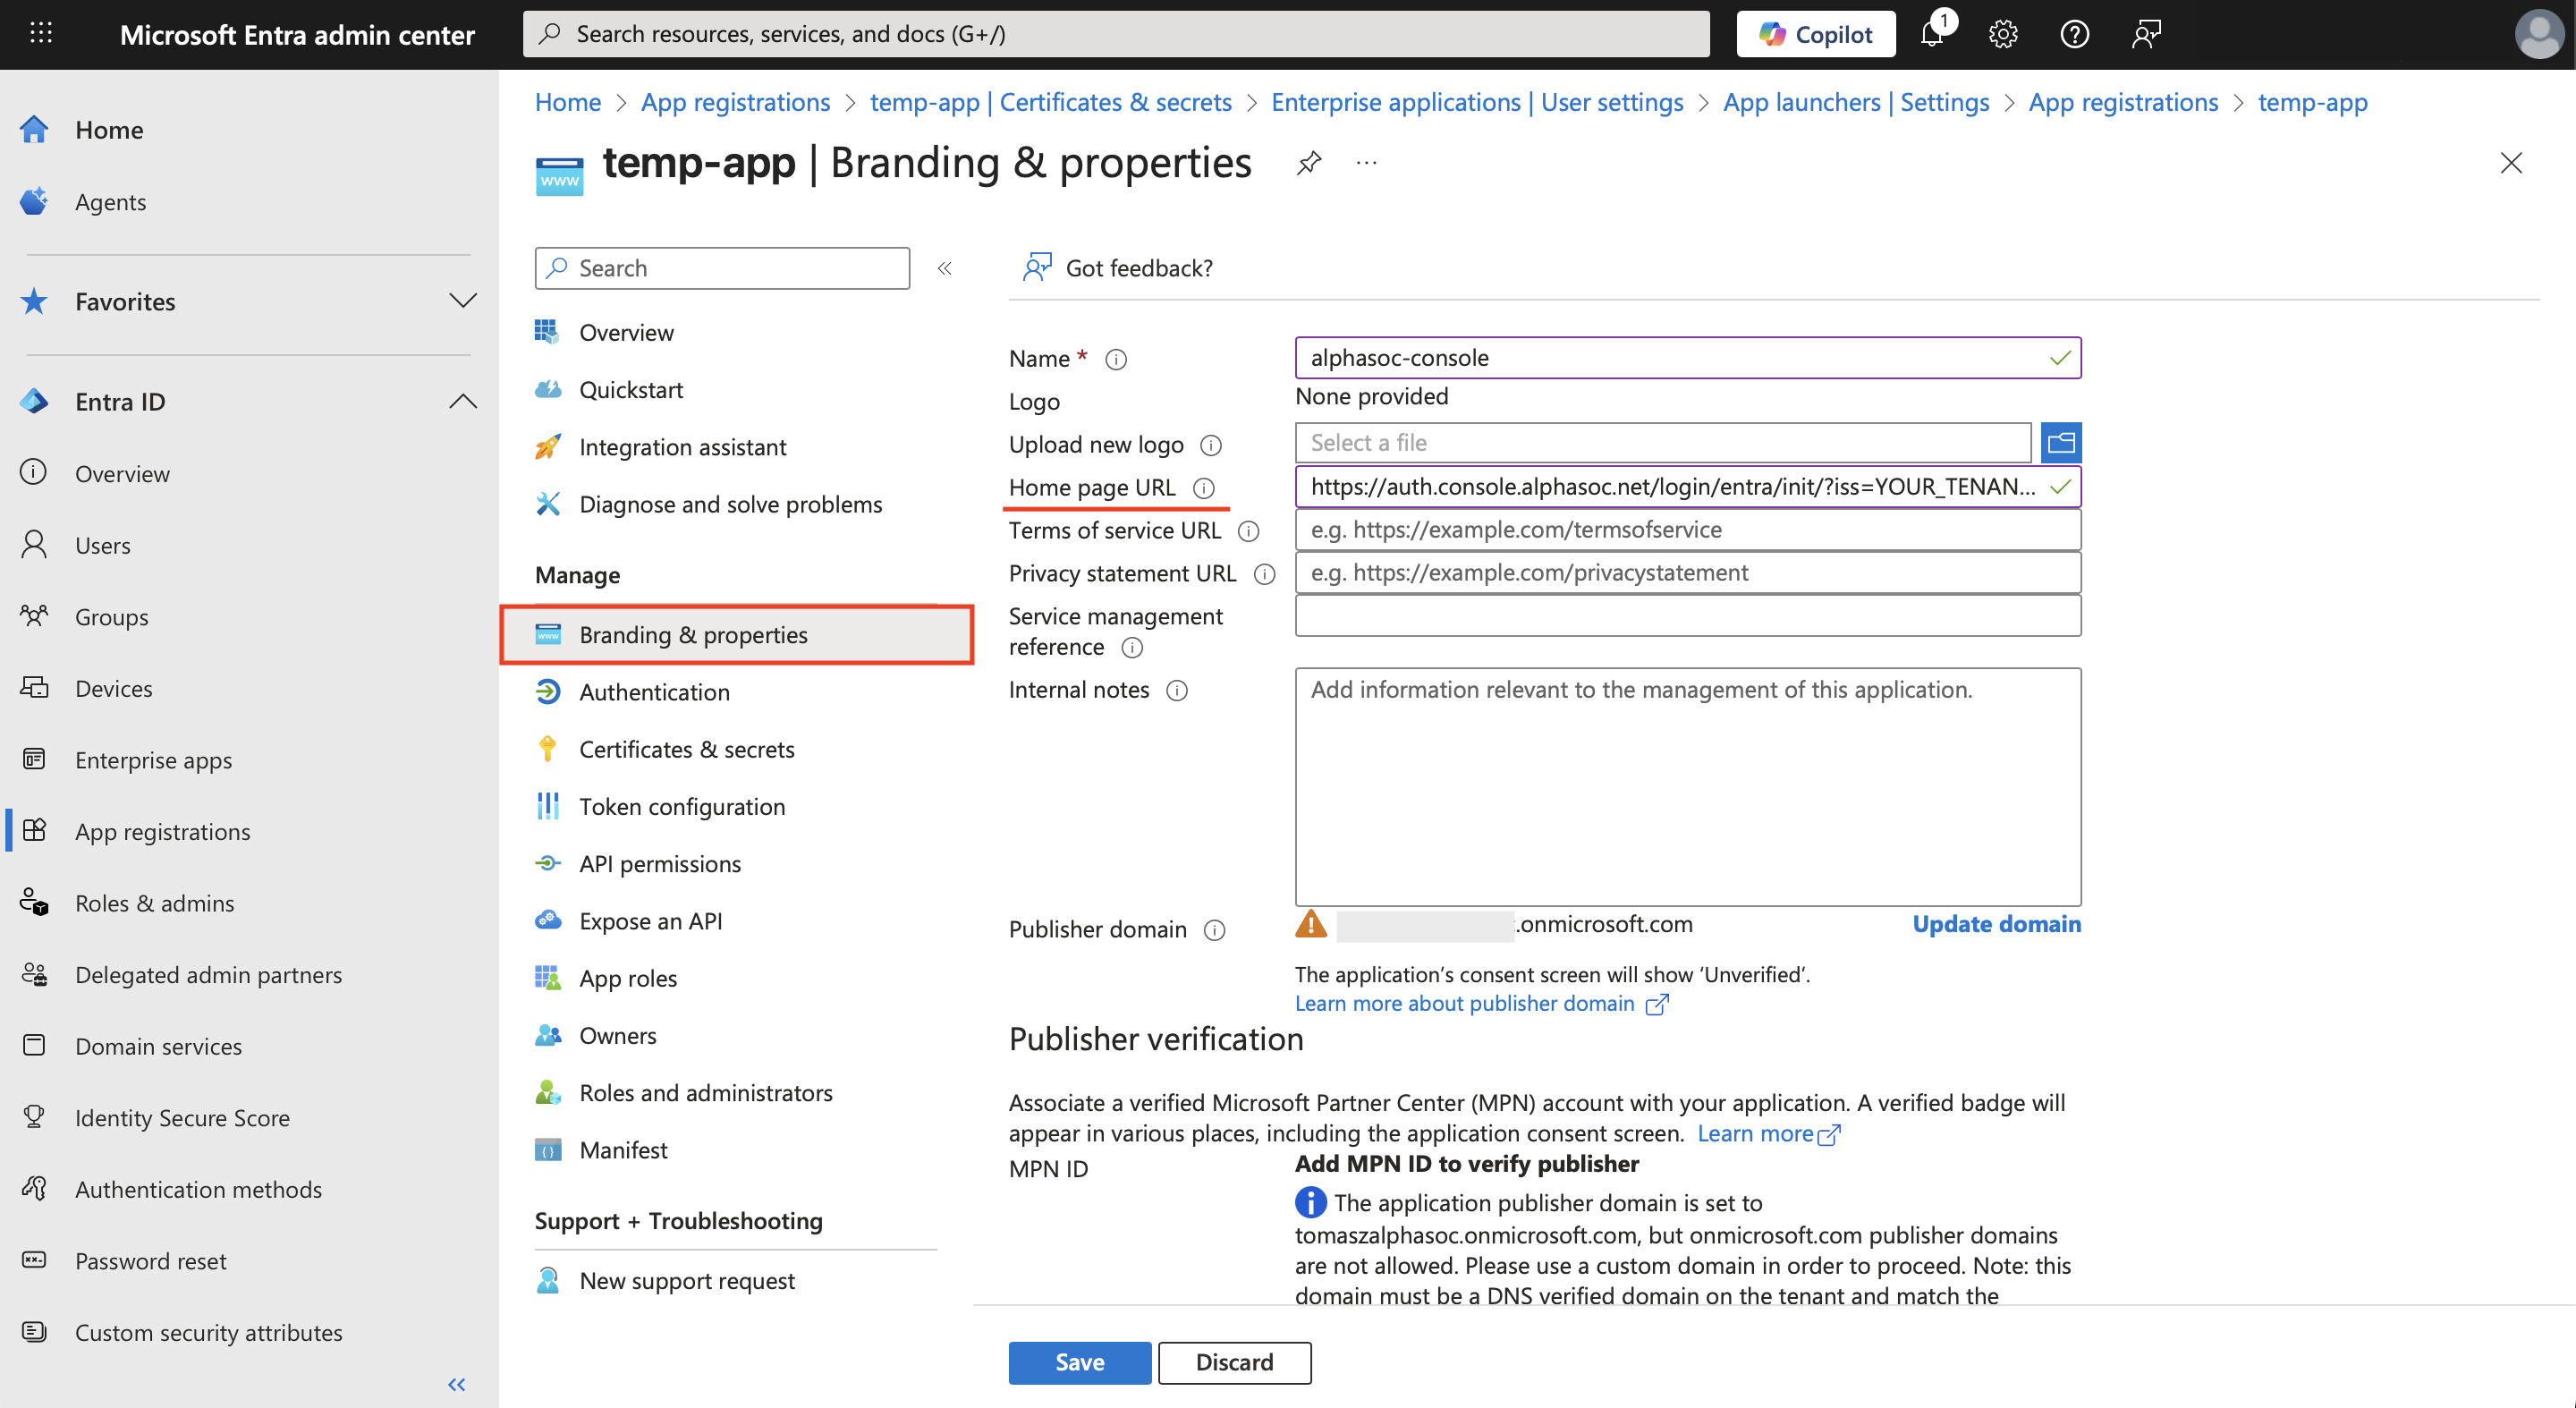
Step 3: Update Home Page URL for Your Application
- Navigate to the Branding & properties tab of your application.
- Paste the following URL into the Home page URL field, replacing
<YOUR_TENANT_ID>with your Microsoft Entra tenant ID:https://auth.console.alphasoc.net/login/entra/init/?iss=<YOUR_TENANT_ID>.
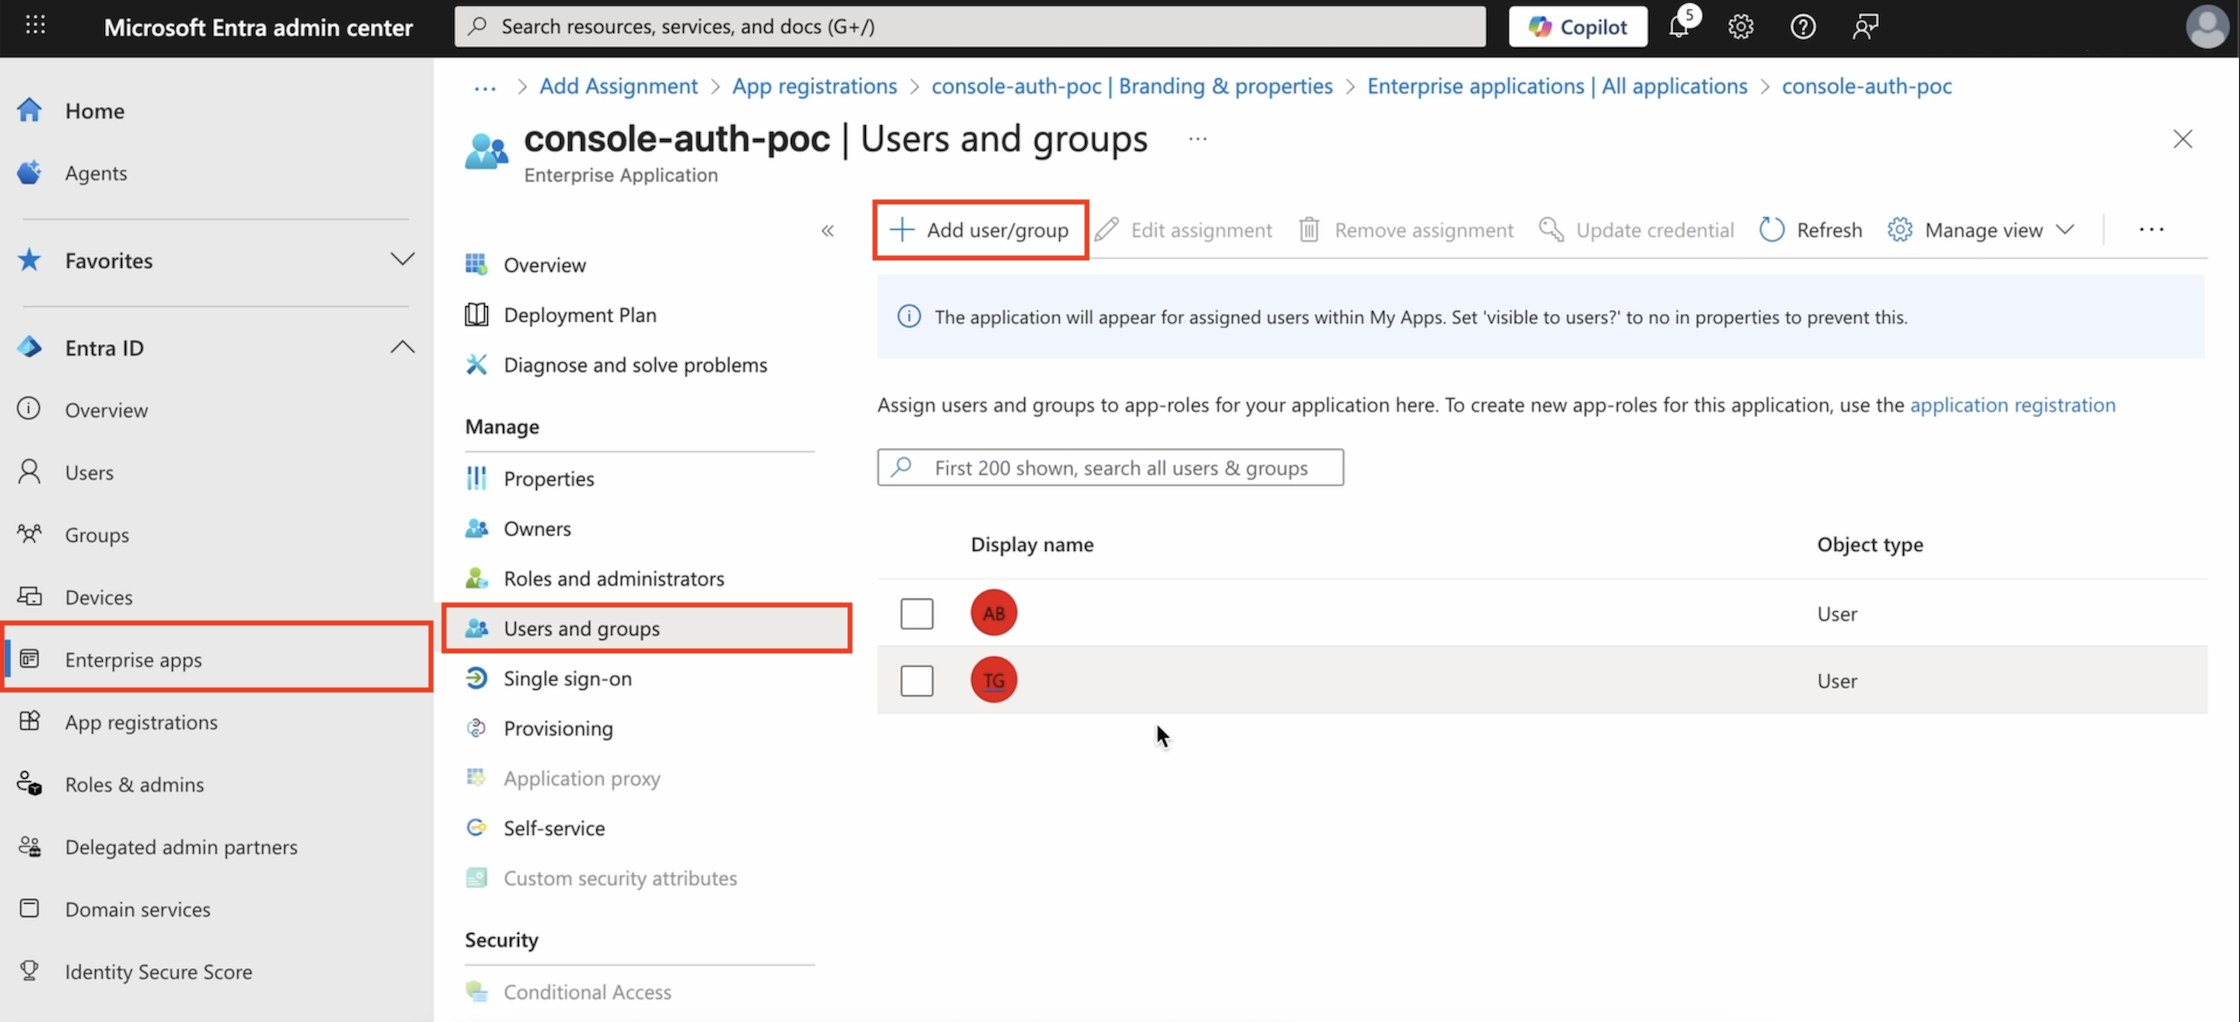
Step 4: Assign Users or Groups to Grant Them Access to the Application
- Click the Enterprise applications tab on the left menu, then select your application.
- Navigate to the Users and groups tab for your application.
- Click Add users/groups, then select the users or groups you want to grant access to the AlphaSOC Console via Microsoft Entra SSO.
Step 5: Configure SSO Settings in AlphaSOC Console
- Sign in to the AlphaSOC Console with an
Owneraccount. - Click the settings icon in the top right corner and navigate to the Authorization tab.
If you don’t see the Authorization tab, make sure you are signed in as an
Owner.
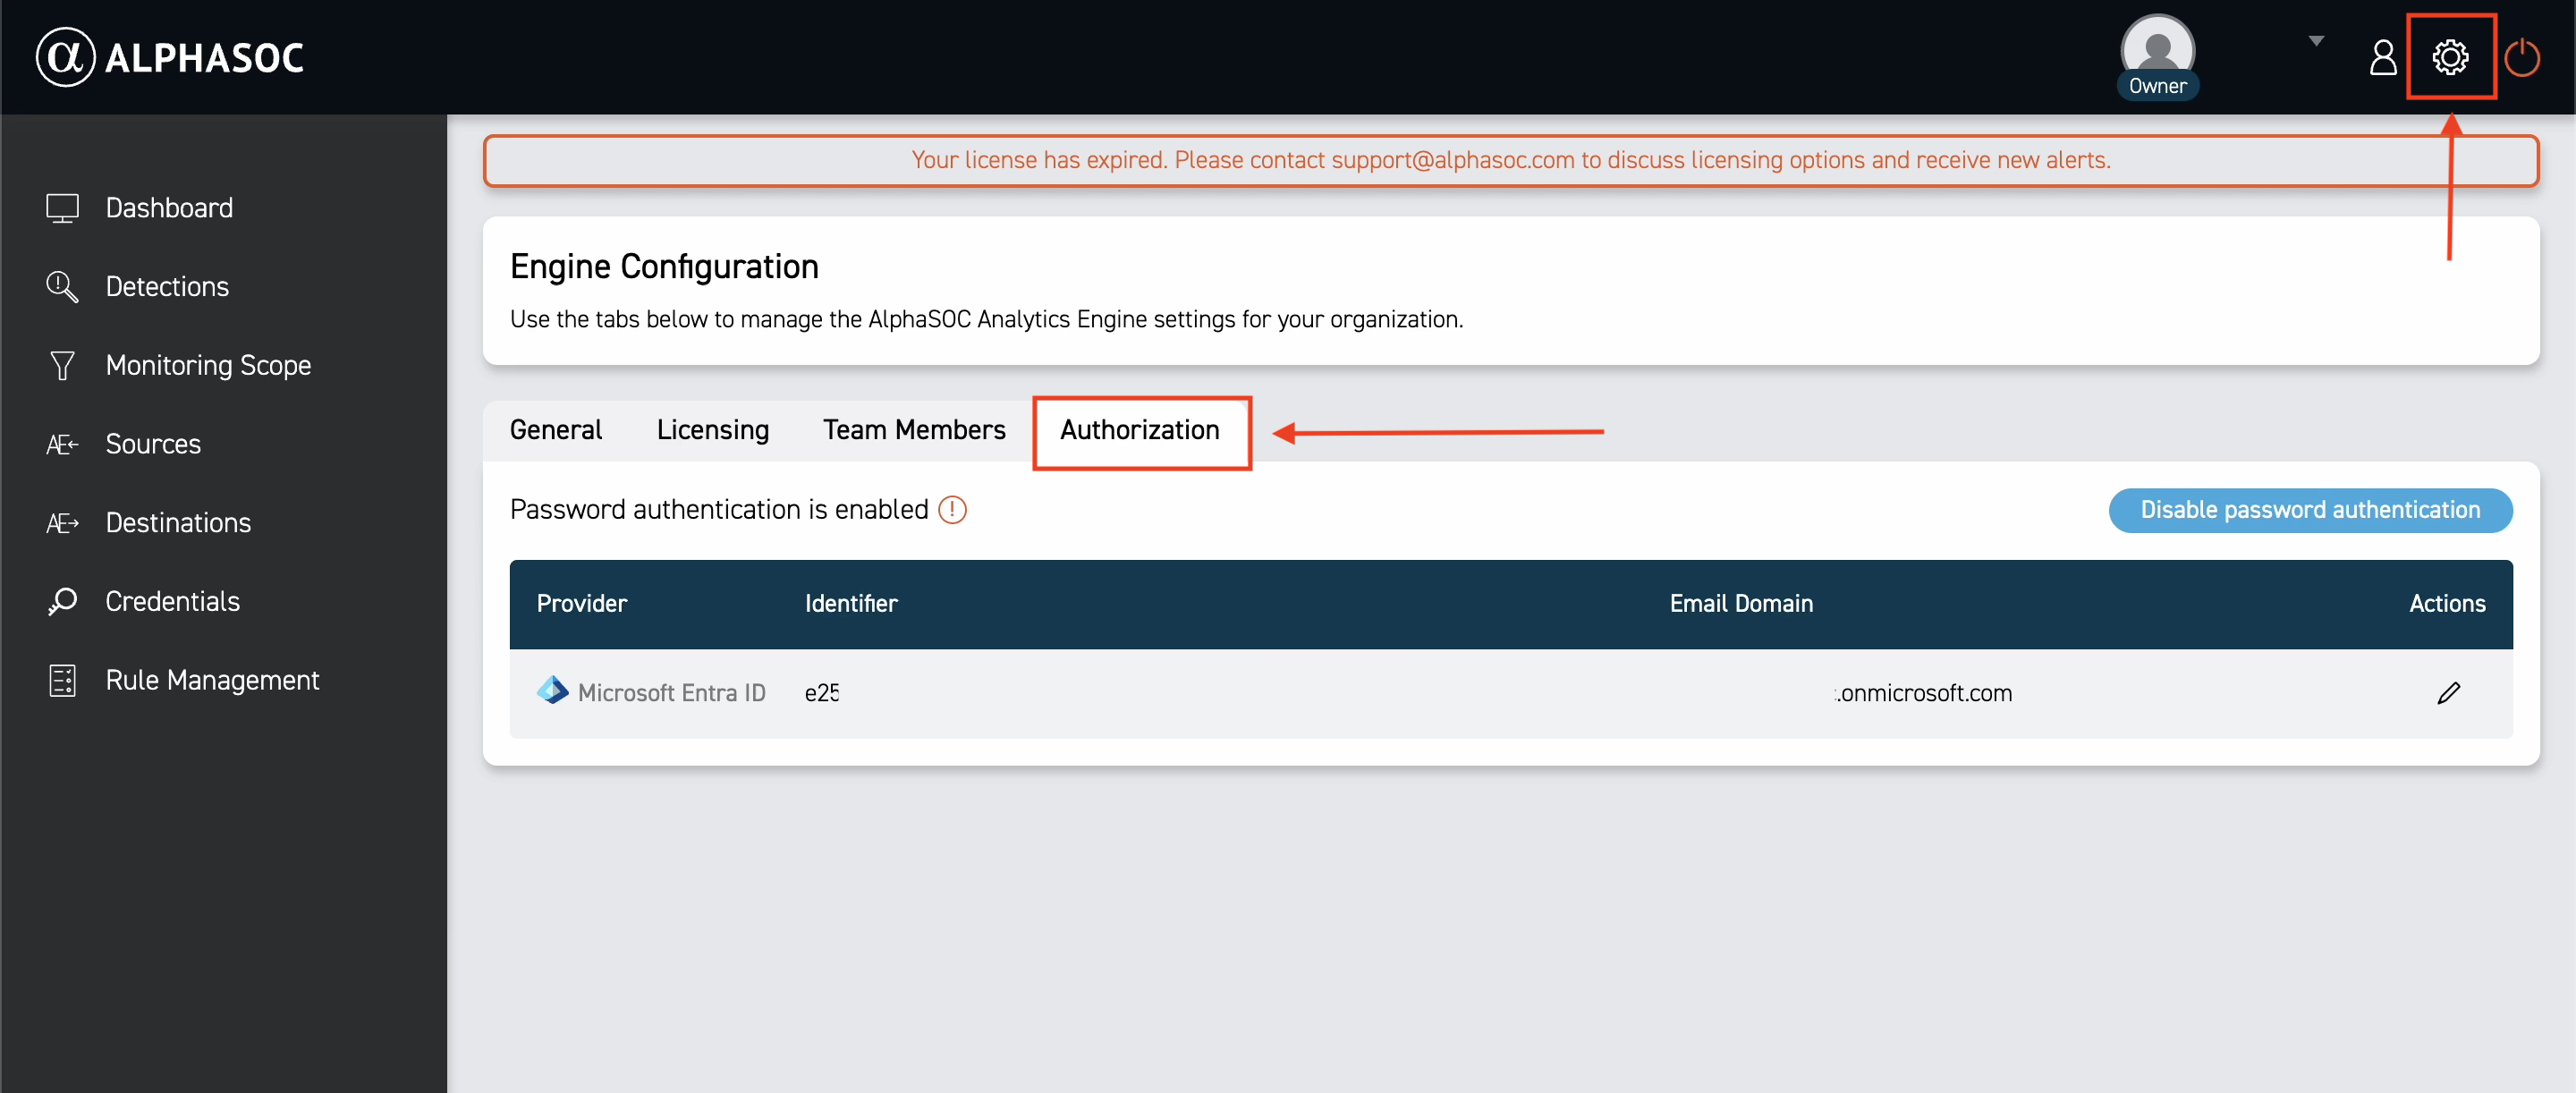
By default, password authentication is enabled. You can disable it later. Click the edit icon next to the Microsoft Entra ID provider to update your credentials.

- To configure the Microsoft Entra ID provider, replace the following values with your:
- Microsoft Entra Tenant: Directory (tenant) ID of your registered application.
- Microsoft Entra Application ID: Application (client) ID of your registered application.
- Microsoft Entra Client Secret: The client secret value you generated in Step 2.
Optionally, you can set your secret's expiration date.
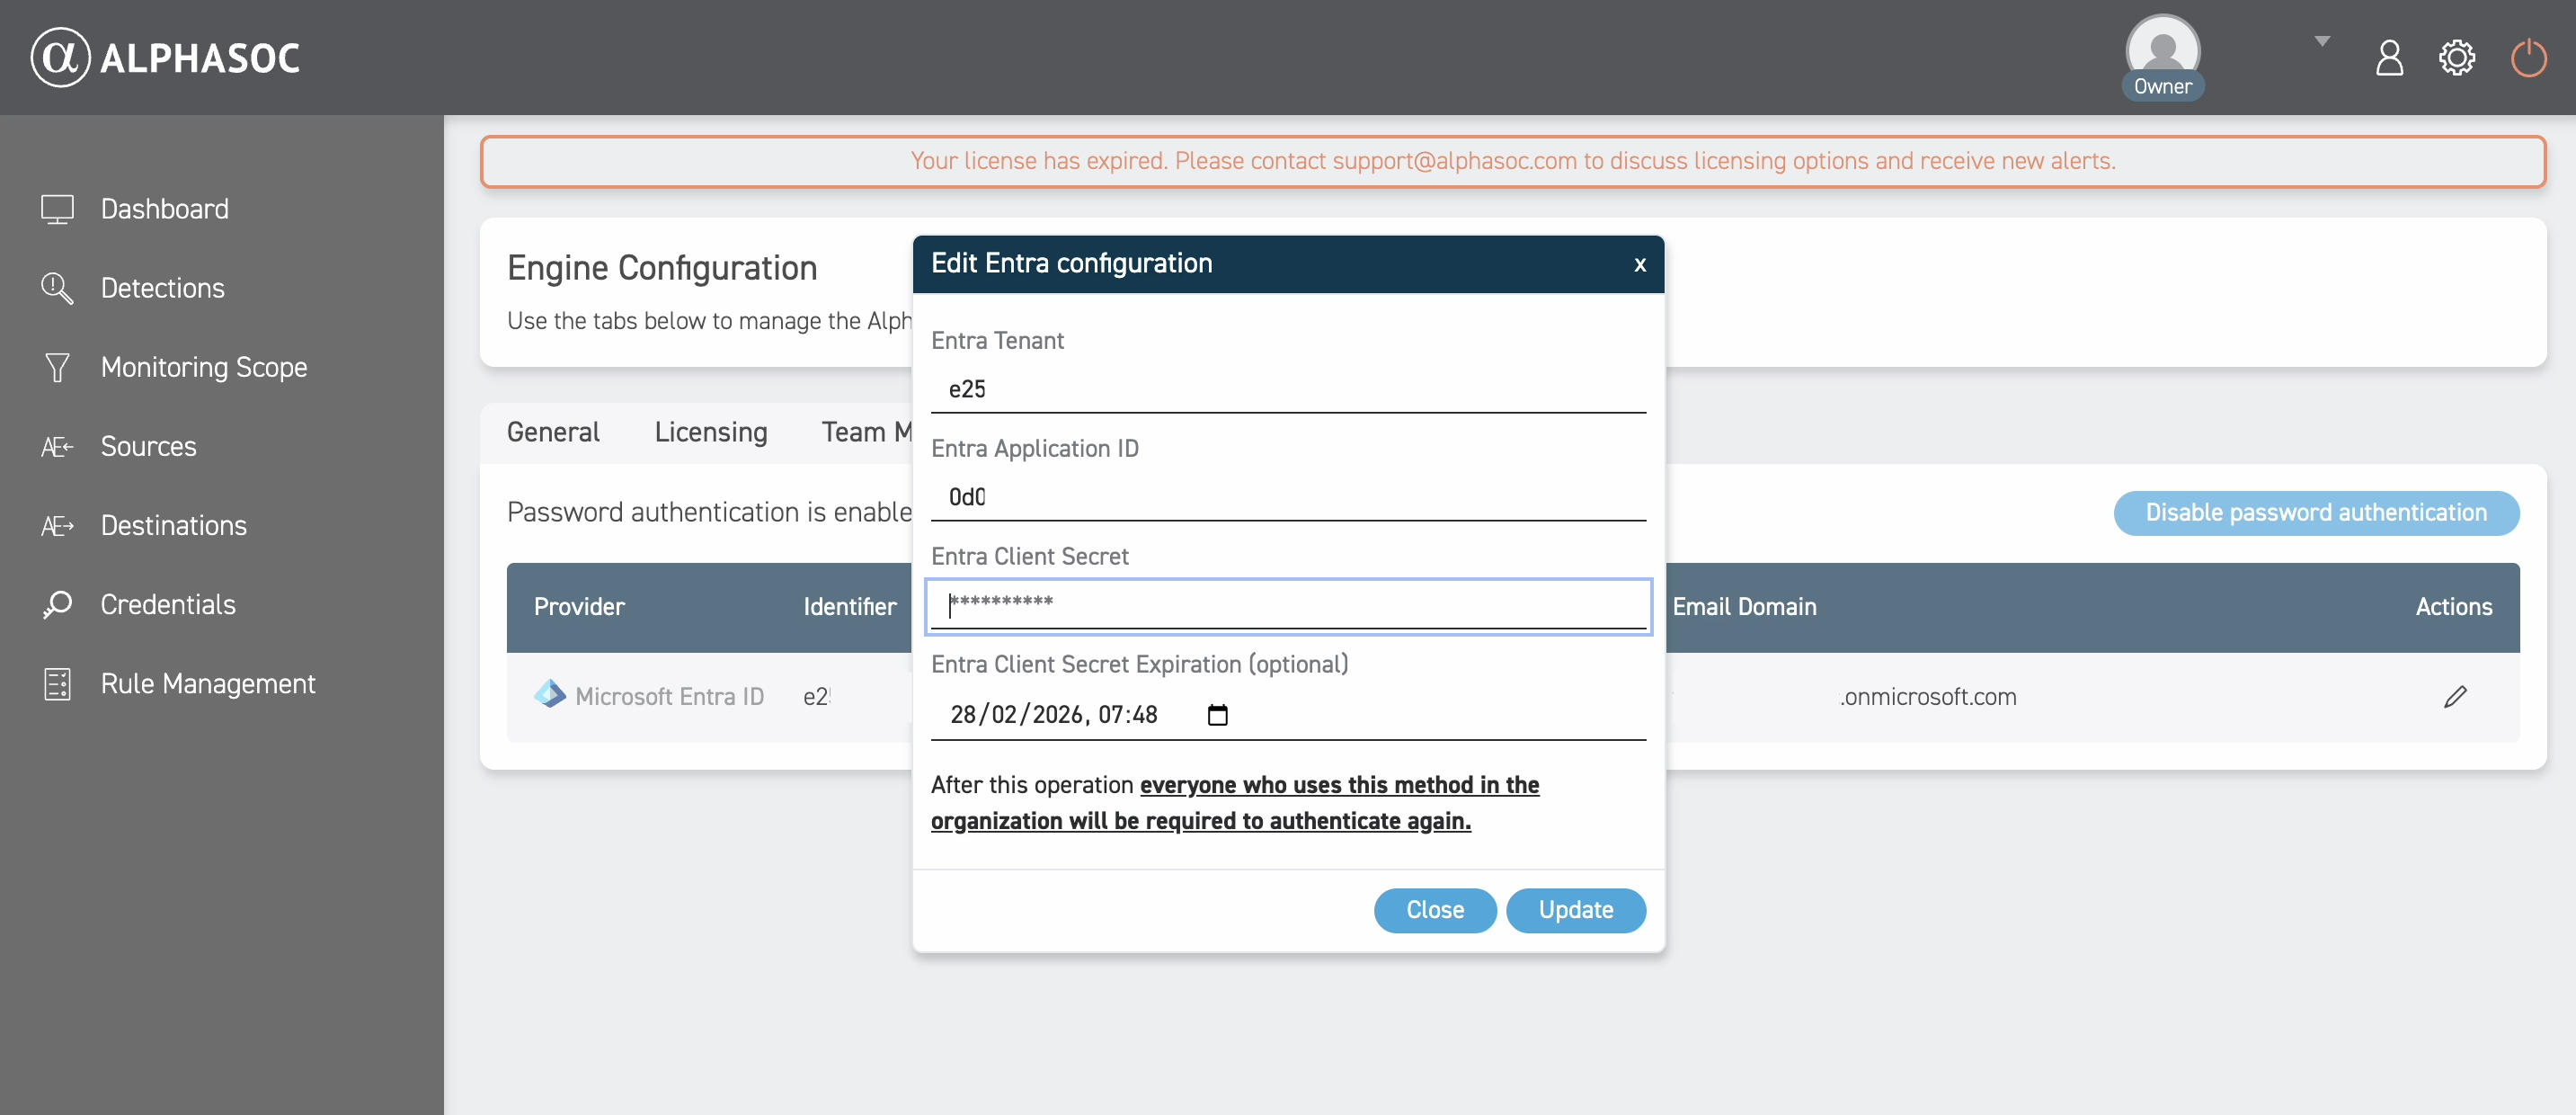
You can find your Microsoft Entra Tenant and Microsoft Entra Application ID on the Overview page of your registered application in the Microsoft Entra admin center.

In the Entra Client Secret field, paste the secret value you generated in Step 2 and enter its expiration date.
Logging in with Microsoft Entra ID SSO
After you have configured the Microsoft Entra ID provider, you can log in to the AlphaSOC Console using Microsoft Entra ID SSO.
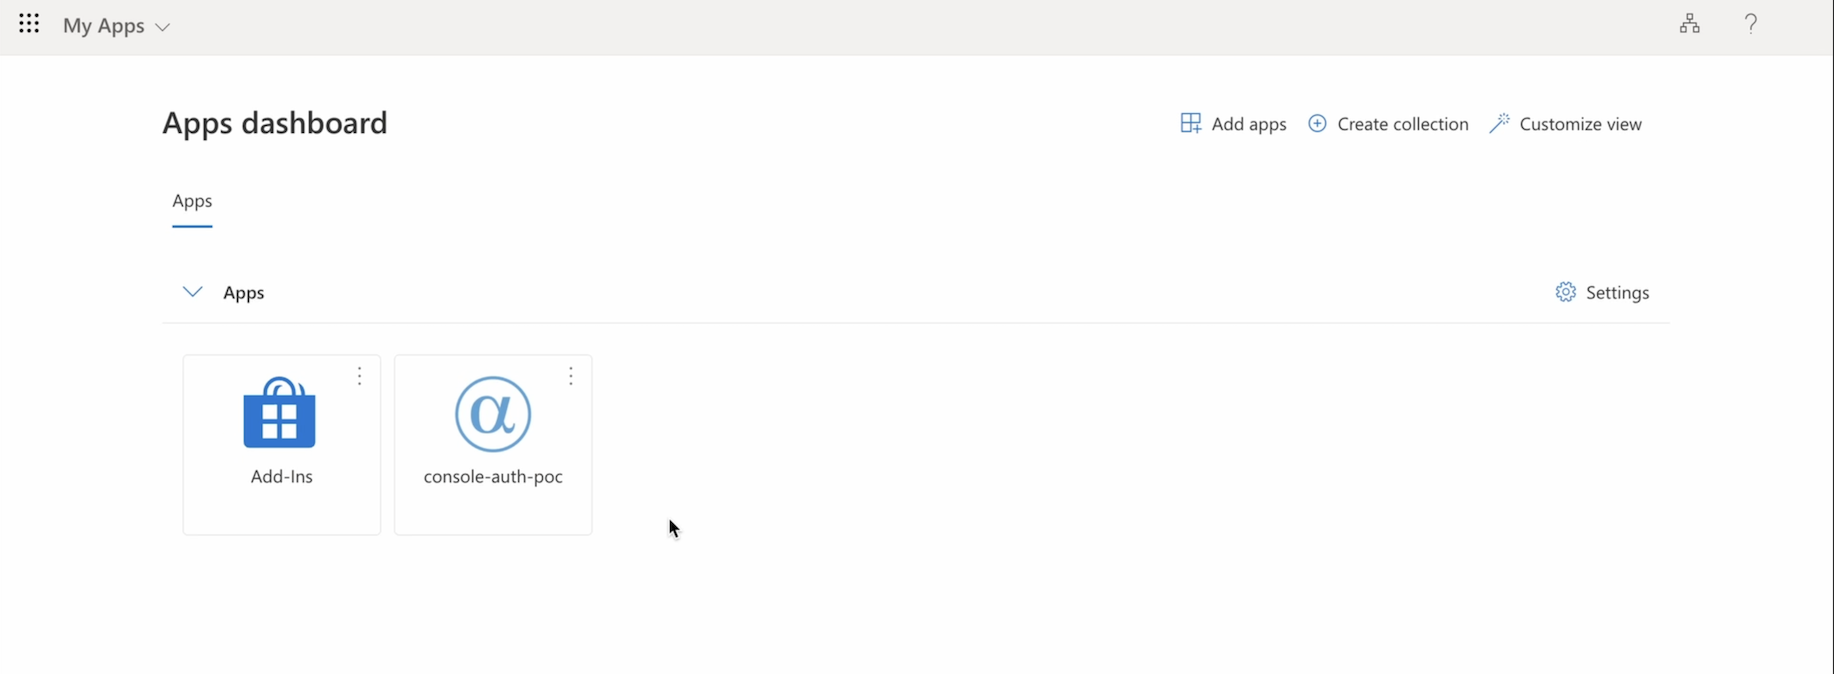
- Navigate to the Microsoft's Apps dashboard and select the AlphaSOC Console application you previously created.
If you don't see the AlphaSOC application in the Apps dashboard, ensure that you have made it visible to users in the Microsoft Entra admin center application settings.
- You will be redirected to the AlphaSOC page. If you have an existing AlphaSOC account and are logging in with MS Entra ID for the first time, you may be prompted to enter your AlphaSOC password.
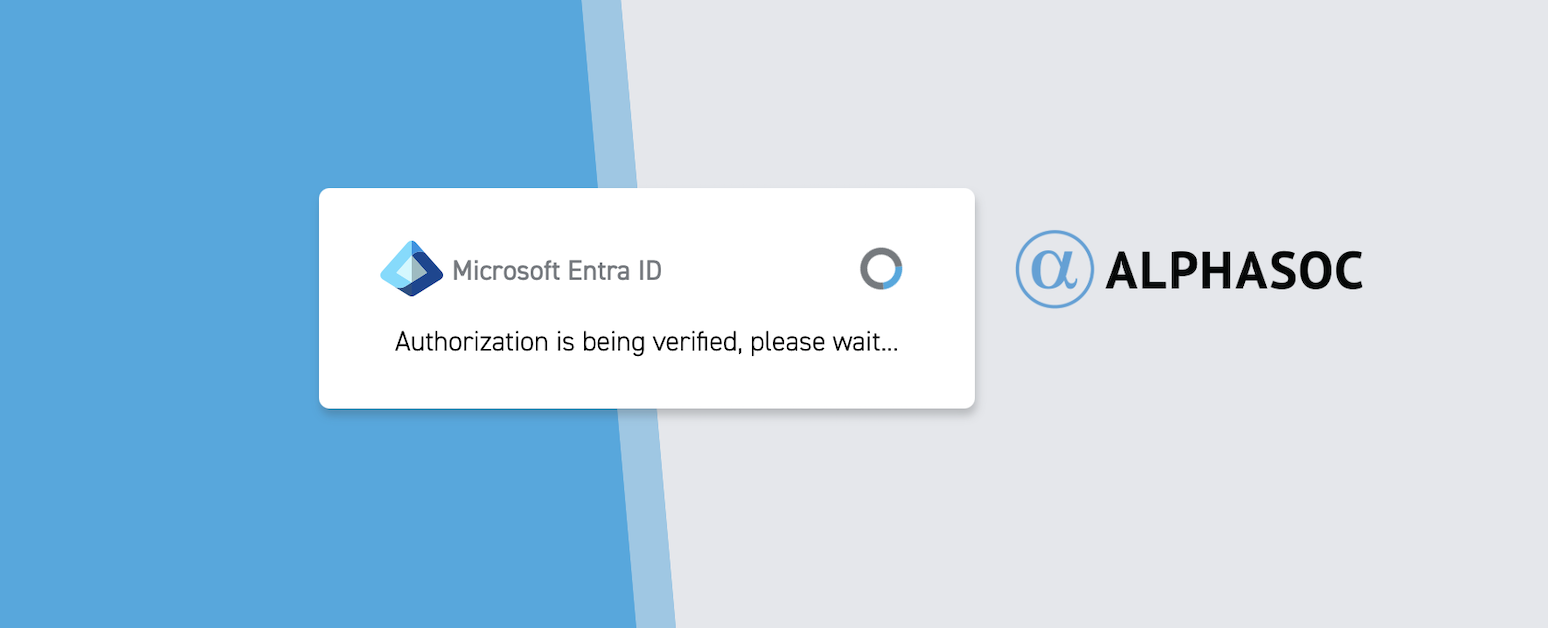
After you verify your password, you will be logged in to the AlphaSOC Console.
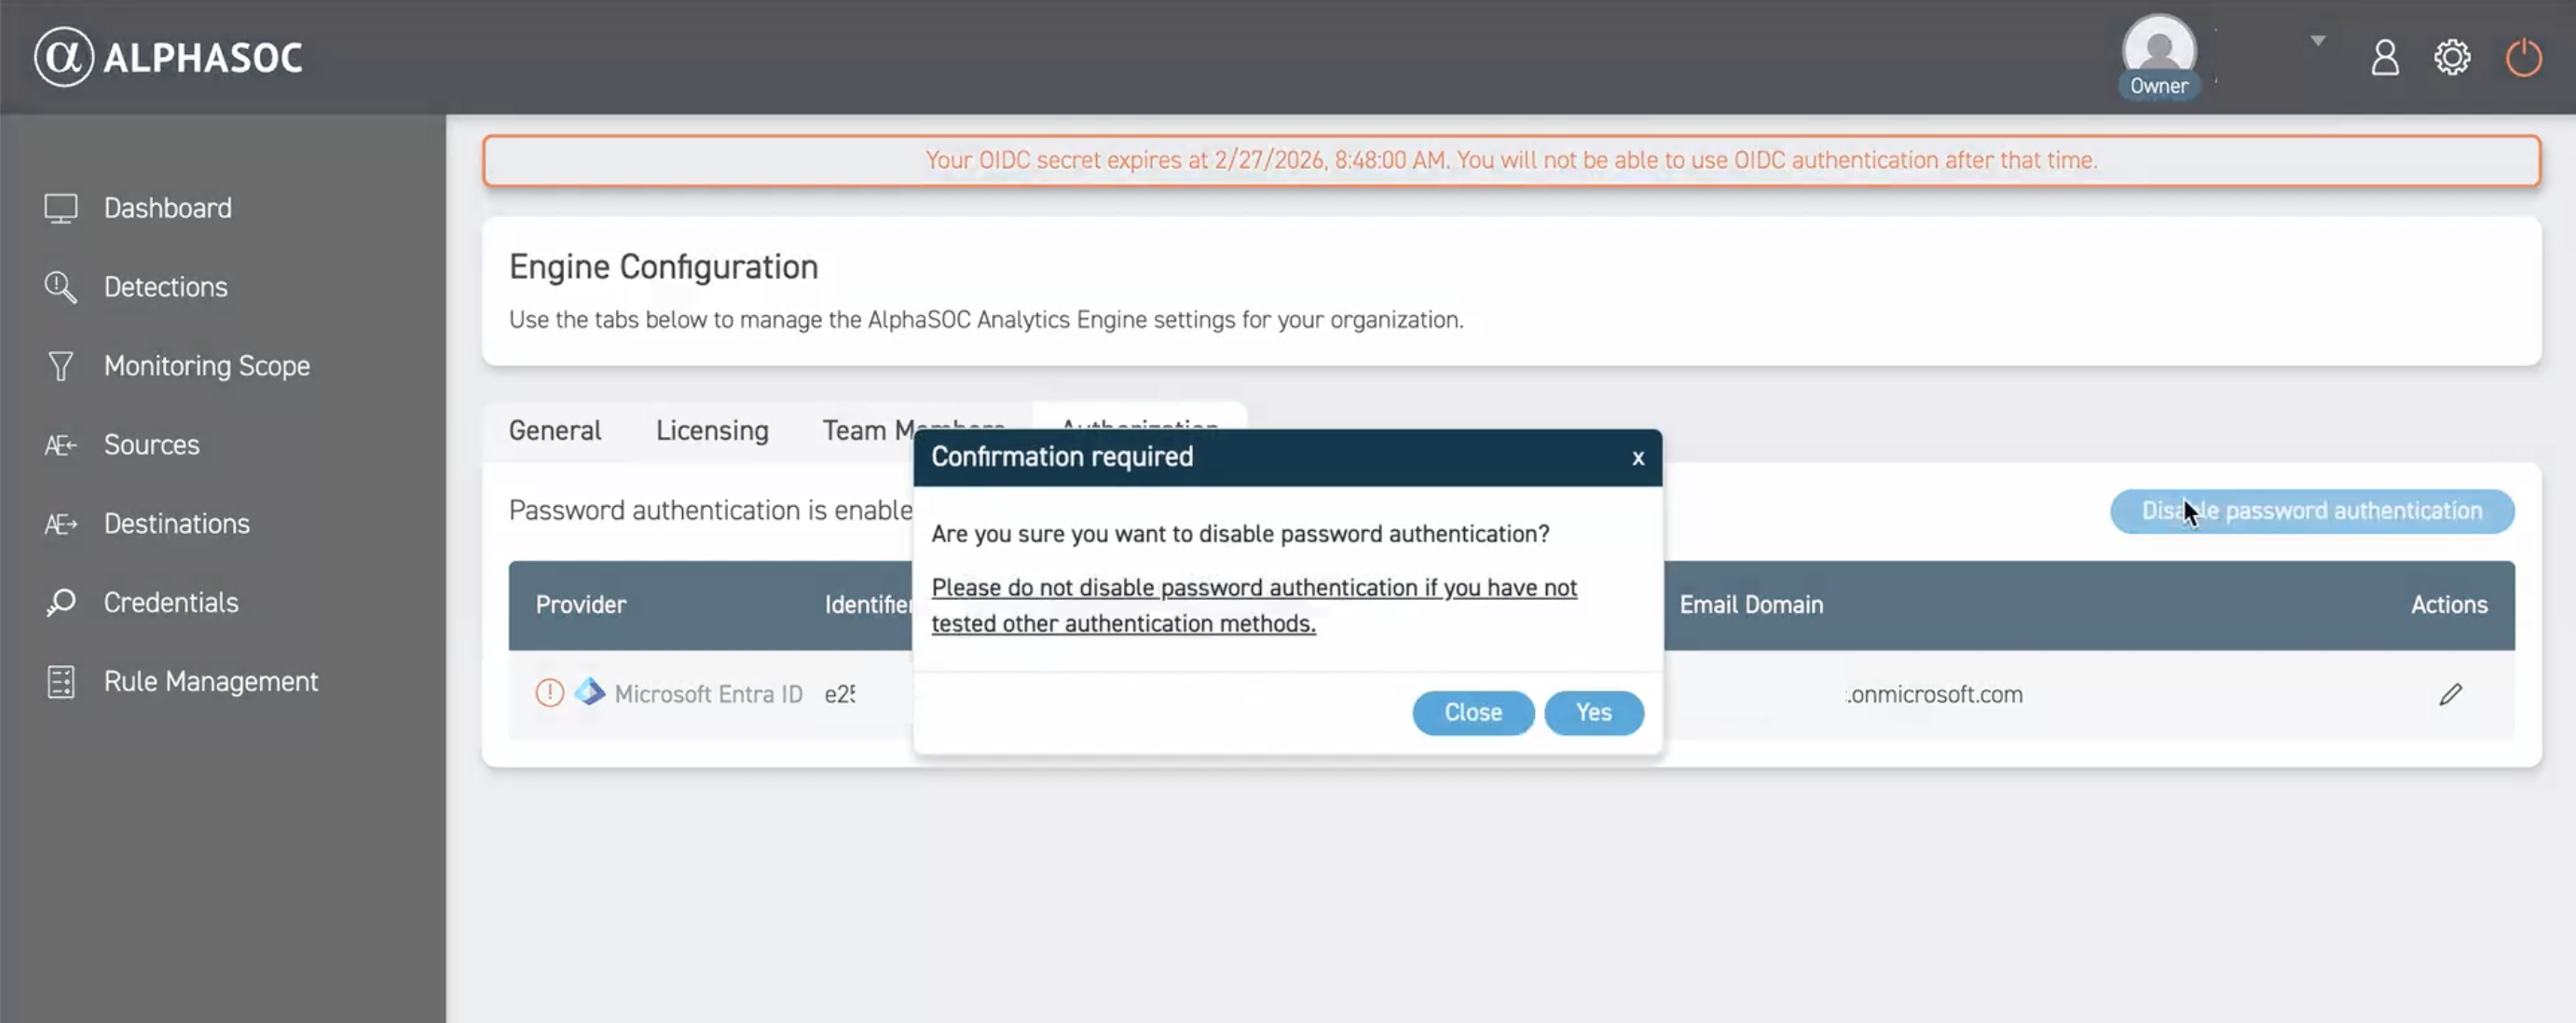
Disabling Password Authentication
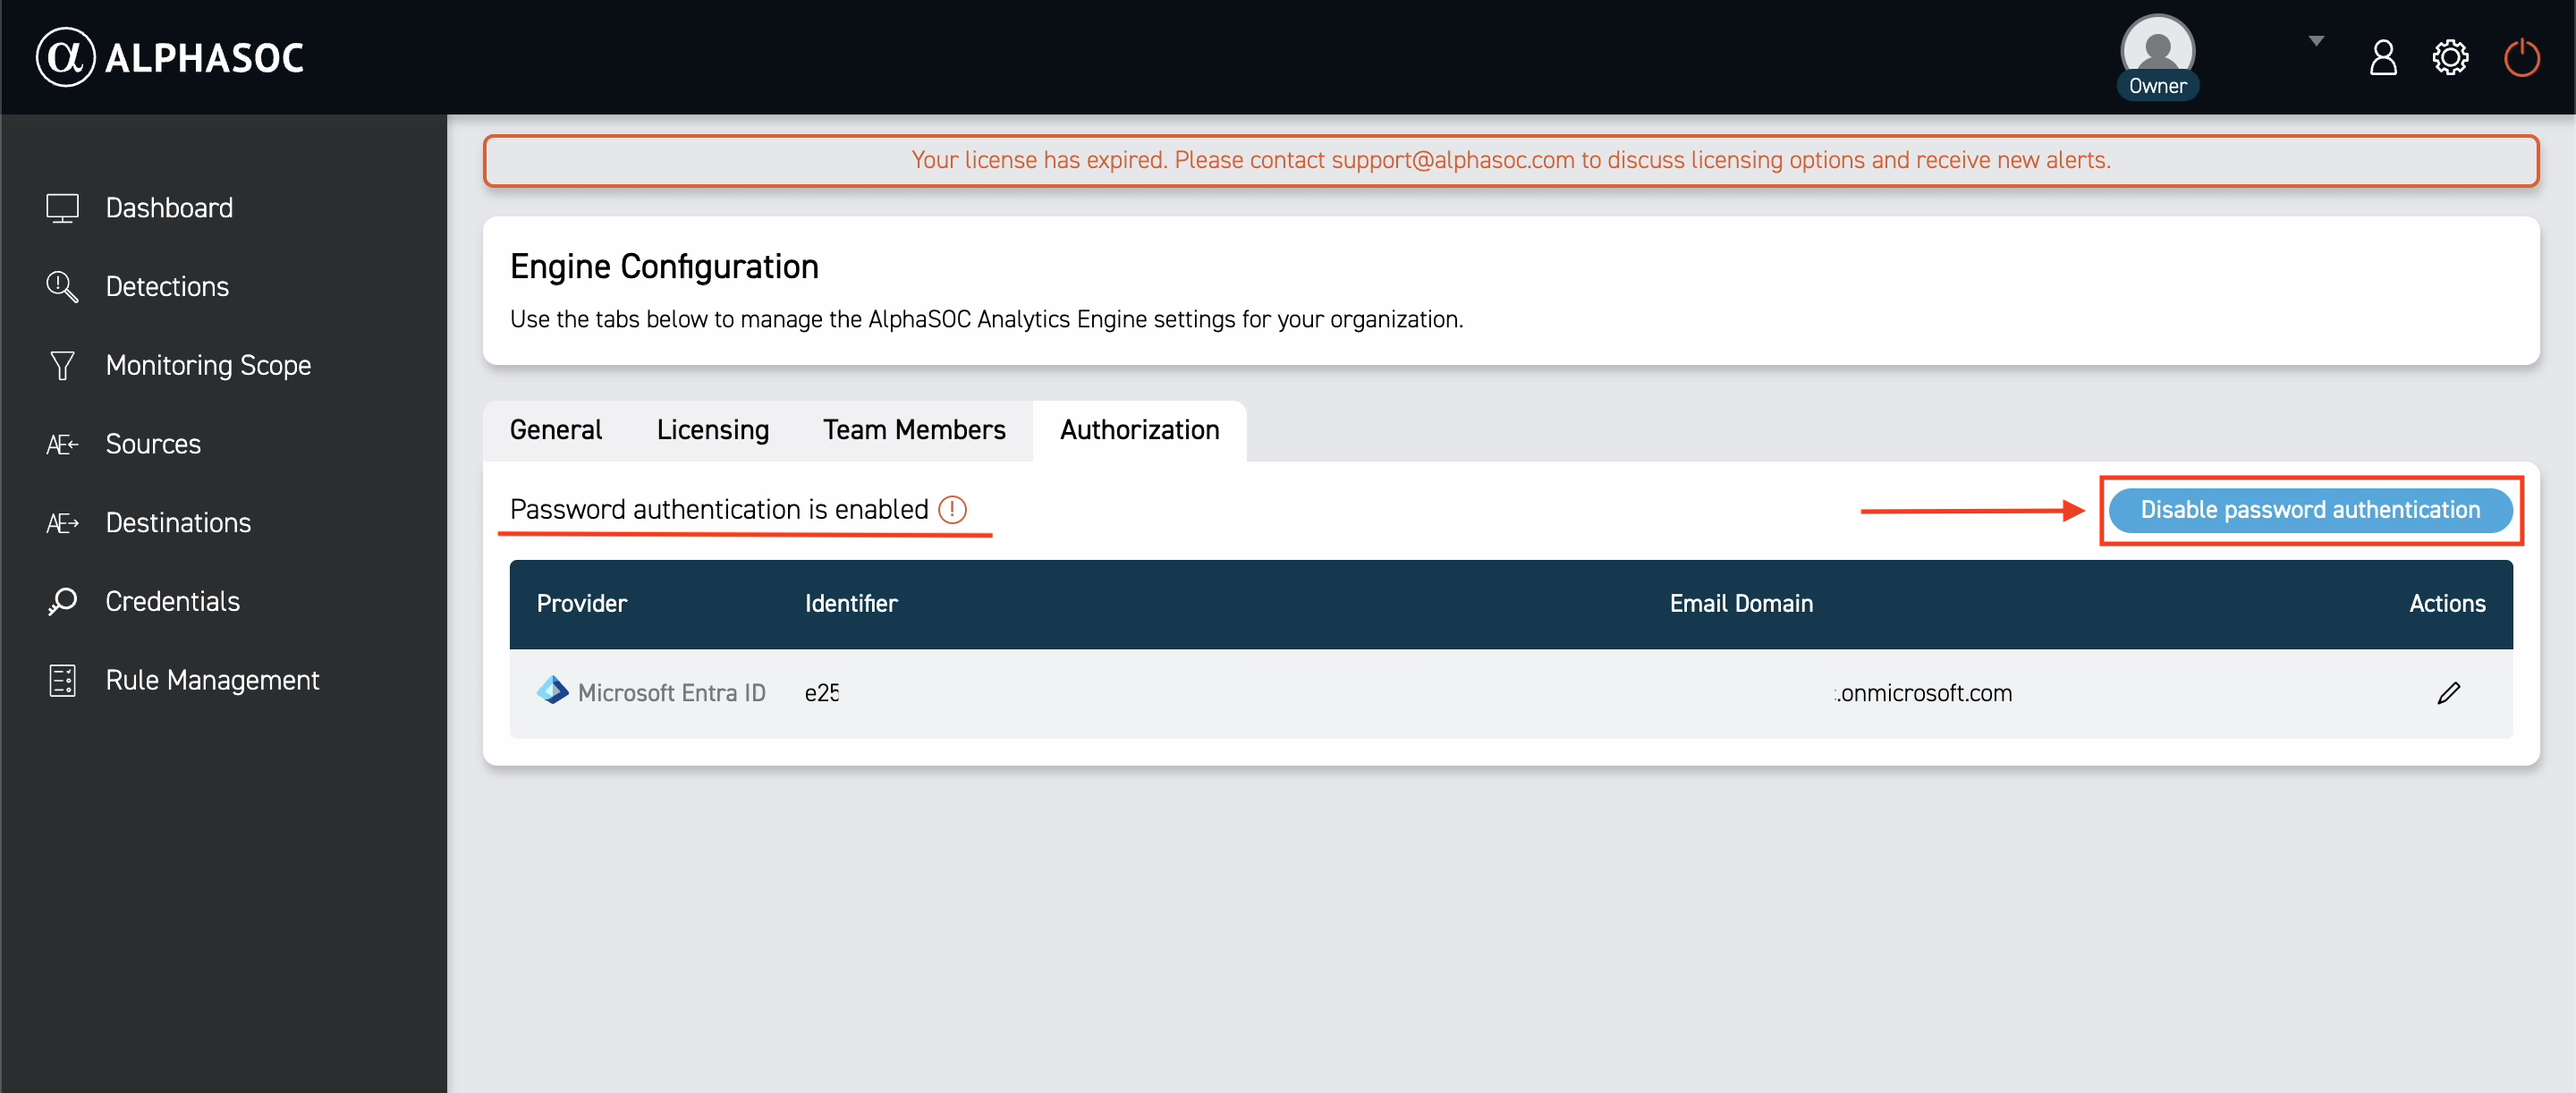
By default, password authentication is enabled. If you want users to sign in only through Microsoft Entra ID SSO, you can disable password authentication.
- Navigate to the Authorization tab of the AlphaSOC Console settings.
- Click the Disable password authentication button.
You will be asked to confirm your action.
After you disable password authentication, all users in the organization will only be able to sign in with Microsoft Entra ID SSO. Ensure Entra ID SSO is enabled before proceeding.
After you confirm, password authentication will be disabled.